

How to set up Unity Teams
Collaboration Made Easy
Introduction
Collaboration is key when working projects with multiple members. Teammates need to keep up to date with all of the changes made in a project and cannot afford to wait or stumble around using external tools to keep projects in sync. This is where Unity Teams comes in. This tool is built right into the Unity editor making it easy to see changes and post updates. Follow along to see how to get started.
About
- Subjects: Unity and Project Management
- Objective: The purpose of this post is to walk you through how to set up Unity Teams inside of Unity.
- Time Allotment: 15 min
Getting Started
Sign up for teams in Unity
First we will need to sign up for Unity Teams. There are two options, a free tier, and a paid tier. The free tier comes with some awesome, though limited, features. You get 1GB of cloud storage for uploading project files, 3 team members can be added per team, you of course get project syncing between members, 1 integration for third party services like Slack or Discord, and you get 90 days of version history so if something goes wrong you can revert back to a previous code base.
The paid tier or Teams Advanced does come free with the Unity Pro license or the student license, you can check out our article on Setting Up Unity to find out more about Unity licenses. If you are not using one of these plans though Teams Advance will cost you around $9 a month, but that comes with a host of features and benefits. You get everything in the free tier with expanded storage of 25GB and unlimited version history and integrations plus the best feature for working with remote teams, cloud builds. Cloud builds give you the ability to build your project in the cloud whenever you sync changes to the cloud. This has the potential to free up a ton of development time by freeing up your personal machine. Also, once the build is complete you will receive a link to download the build meaning that everyone on your team has access without you trying to upload builds to third party storage sites to share.
Enable Collab in Unity
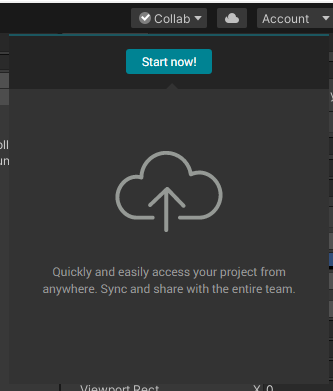
Once you have signed up for teams on your Unity account getting it enabled on your project is extremely easy. Open up your project in Unity and locate the Collab button in the upper right corner.
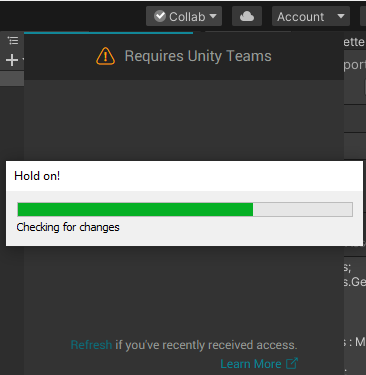
Once you click the drop down you will be presented with a single button Start now! Clicking this will take a few moments and in our case it appeared to error out before returning to the screen prepared for the next steps.
Sync Initial Updates in Unity
Similarly, to other source control management systems, Unity will require an initial sync to get things started. If you are already collaborating with a team, then one member should create the project in their local Unity editor and then publish the initial structure before moving on to the next step. To help with tracking and provide context about what changed since the last time the project was updated, you will need to enter a description of the change into the text box provided.
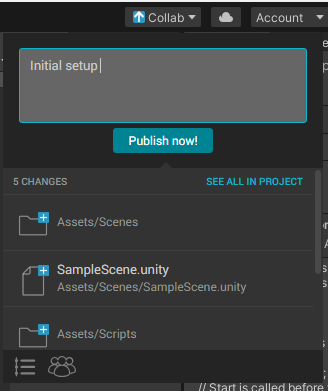
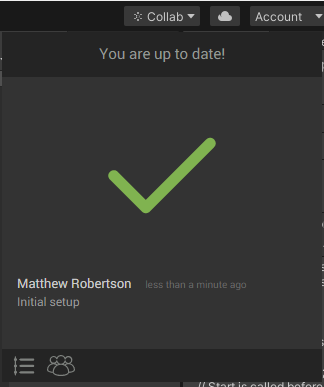
For the first sync just enter text along the lines of “Initial commit”. Once you are done select publish now. It should only take a few moments and you will be met by a green checkmark stating you are up to date.
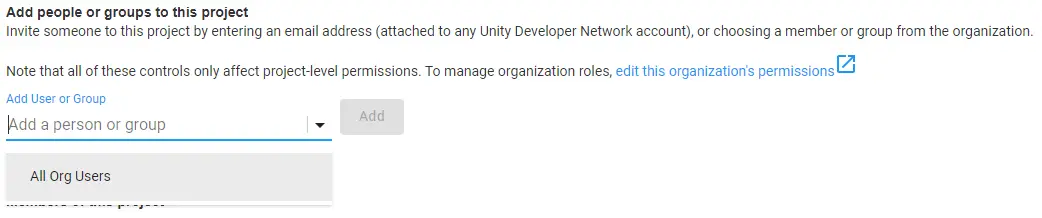
Add Team Members in Unity Collab
At the bottom of the Collab dropdown, you will now see an image of a group of avatars. If you hover over this you will see the tooltip “Invite Teammate”. Select the Invite Teammate button to add members to your project.

This will open up a web page that will display your project under your Unity account. From here you will see the option to add members by email address. Enter the email address of the member you want to invite and select Add. Make sure the email address you enter is tied to a Unity developer account.
Once your user is invited you will see their name with the following dropdown next to it. This is where you delegate permissions to your teammates.
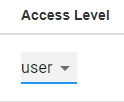
Owners can access financial information for the account. They are also the only ones who can assign another user as an owner.
Managers can add services to the project, add members, and assign permissions.
Users can read and write to the project folder including adding new files or deleting existing.

Once your teammate accepts the invite they are all set to download the project files. Once downloaded they can open the project in the Unity editor and begin working.
Update Project and Sync Changes in Unity
When you are done making changes to the project you will want to sync the data so that your teammates can pull the latest version of your code. Opening up the Collab dropdown once again will cause Unity to check for changes.
Once done you will see a list of files where changes were made along with the text box for commenting on those changes.
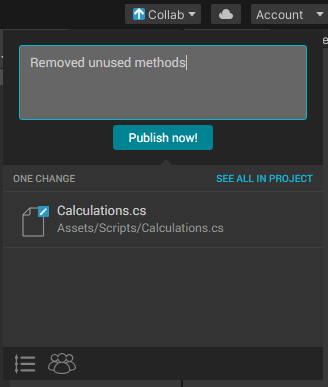
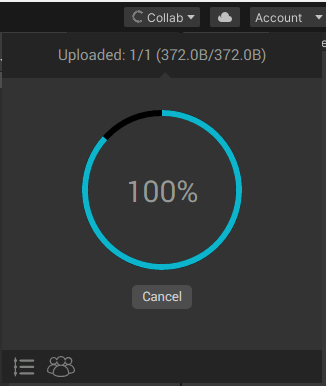
Enter your comments and select Publish now! Expect this to take a little longer to finish, based on your network connection, if you have made a lot of changes or uploaded assets with large file sizes.
You now have everything you need to begin collaborating with your teammates. Source code management is only one piece needed for working with others. If you want to know more about how to manage your project tasks and dividing work among members check out our article on Kanban Boards. Also, we currently have two games on Google Play and at the Amazon Appstore for Android, check them out below.