
Unity Multiplayer: Create a Multiplayer Game Using the New Input System for Multiplayer Controls
Introduction
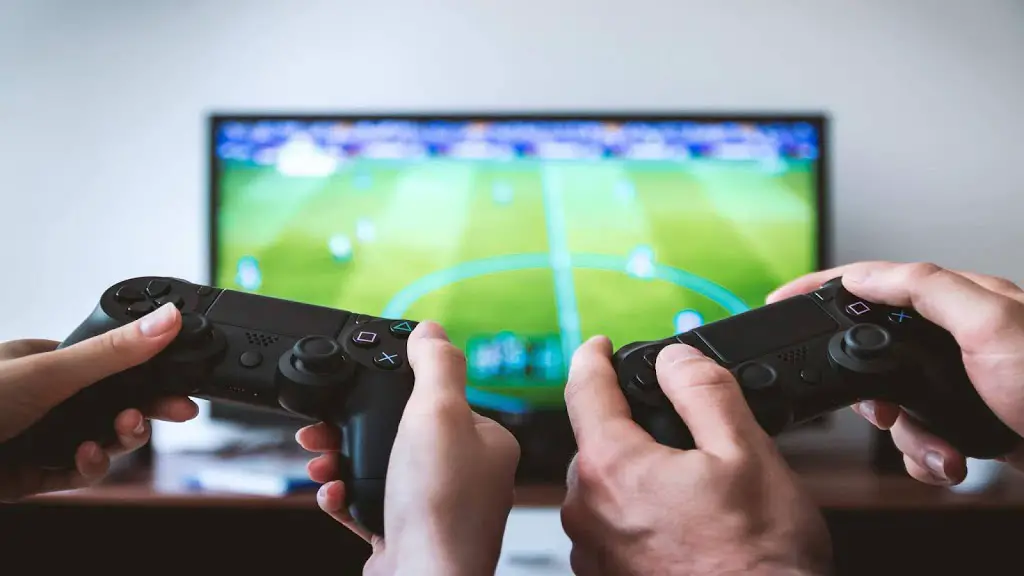
We recently began prototyping our latest game idea with Unity and decided we should implement local multiplayer and quickly realized we had never developed a multiplayer game with the type of controls we envisioned. We began looking for resources about implementing multiplayer controls in Unity and allowing multiple devices to map to multiple players. What we came up with was a simple straightforward process that was so easy to integrate with our current code it was astonishing. Here are the steps to create your own multiplayer controls in Unity which we discuss in greater detail below.
- Upgrade to the New Input System
- Create Input Actions
- Assign Methods
- Attach Player Input
- Convert Player to a Prefab
- Create an InputManager
Getting Started
Upgrade to New Input System Package
This implementation relies on Unity’s new input system. As of 2020.1.13f1 the older input system still comes enabled by default. So, in order to set up our multiplayer controls we will have to install the new input system. To do this we will navigate to our package manager and change the view to ‘Unity Registry’.
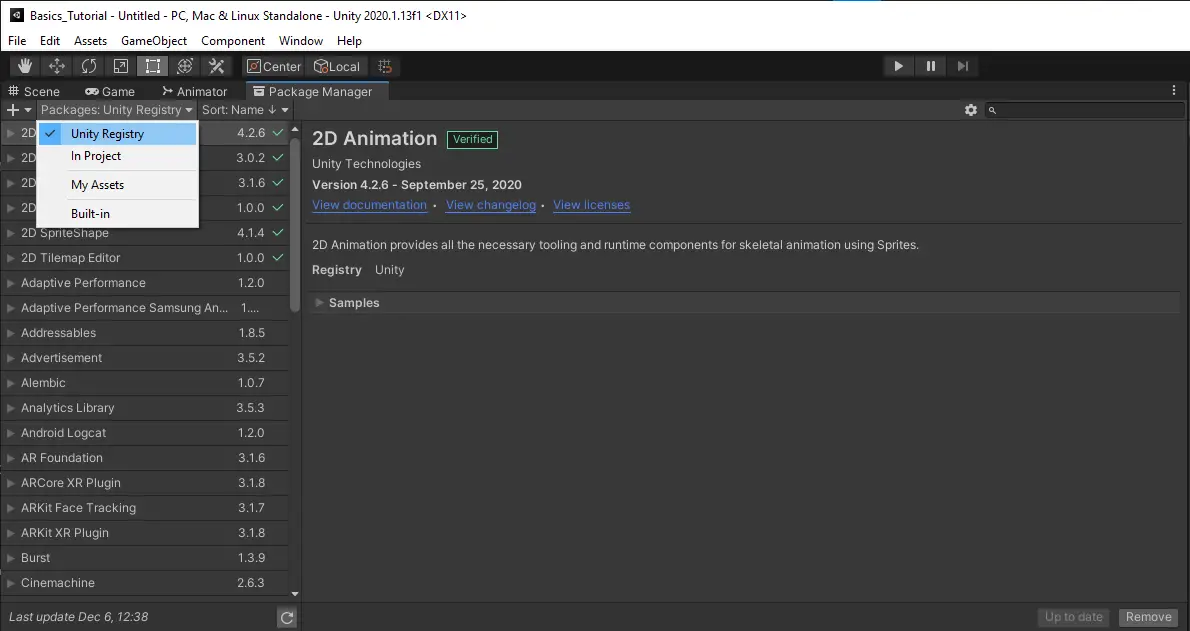
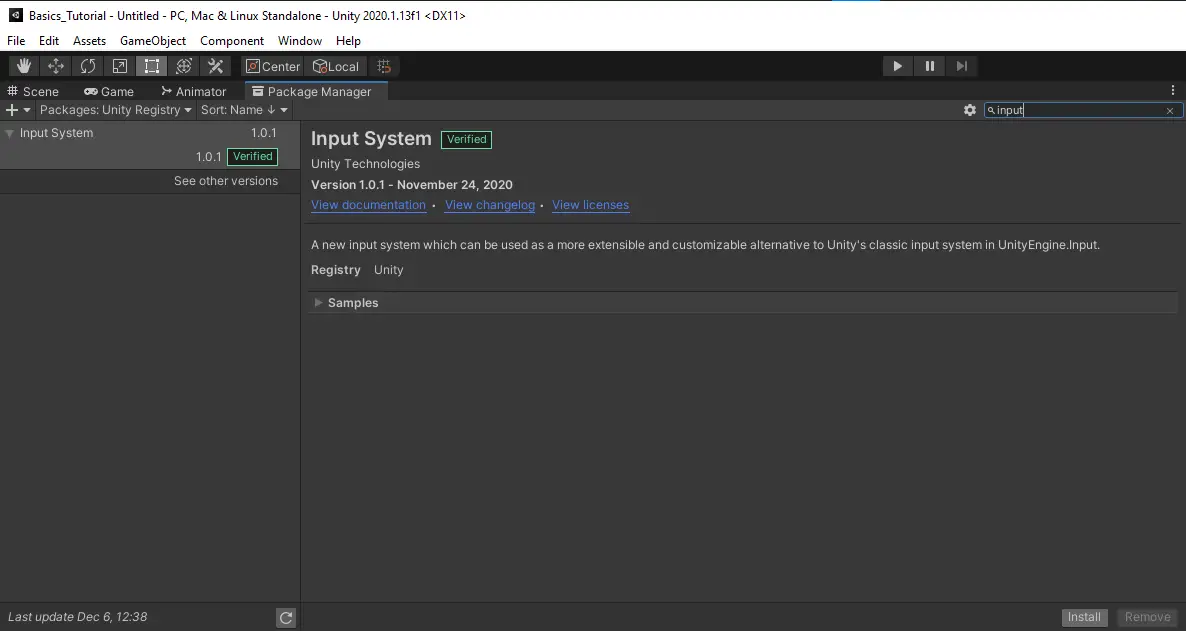
From here we can search for ‘input’ in the search bar and select Input System. Install using the install button in the lower right-hand corner.
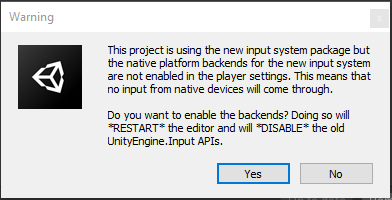
Make sure you have saved your scene as the Unity editor will need to restart to disable the old input APIs and enable the new system. Select yes to continue the install and, depending on your machine, the editor will take a few minutes to restart.
Create Input Actions
The input system makes use of Input Actions to create actions that occur when the specified input is used. These can be key presses, joystick manipulation from a gamepad, button presses, or mouse clicks. The action listens for these events and can respond with outputs, such as Vector2, Vector3, doubles, quaternions, etc., or events, like when a button is clicked.
To create an Input Action, go to your menu bar and select Assets > Create > Input Actions.
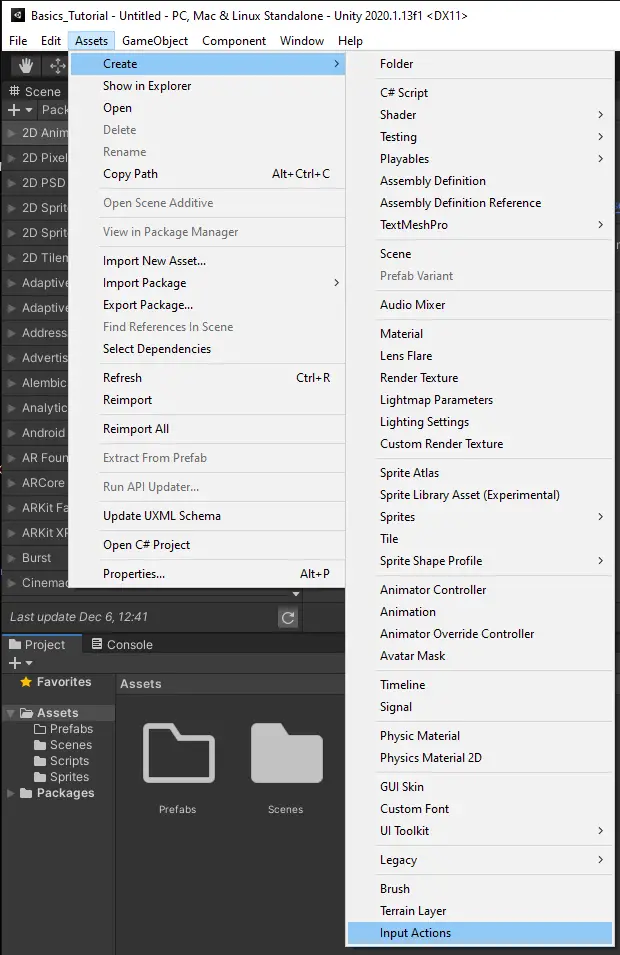
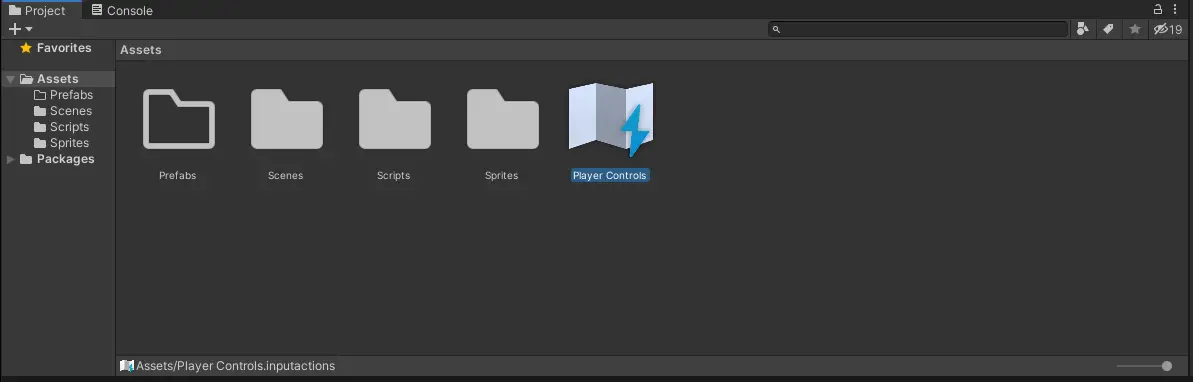
This will create an Input Action, which is represented by the accordion style brochure icon, and prompt you to enter a new name. Select a name that represents what this asset will hold. We will name ours Player Controls.
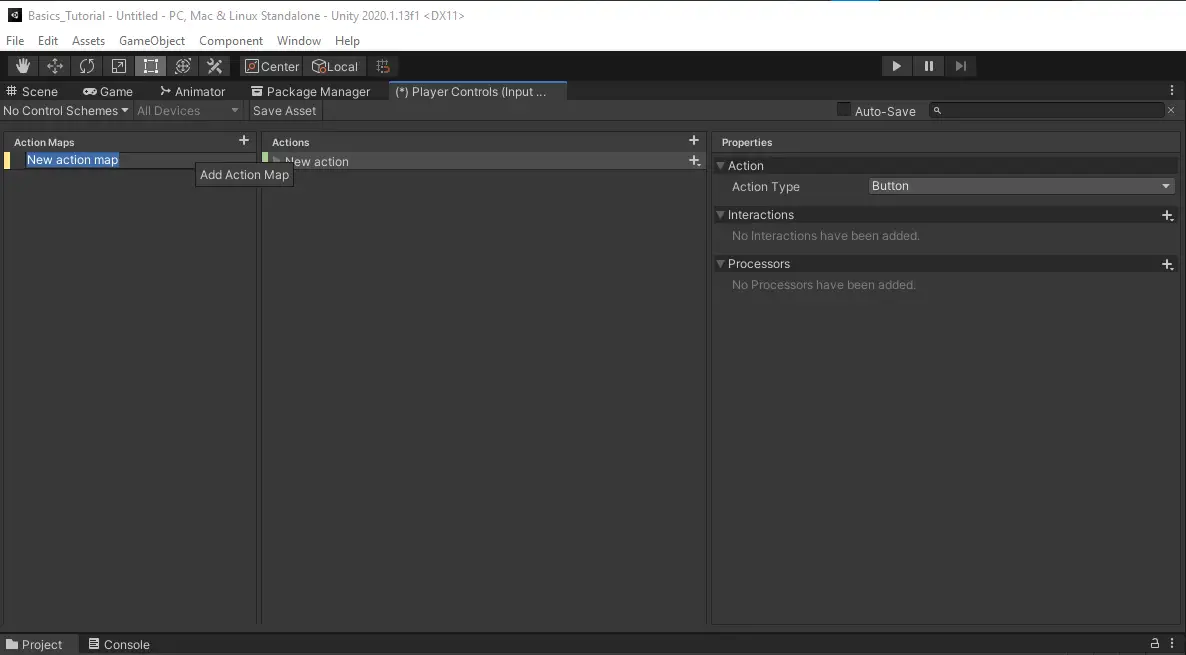
Double click the newly created Input Action and you will be presented with a new window with the name you selected and (Input Actions) as the title. From here we are going to create a new Action Map. Action Maps allow you to set up different profiles for inputs under one Input Action. You could create one for driving a car, navigating a UI, or, as we will do here, for controlling the player character.
To create the new action map, select the plus icon at the top right of the Action Maps column. We will name our action map ‘Player’.
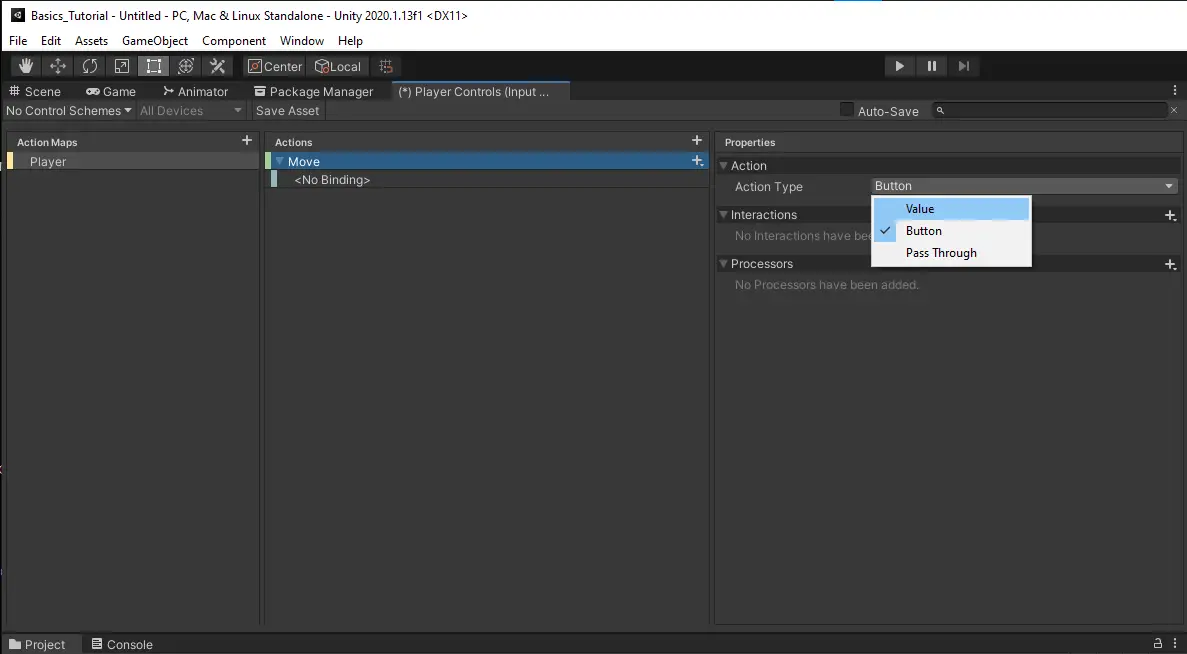
From here we will create an Action for our Action Map. Again, Actions work as events that are triggered when the specified inputs are used.
To create our new Action, select the plus sign from the top right of the Actions column. Give it a name, we will call ours Move.
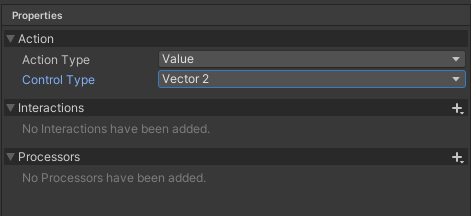
You will see the right-hand column for properties display some new information. In the properties column select Action > Action Type and set it to what action you want to occur. Since we are wanting to capture and return the inputs as movement from the user, we will select Value.
You will then be presented with a new property for Control Type. This is where you select the type of value you want returned from your inputs. Since we are doing movement in 2d space we will select Vector 2 as the Control Type, if you are making a 3D game you will want to use Vector 3.
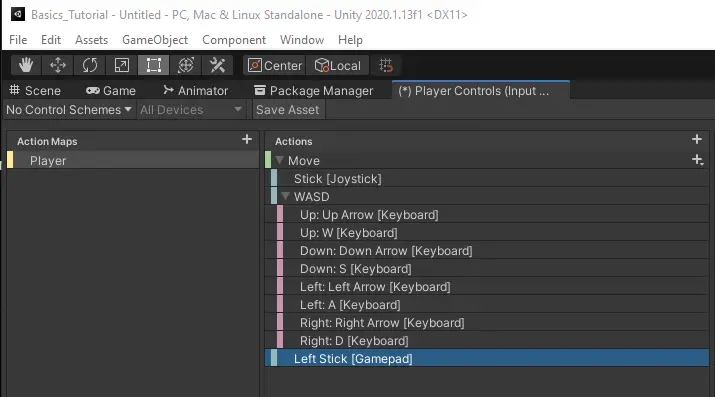
We specify the inputs we want to trigger our action by adding bindings or 2D Vector Composites. For our first input we will add a 2D Vector Composite which will combine inputs into a 2D Vector or Vector 2.
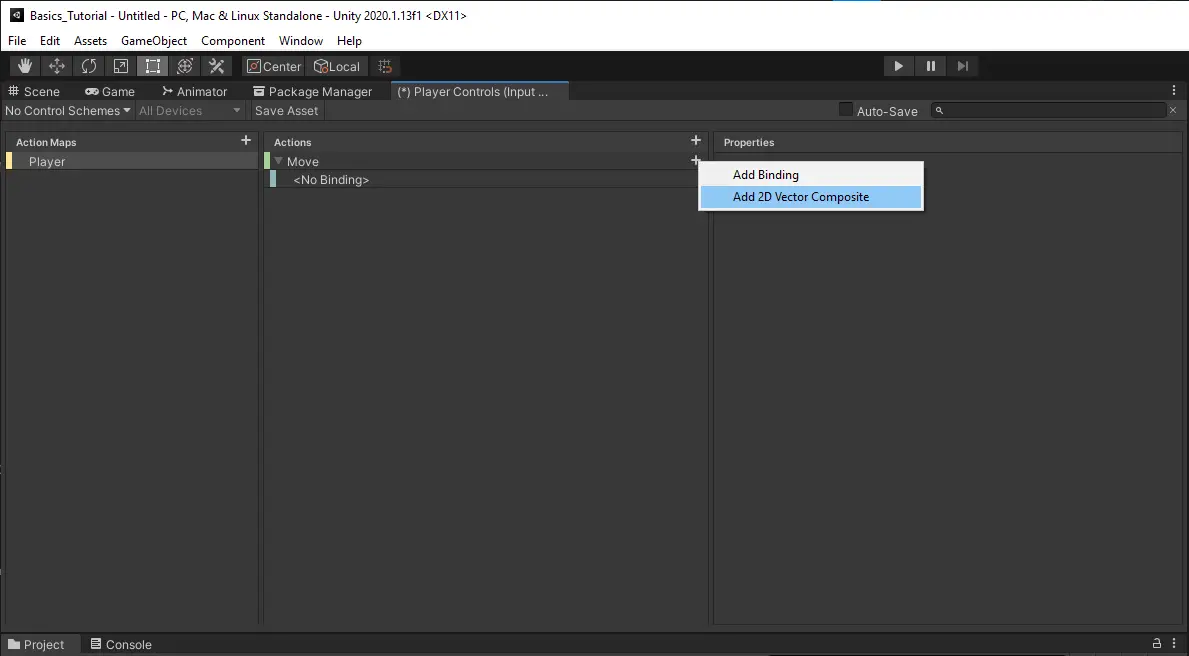
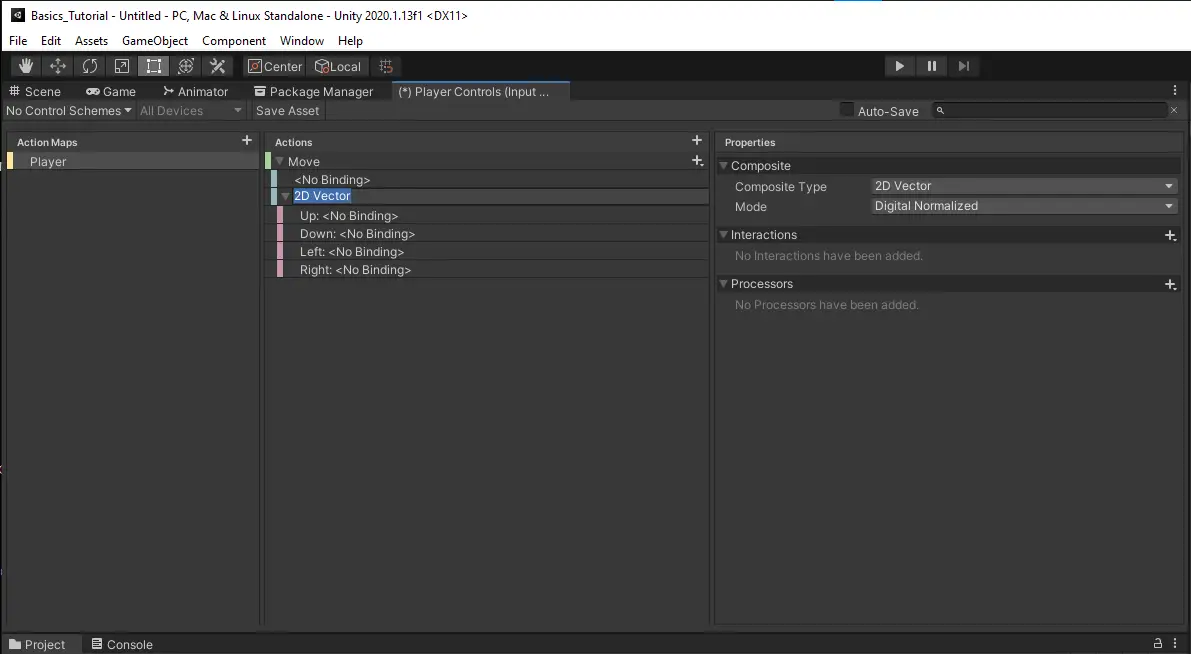
This will add an input called 2D Vector to our action. Let us right click and rename that to WASD to represent our up, down, left, and right inputs.
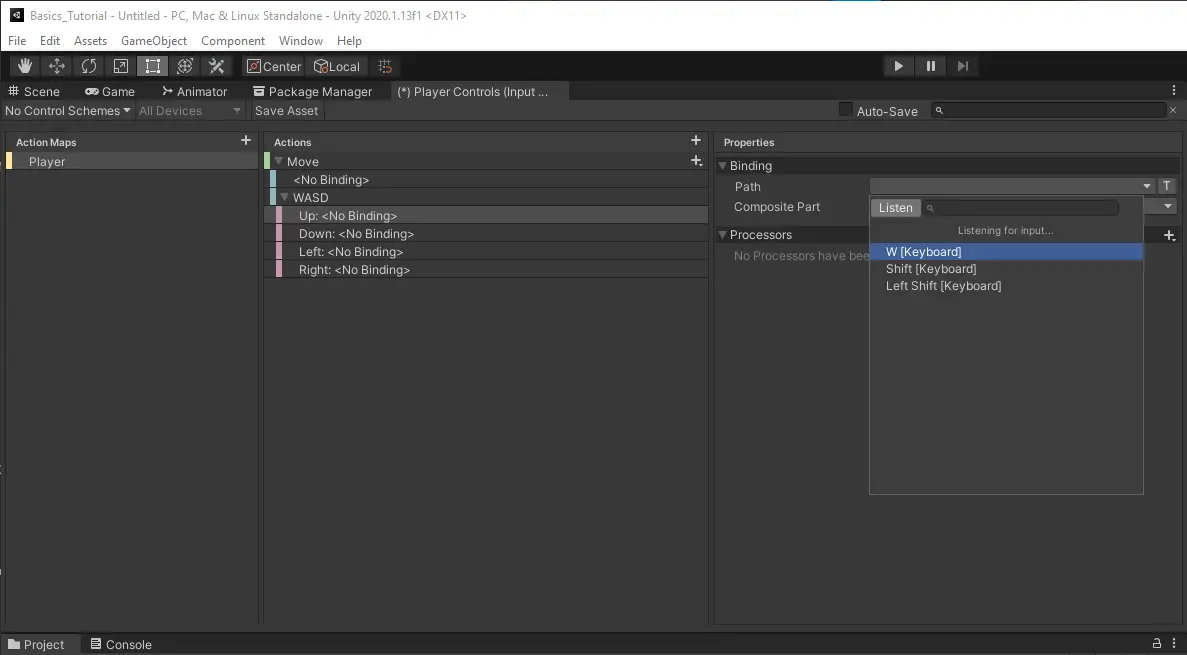
Now we can assign input keys from our keyboard to the directions in the WASD input. Select the UP: input and in the properties column you will now see a Binding header and a path option. Select Path and you will be given the option of searching for a key or the more convenient option of Listening for a key. Select Listen and press the W key on your keyboard. This will bring up the W [Keyboard] option. Select that and move on to the Down input. Again, use Listen and press the S key. Select the S [Keyboard] option. Continue to do this for the remaining left and right options with the A and D keys.
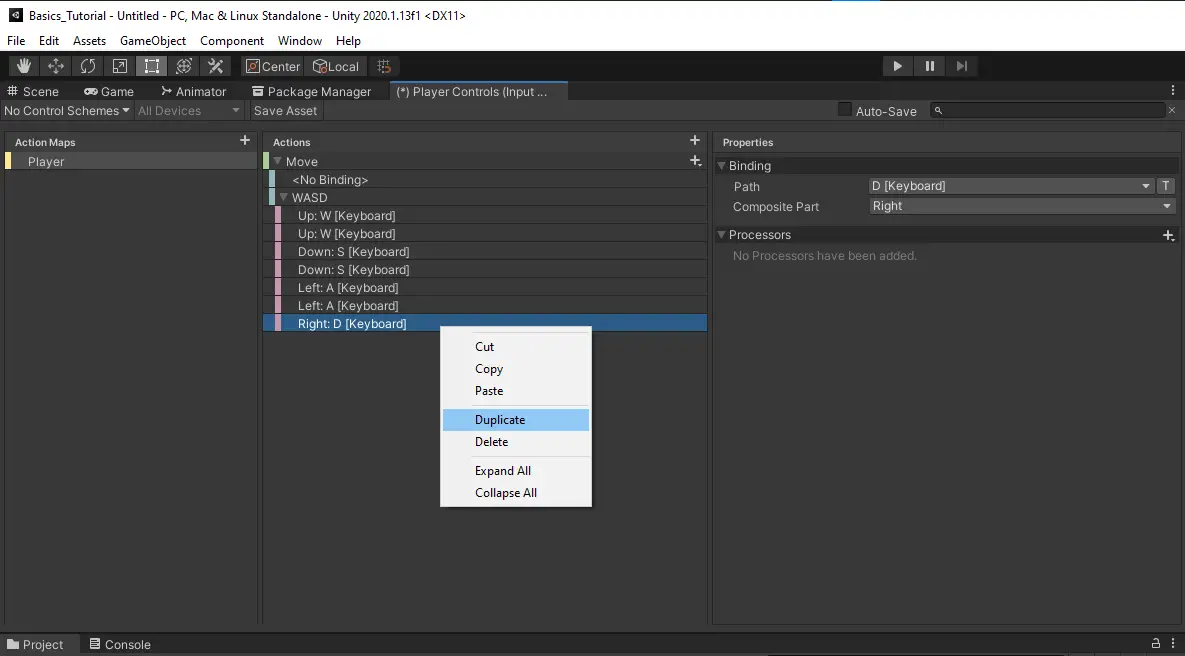
Now we want our players to have some options when using a keyboard for multiplayer. Let us duplicate each of the Up, Down, Left, and Right inputs and change the input key on the duplicates to the corresponding arrow keys.
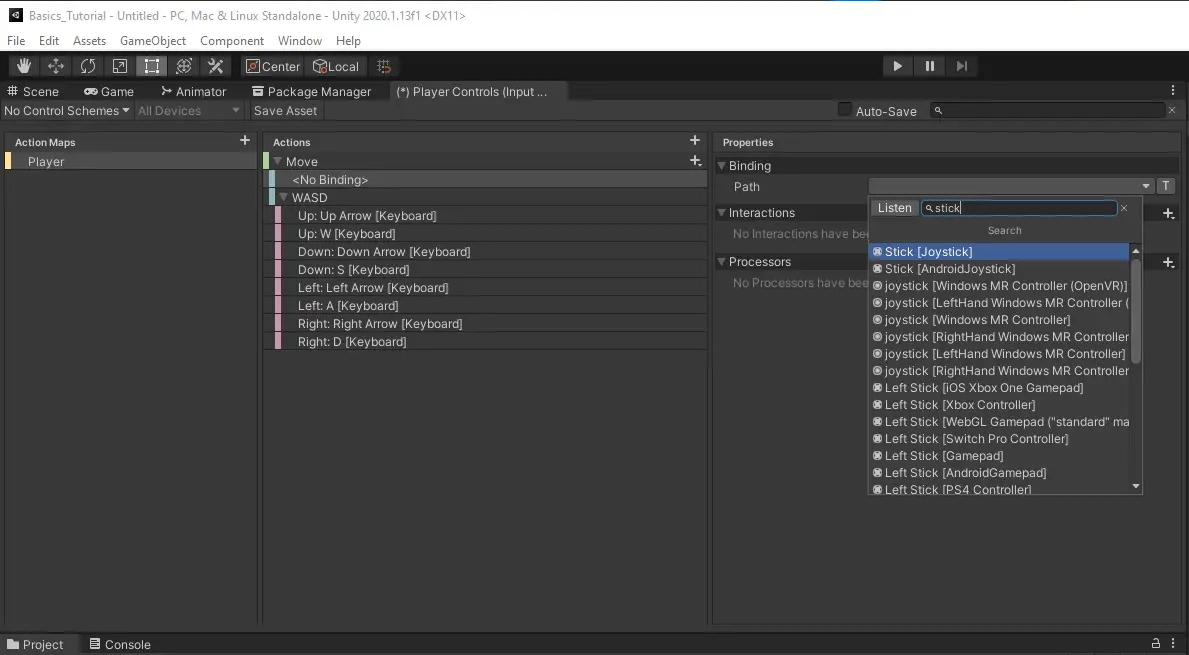
When the action was created it came with a default empty binding. Let us make use of it by selecting it and opening up the path options. We want to use this input for a joystick, but we do not have one attached to our workstation at the moment. This is where we can use the search feature. Type in ‘Joystick’ and you will see all of the related results. At the top select Stick [Joystick].
Now we want to use one more type of input for movement. So, let us use the plus icon on the Move action once more and add a binding.
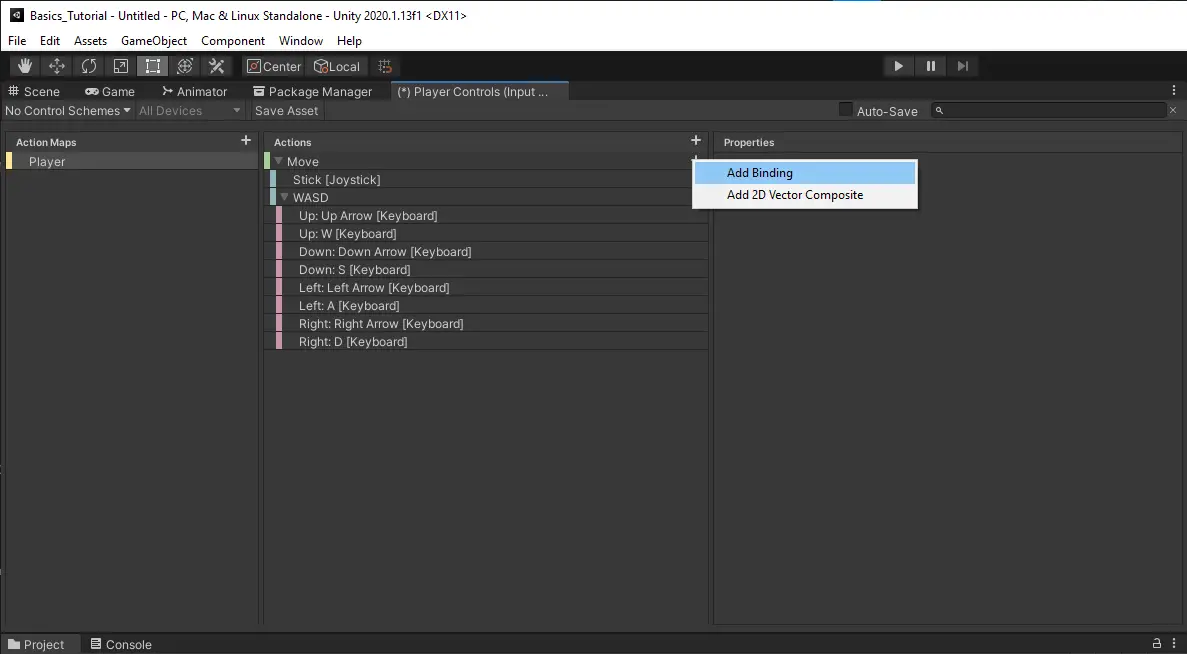
This time we can use the categories under the search bar and select GamePad.

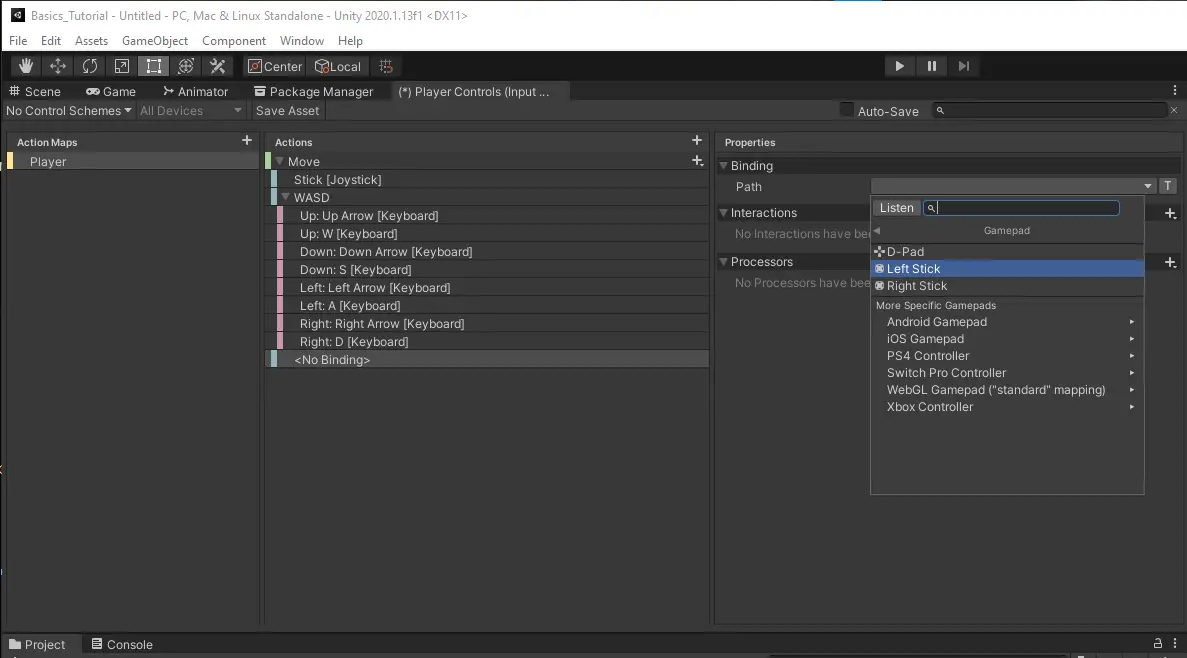
From the GamePad select Left Stick.
Now our players can set up multiplayer with their keyboard, joystick, and/or gamepad and be able to move their character without any additional changes. This is what your final Move inputs will look like. Now before you do anything else you must SAVE your Input Actions. To do this select Save Asset located at the top of the window, just above the action column. If you do not hit save your inputs will not take effect and you will have to redo all your work if you exit the Unity editor.
Assign Methods
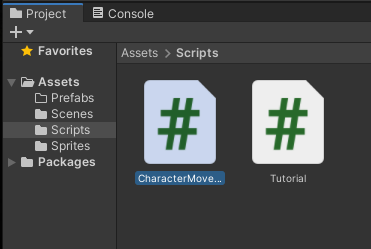
Now that we have Input Actions and inputs, we can now deal with passing that info into our scripts. For this we will create a simple 2d character movement controller called CharacterMovement.
The first thing we want to do is get Unity’s InputSystem imported. We will do this by stating.
using UnityEngine.InputSystem;Since we called our action Move, we will need to define a method called OnMove to be called when Move inputs occur. If you had called your action WickedKickFlips then the method you would need to define is OnWickedKickFlips. Just append On to whatever your action name is. Simple. We also want to make sure our value is passed in so we will have an input value of type InputValue.
For our CharacterMovement script we want to capture and store the Vector2 from our InputValue. To do that we will call the Get method on the InputValue with a type Vector2 and assign it to the field movement.
    void OnMove(InputValue value)
    {
        movement = value.Get<Vector2>();
    }
Next, we will need to create the movement field as well as a few others. Create fields for a Vector2, float, and a RigidBody2D. We will also set the access level to private to properly encapsulate our data. We will need access to the float value inside of our editor to make adjustments and tune movement speed later.
   [SerializeField]
    private float movementSpeed;
    private Vector2 movement;
    private Rigidbody2D rbody;
We need to get a reference to the RigidBody2D when our object is loaded. To do that we will call GetComponent inside the Awake method.
    private void Awake()
    {
        rbody = GetComponent<Rigidbody2D>();
    }
Now to move our player character around the screen we will need to manipulate the RigidBody2D of our character. Create a private method called Movement. Inside we will first get the current location of the character. Then we will take the movement from our input and multiply it by the speed we want the character to move. We now add that to the current position multiplied by Time.fixedDeltaTime to get our new position. At last, we move the RigidBody2D with the MovePosition method.
 private void Movement()
 {
     Vector2 currentPos = rbody.position;
     Vector2 adjustedMovement = movement * movementSpeed;
     Vector2 newPos = currentPos + adjustedMovement * Time.fixedDeltaTime;
     rbody.MovePosition(newPos);
 }
Since manipulating the RigidBody2D is a physics action we will call our Movement method inside of FixedUpdate.
    void FixedUpdate()
    {
        Movement();
    }
And that is it for our script. Your final script should look similar to the one below. If you are using 3D objects, make sure to change from Vector2 and RigidBody2D to Vector3 and RigidBody.
using System.Collections;
using System.Collections.Generic;
using UnityEngine;
using UnityEngine.InputSystem;

public class CharacterMovement : MonoBehaviour
{
    [SerializeField]
    private float movementSpeed;
    private Vector2 movement;
    private Rigidbody2D rbody;

    private void Awake()
    {
        rbody = GetComponent<Rigidbody2D>();
    }

    void FixedUpdate()
    {
        Movement();
    }

    void OnMove(InputValue value)
    {
        movement = value.Get<Vector2>();
    }

    private void Movement()
    {
        Vector2 currentPos = rbody.position;

        Vector2 adjustedMovement = movement * movementSpeed;

        Vector2 newPos = currentPos + adjustedMovement * Time.fixedDeltaTime;

        rbody.MovePosition(newPos);
    }
}
Attach Player Input
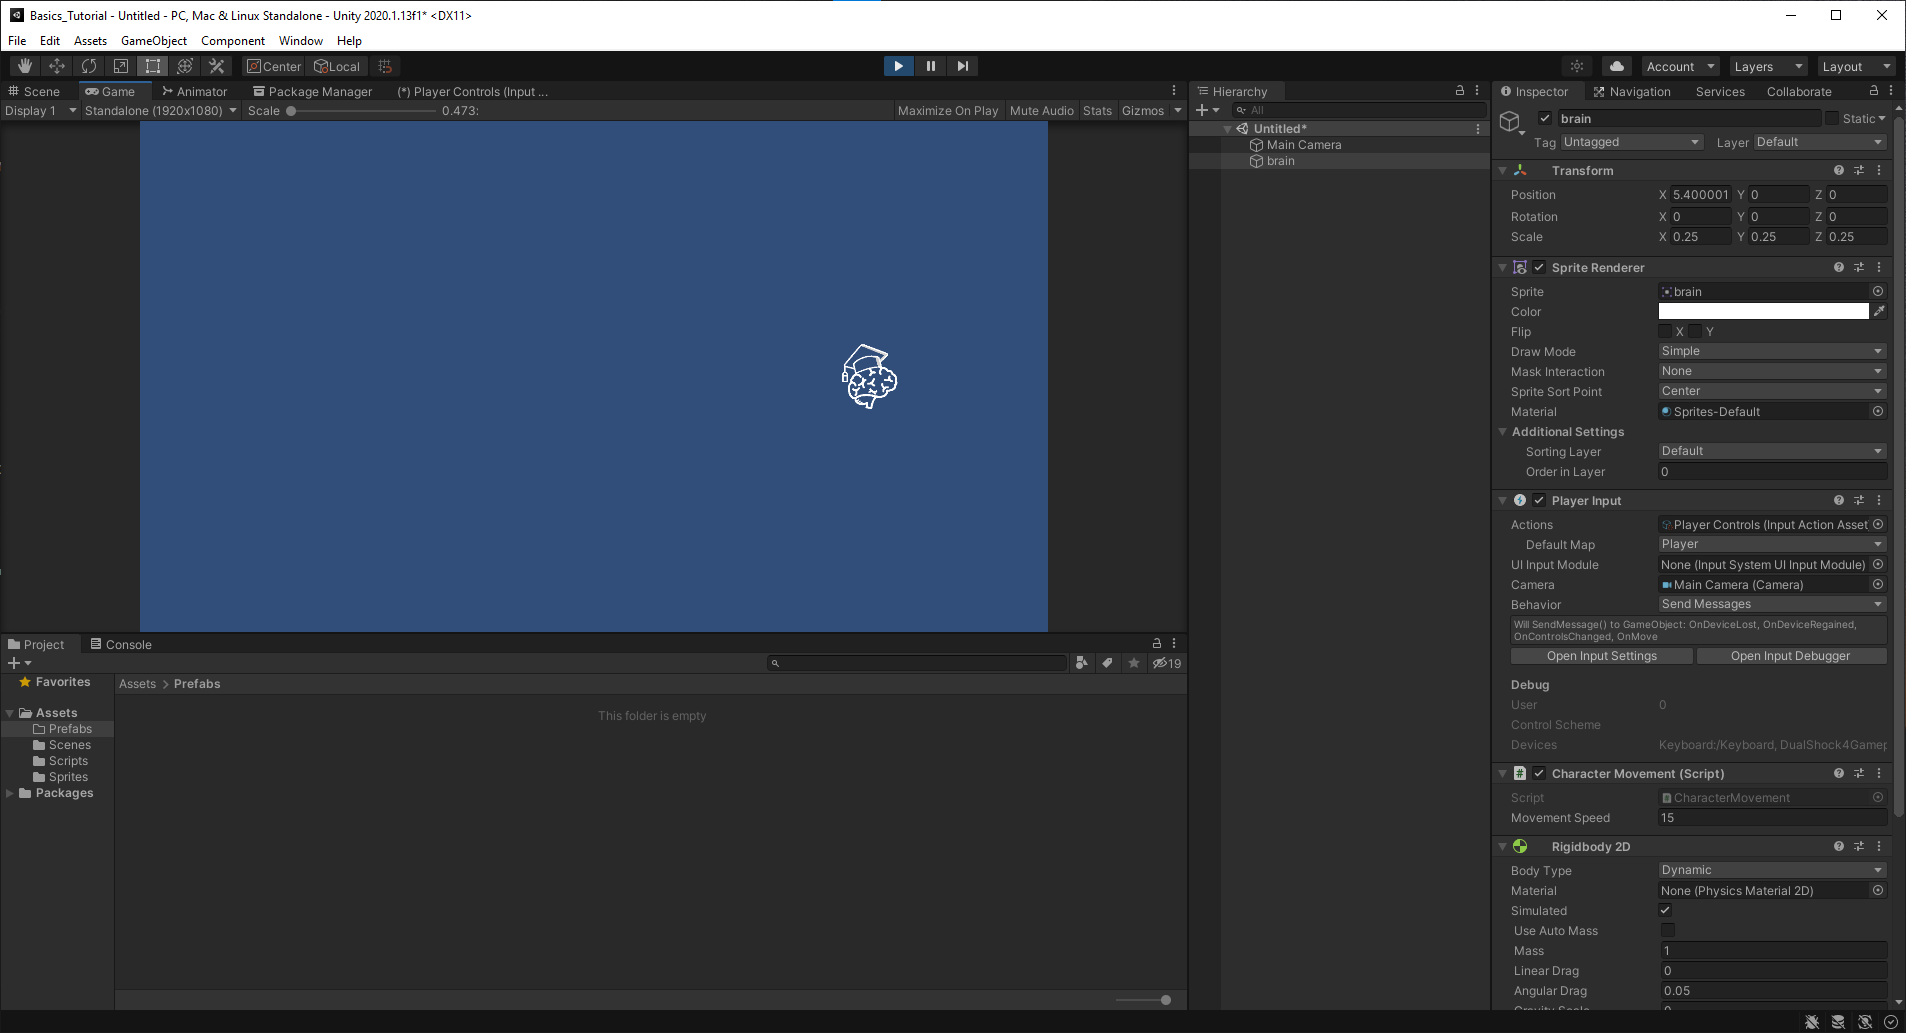
We will be using our brain character sprite to represent our player. You could use any sprite or game object available that you want to move through player input.
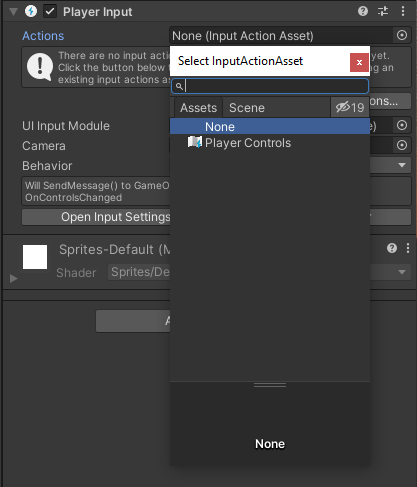
First thing we need to do is add a Player Input component to our character. To do this select Add Component and search for Player Input.

Once added we will need to assign our Input Action asset we created earlier. Select the empty field and you will see a list of compatible assets. Our multiplayer control asset will be the only one available.
The default map will be Player because that is the only map we created. If you have more, you will need to select the map you are wanting to use for this character. We will also drag in a reference to our camera. We just have the one main camera for our scene so we will use that.
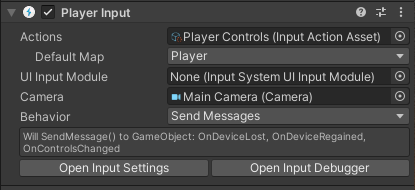
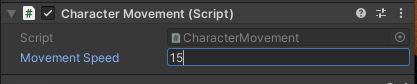
Make sure to add your Character Movement script as a component to the player. We will also need to set the speed. Something around 15 will be a good speed for now.
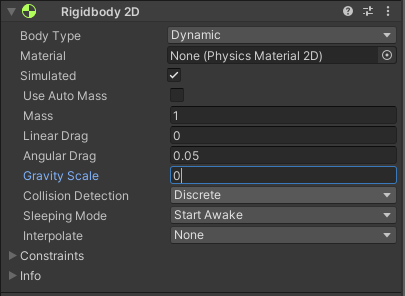
Also, attach a RigidBody2D component, or RigidBody if 3D. We are setting the Gravity to zero to keep our character from falling down.
Now if we click play, we can move our sprite around the screen. Yay, but we need to make this a multiplayer game.
Convert Player to Prefab
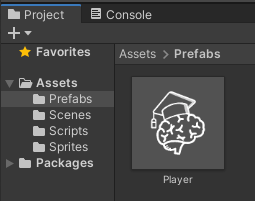
Let us convert our character into a prefab by dragging it to the prefab folder. Delete the character from the scene.
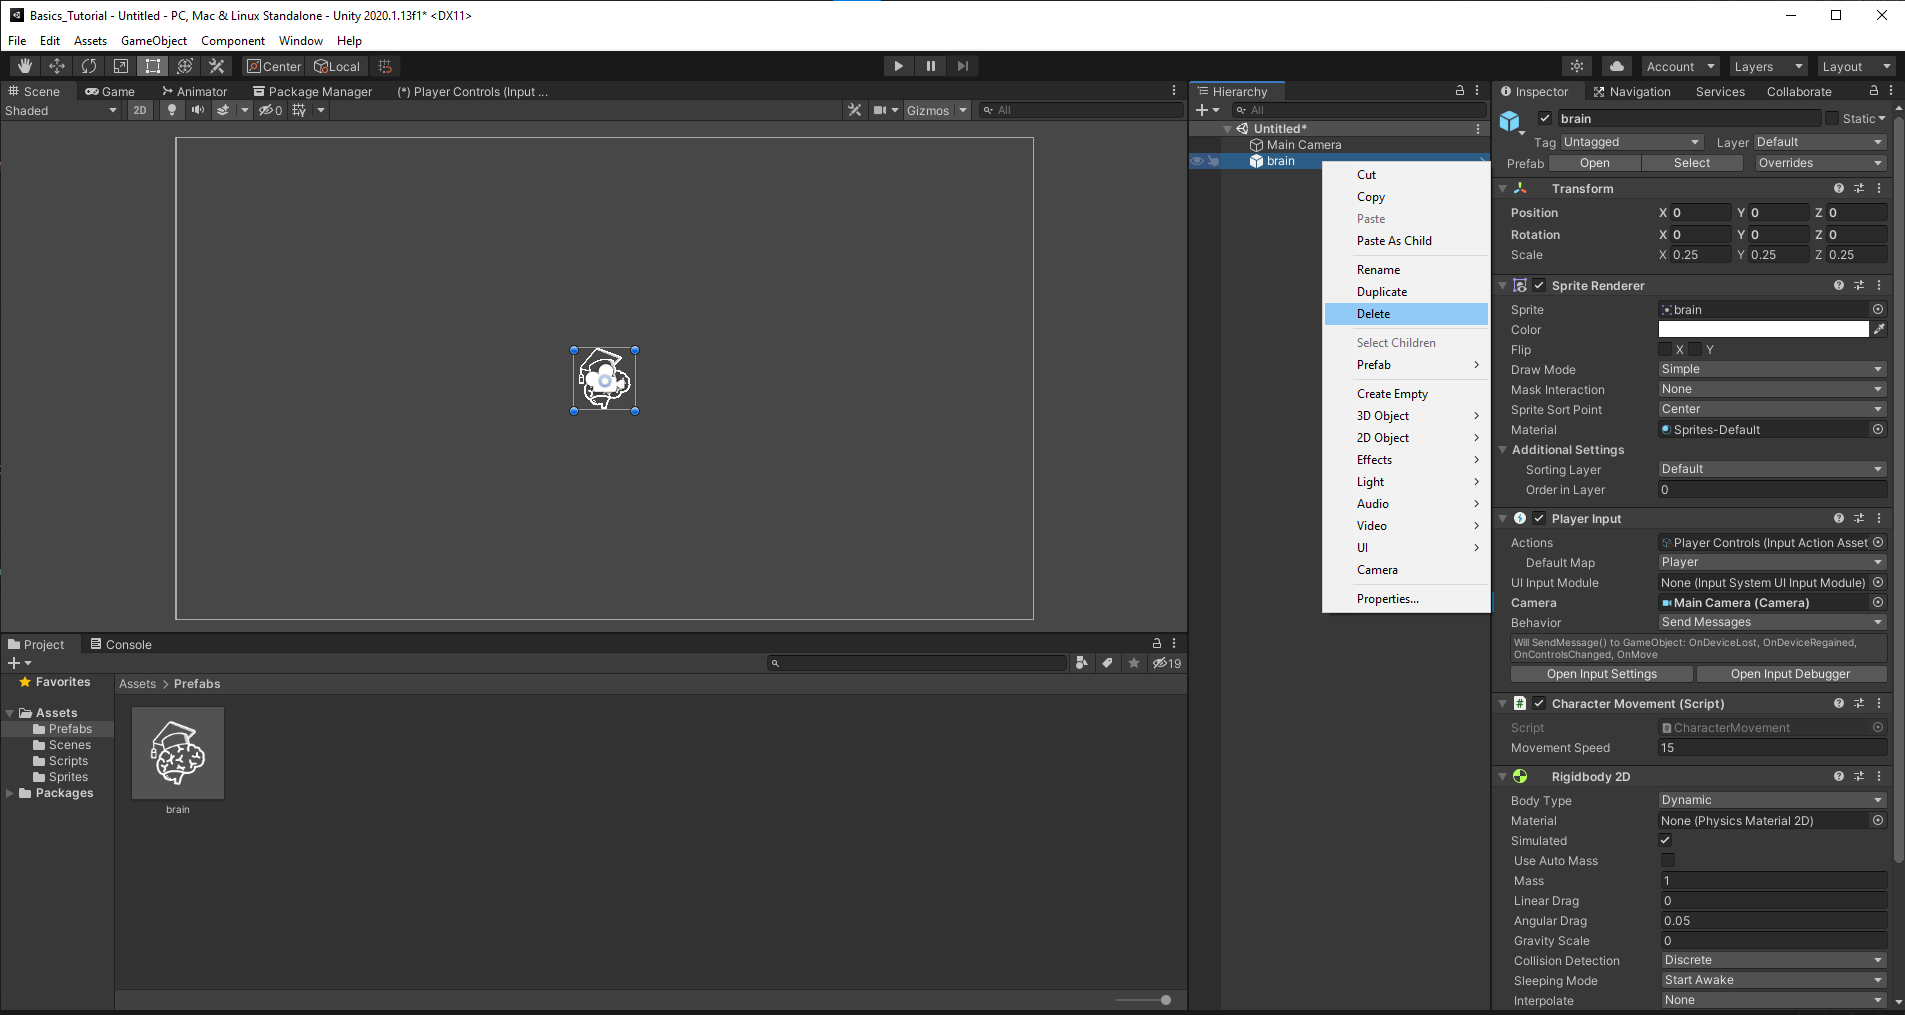
We are also renaming our prefab to Player to make it more clear what the prefab is for.
Create InputManager
Now that we have our Input System, Input Actions, Inputs, 2D Character Movement script, Player Input and Player prefab we can finally give our game true multiplayer controls.
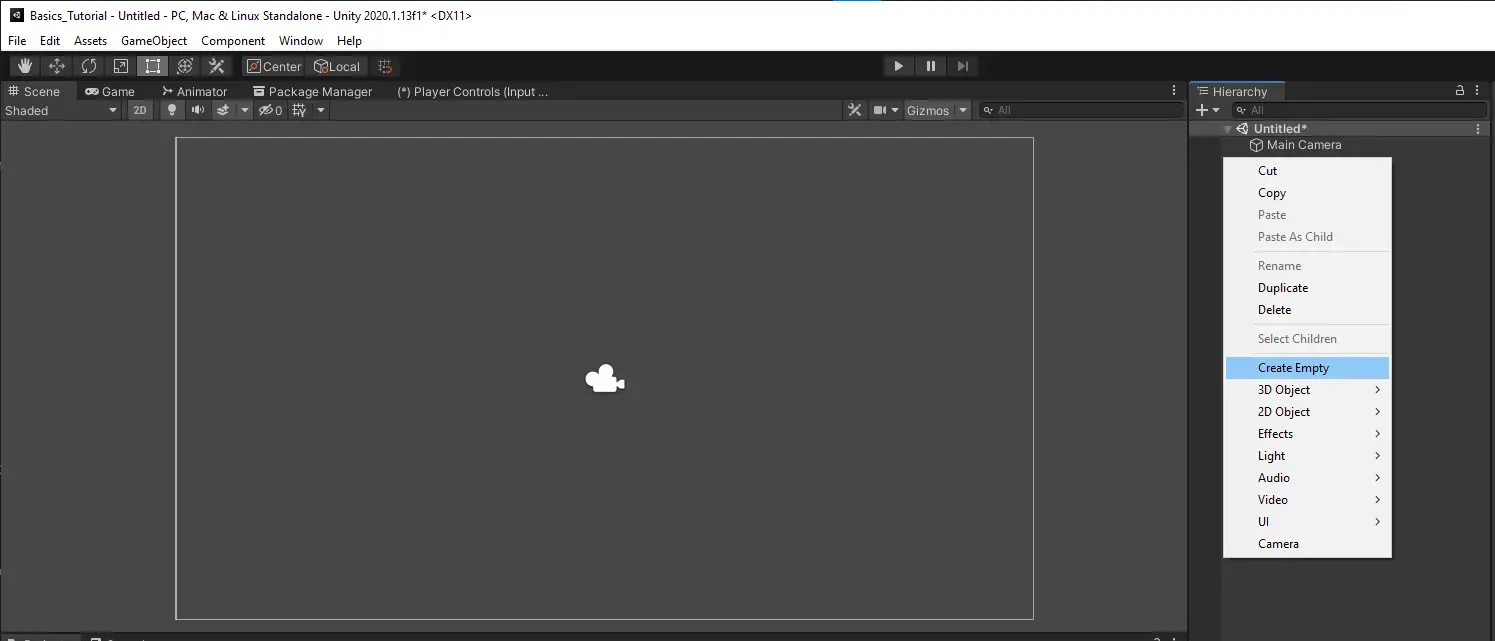
Start by creating an empty game object in the hierarchy. We will rename it to InputManager.
Add the component Player Input Manager to the newly created game object.
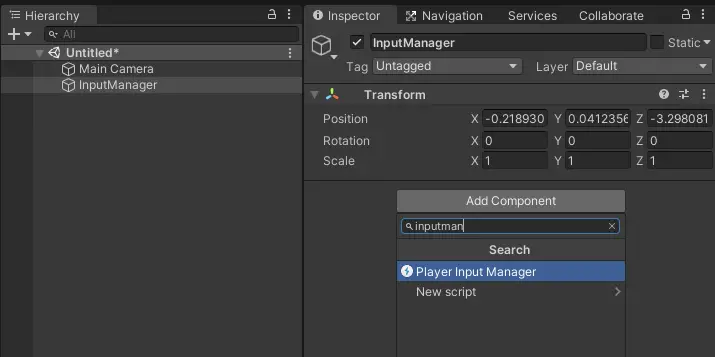
Player Input Manager is going to handle all of the heavy lifting for the management of the multiplayer controls. It will detect new devices, assign a prefab to that device, and keep track of what inputs belong to which character. All without having to write any additional code.
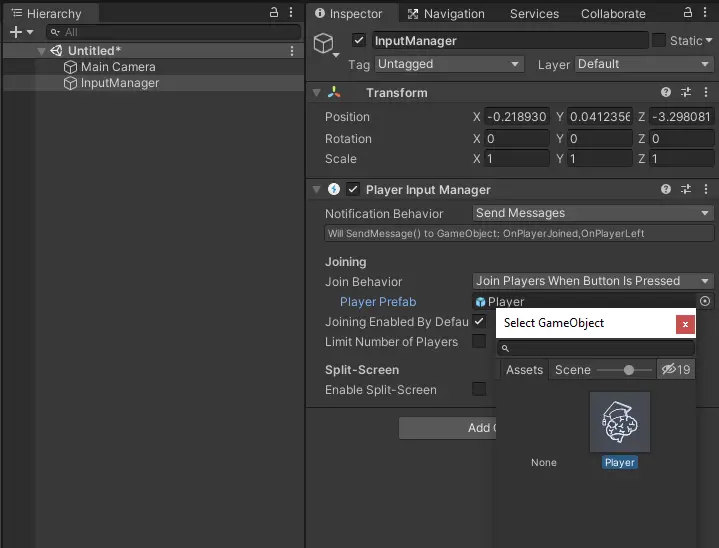
We need to specify a Join Behavior. The default is join when a button is pressed. This will add a new player when a button is pressed on a new input device. It will not add multiple players if you press keys on the same device.
Next, we drag in or use the empty field to select our Player prefab into the Player Prefab field.
We can limit the number of players that can join by selecting the box labeled Limit Number of Players. This populates a new field where you can specify the maximum number.
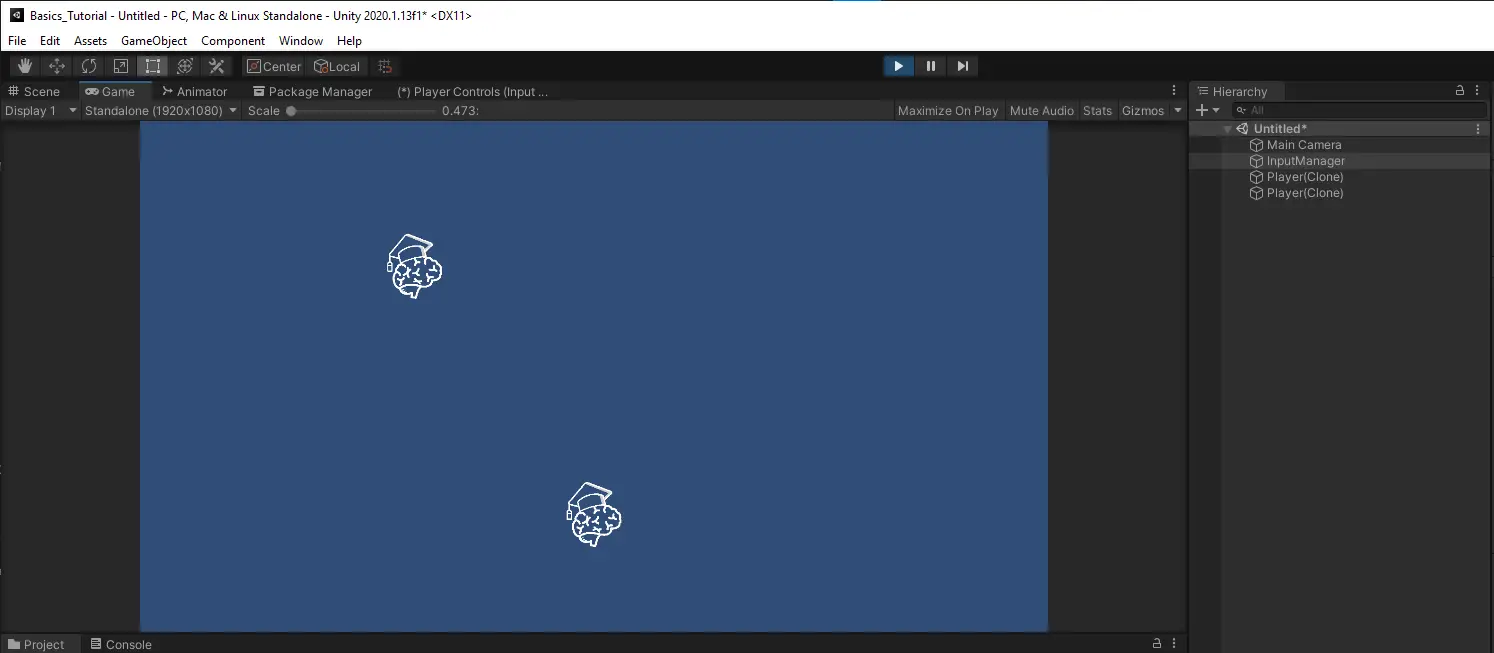
Now, for the piece de resistance, hit play in the Unity editor and press a button on your keyboard, gamepad, or other input device and watch the player characters spawn in. Here we can see I now have two characters that are independently controlled by multiple players. One was populated by my keyboard and the other by my PlayStation 4 controller.
And now you are ready to make your own multiplayer games in Unity. Thank you for stopping by. Stick around and check out more of our tutorials or posts like our piece on Unity and C# Basics: Variables. Also, leave a comment telling us what you liked or did not like about the tutorial. Was it easy to follow along? What do you want to learn next? As always check out some of our published apps below.