

Tips and Tricks: Unity Destroy
Introduction
When setting out to make a game you will inevitably need to destroy something, and no I do not mean your keyboard. When a player eliminates an opponent, crashes through a brick wall, or consumes an item you will most likely want to remove those items from the game. In Unity, we do this by calling Destroy() in our C# scripts. When Unity Destroy is called, the object being destroyed is removed once the update lifecycle is complete. This cycle happens fast, so fast you will not even notice the delay. Once the object is gone it is no longer accessible in game. Most of the time this is what you want to happen, but in some cases, you may need to Destroy the GameObject after some time, Destroy the script it is called in, or Destroy the GameObject it is attached to. We will discuss exactly those situations in this Tips and Tricks: Unity Destroy.
Getting Started
We will get things started by setting up a simple example scene. If you wish to follow along, the rest of this section will walk you through the simple set up. If not, you can jump ahead to the Destroy GameObject section where we will demonstrate how Unity Destroy works.
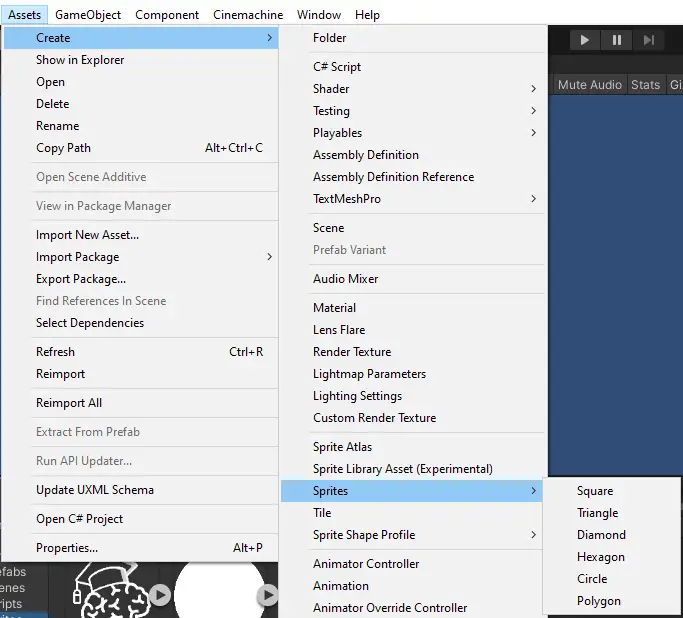
In this scene we will use the editor to create a circle sprite by going to the menu bar and selecting Create > Sprites > Circle. Repeat the process but this time select the Square.
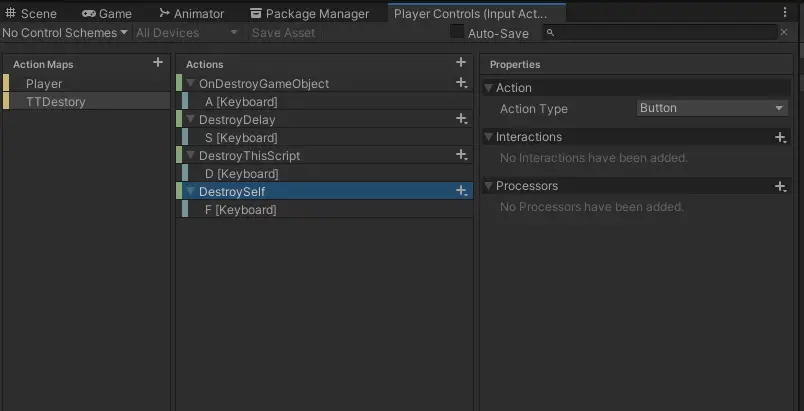
We have also created input actions using Unity’s input system. To see how to setup input actions check out the create input actions section of Unity Multiplayer: Create a Multiplayer Game Using the New Input System for Multiplayer Controls
Next, we will create a Destroy script to hold our destroy examples. We have called this script TTDestroy. This script has one field to hold a reference to our circle for no nefarious reasons…
using System.Collections;
using System.Collections.Generic;
using UnityEngine;

public class TTDestroy : MonoBehaviour
{
    [SerializeField]
    private GameObject circle;

}
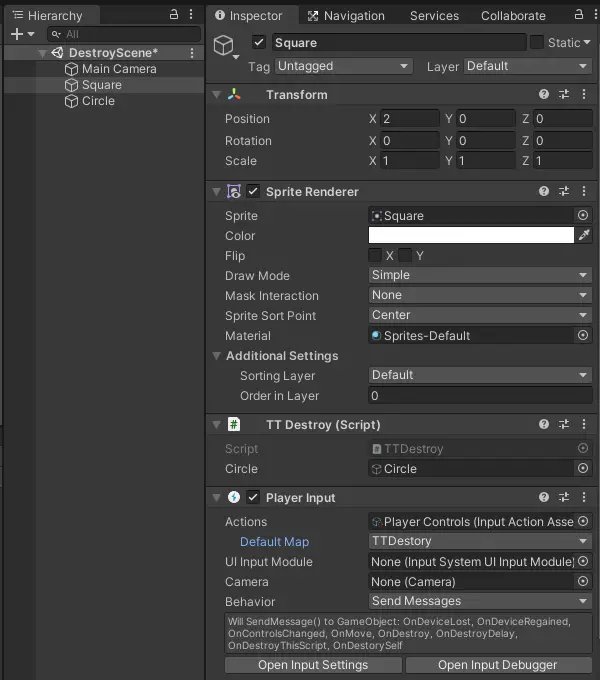
Drag your two sprites into the scene and attach the TTDestroy and a Player Input component by selecting add component in the inspector. Drag the circle gameobject into the field for the TTDestroy script and add your input actions to your Player Input as seen below.
We are now ready to begin.
Destroy GameObject
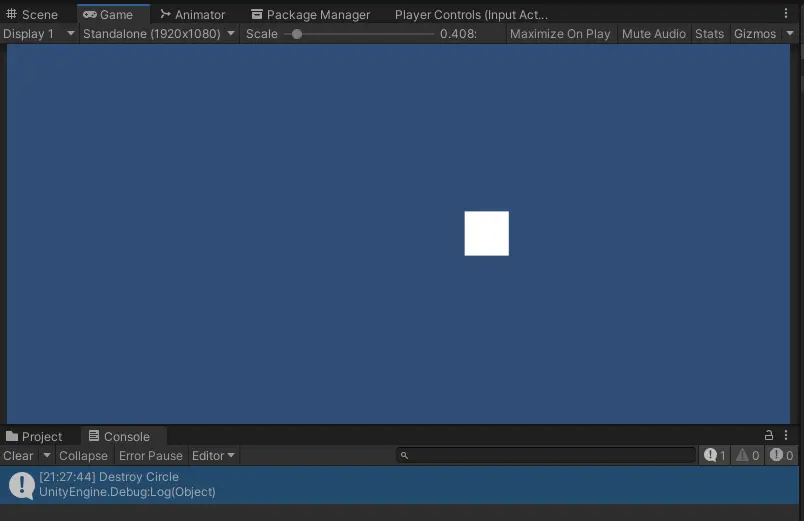
Unity Destroy takes at minimum one argument, a game object to destroy. In your script you can pass in any game object you hold a reference to. Since we set a reference to our circle in the editor, we can pass that to the destroy method.
    void OnDestroyGameObject()
    {
        Debug.Log("Destroy Circle");
        Destroy(circle);
    }
Now if we play the game and hit our DestroyGameObject key, A, our circle will disappear immediately and we get a message that we destroyed the circle, mwahahaha, cough, cough… moving on.
Destroy GameObject in X seconds
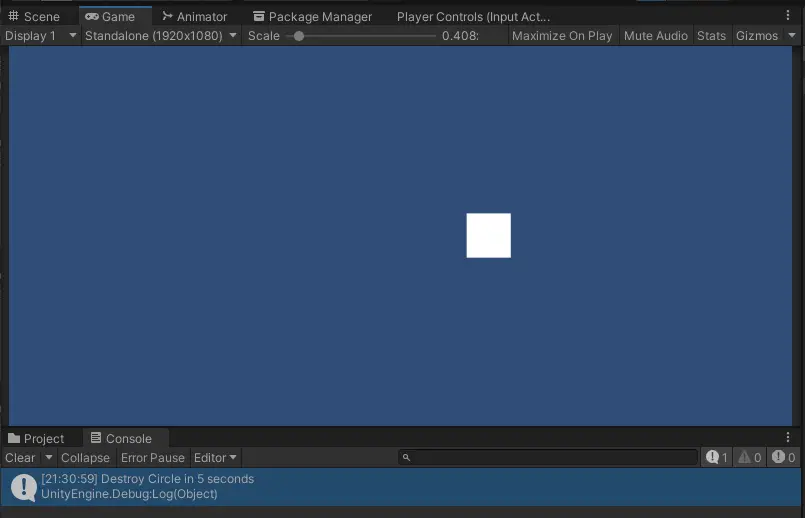
The Destroy method also takes a second argument, a float. Or more specifically a time that will be converted to seconds. We can use this to delay the destruction of an object.
    void OnDestroyDelay()
    {
        Debug.Log("Destroy Circle in 5 seconds");
        Destroy(circle, 5f);
    }
Now if we play the game and hit our DestroyDelay key, S, we get a message that we will destroy the circle in 5 seconds and then after the timer the circle will again disappear.
Destroy This Script
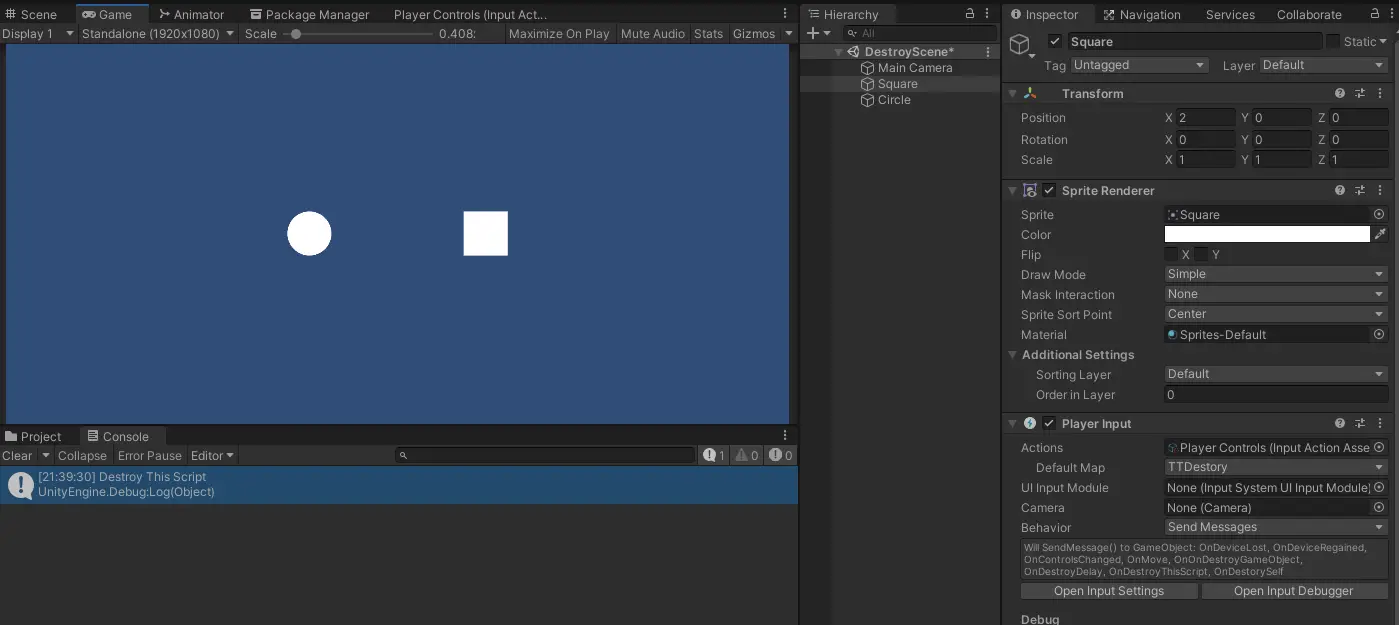
Now, let us say we want to place an item down and after it is placed it becomes a regular object. In this case, we want to just destroy the item script attached to the gameobject. For this, we can use the keyword ‘this’ to reference the script that called it.
    void OnDestroyThisScript()
    {
        Debug.Log("Destroy This Script");
        Destroy(this);
    }
Once again, if we play the game and hit our DestroyThisScript key, D, we get a message that we will Destroy this script. This time the circle did not disappear but if we look over to the inspector with our Square object selected in the hierarchy, you will see that the TTDestroy script is no longer part of the game object.
Destroy Self
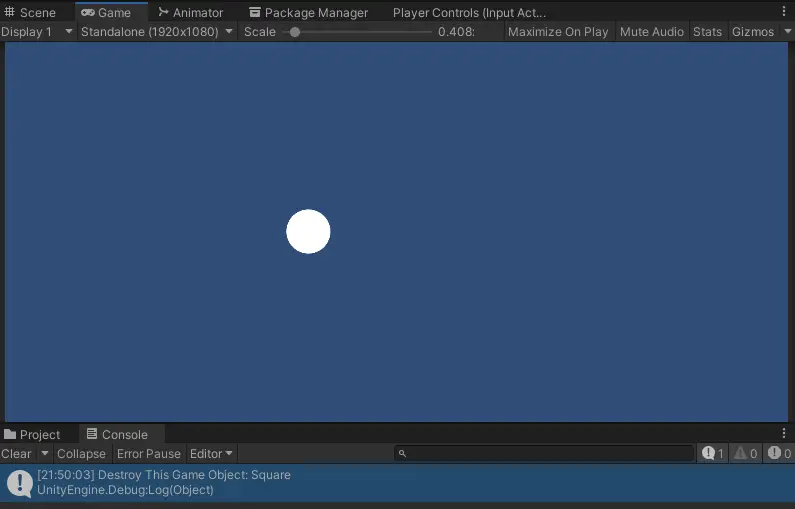
Finally, sometimes you need to Destroy the GameObject that the script is attached to. This is useful for things like projectiles that can only go a certain distance before destroying themselves. In this case you would use the keyword gameObject, note the lowercase g. This references the GameObject, big G, that the script is attached to.
    void OnDestroySelf()
    {
        Debug.Log("Destroy This Game Object: " + gameObject.name);
        Destroy(gameObject, 1f);
    }
Hit play for the last time and press our DestroyThisScript key, D, we get a message that we will Destroy this Game Object and after the timer our Square disappears.
And now you are ready to start using Destroy in your own Unity games. Thank you for stopping by. Stick around and check out more of our tutorials or posts like our piece on Unity Multiplayer: Create a Multiplayer Game Using the New Input System for Multiplayer Controls. Also, leave a comment telling us what you liked or did not like about the tutorial. Was it easy to follow along? What do you want to learn next? As always check out some of our published apps below.