

Unity Split Screen Multiplayer: Using Cinemachine Follow Cameras
Introduction
Split screen is a pivotal piece in creating a local multiplayer game. With Unity Cinemachine and Player Input Manager we can seamlessly create split screen cameras for multiple players that will follow the player character. Split screen allows for independent control of a player’s character instead of being subject to a shared camera and the whims of your friends trying to go back for pickups when you just want to push ahead. We ended our multiplayer controls tutorial by setting up the Player Input Manager to allow joining but our players have to share a camera. We will add on to the end of that tutorial with these additional steps.
- Import Cinemachine Package
- Add Camera to Player Prefab
- Create a Virtual Camera for the Player
- Turn on Split Screen in the Player Input Manager
- Add a CinemachineBrain
- Create Layers
- Create Camara Initializer Script
- Attach Script to Player Prefab
If you have not seen the previous tutorial and already are already using Unity’s new Input System you can follow along as long as you have the following setup.
- Input Actions
- A player prefab with player inputs attached.
- A Player Input Manager
If you want to follow along from the beginning, you can find the tutorial here: Unity Multiplayer: Create a Multiplayer Game Using the New Input System for Multiplayer Controls.
Getting Started
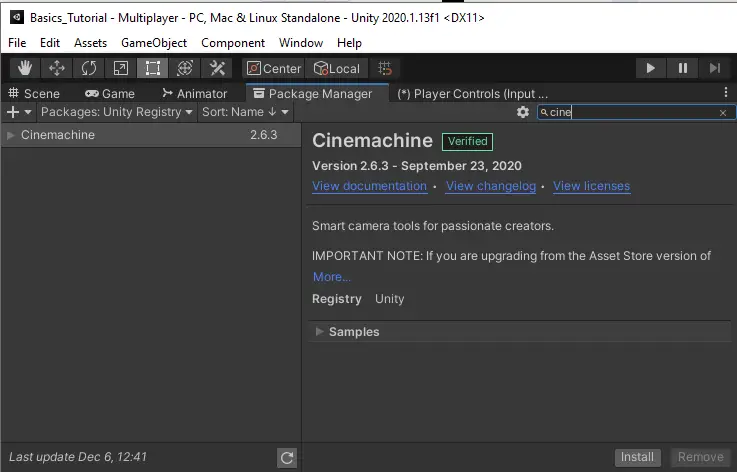
Import Cinemachine Package
We have to start by importing the Cinemachine package in order to create virtual cameras and control them in our scripts.
To do this open up Package Manager in the Unity editor and change the package filter to Unity Registry. We can then use the search bar in the top right to search for Cinemachine. Hit install and we are ready to roll. Once it is done installing you will notice a new Cinemachine menu in the menu bar.
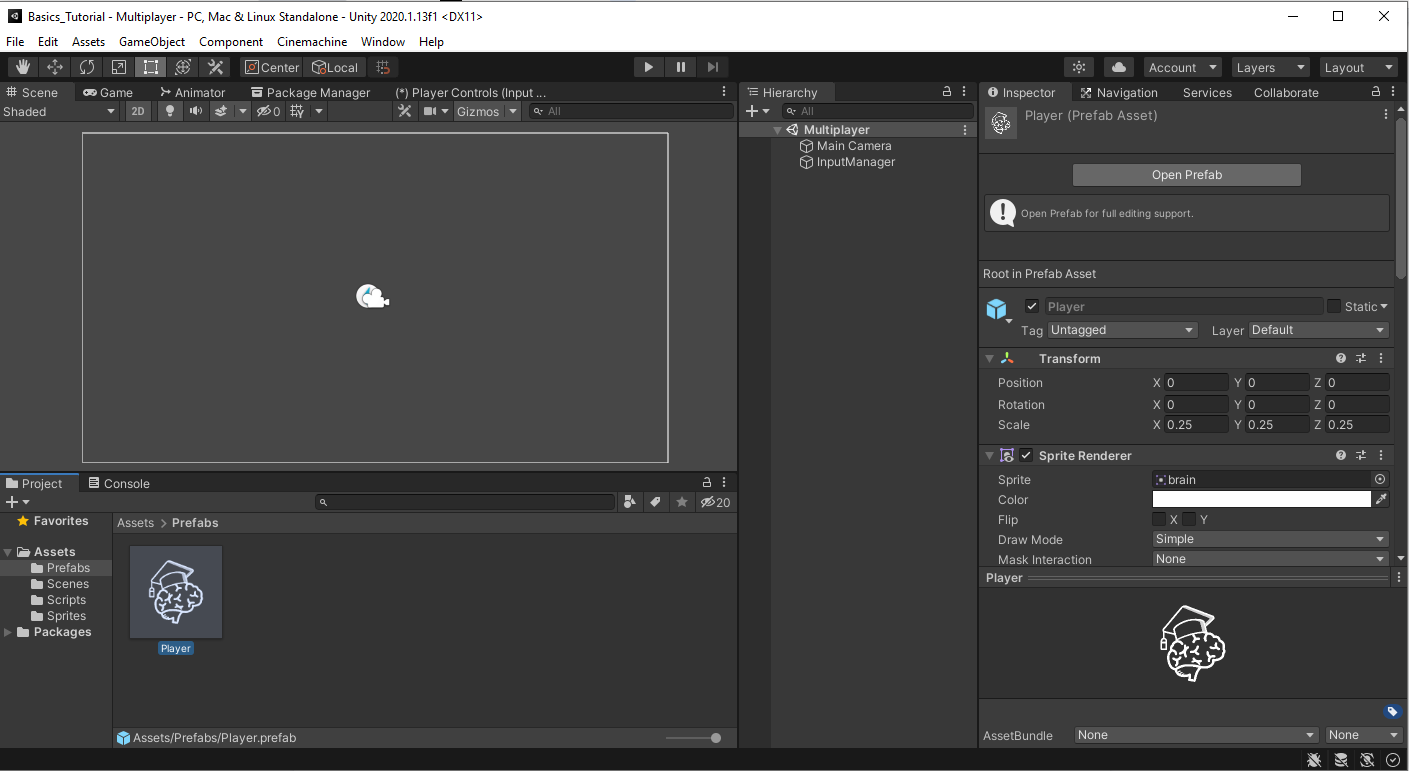
Add Camera to Player Prefab
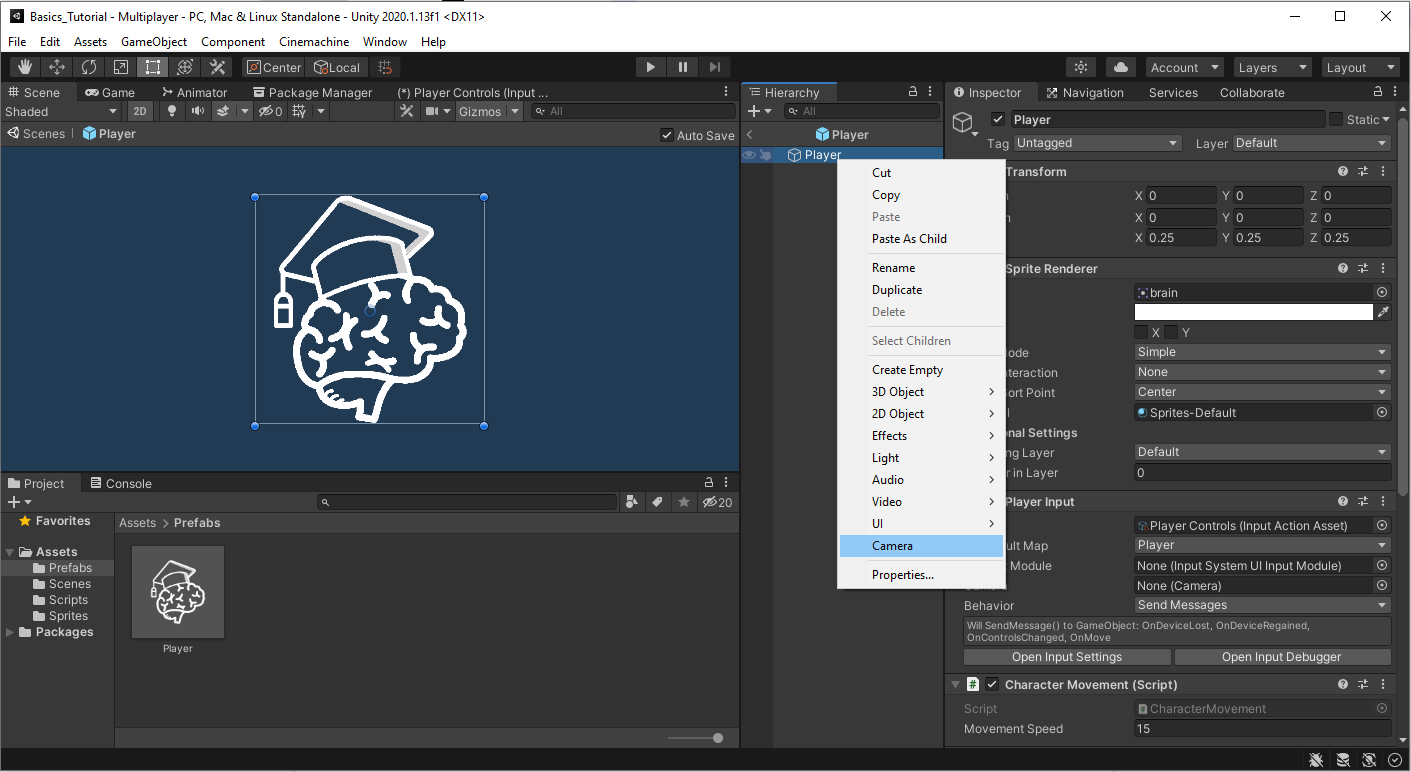
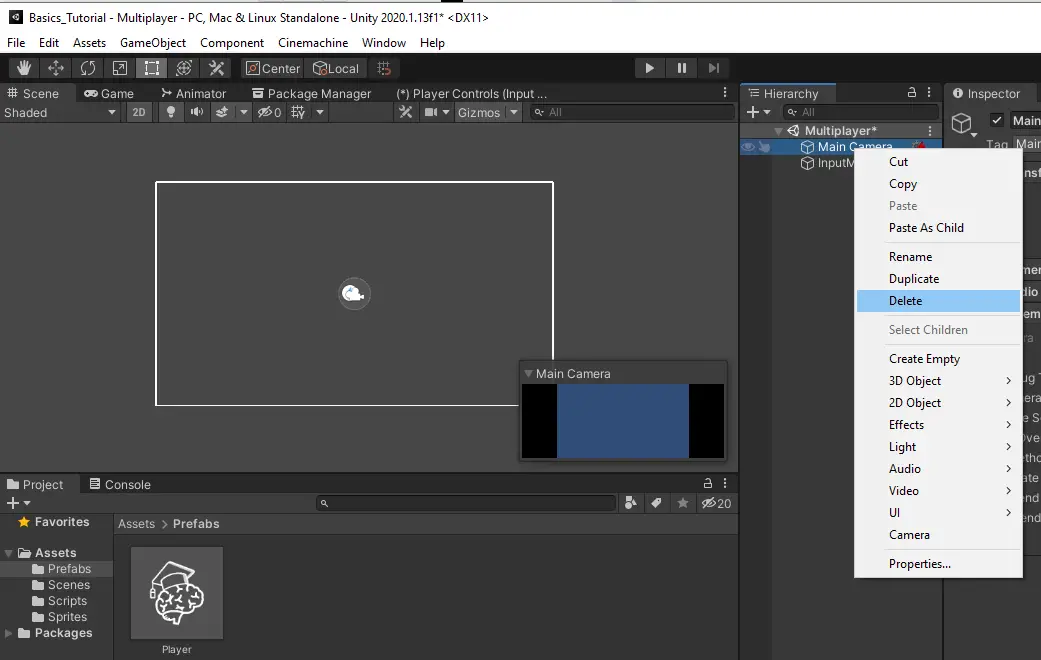
Since each player is spawned using the Player prefab, we first have to make a few modifications to it. Double click the prefab to open it inside the editor.
For the player to see their character we will need to add a camera for each player that joins. Add a camera by right clicking the Player object in the hierarchy and selecting Camera.
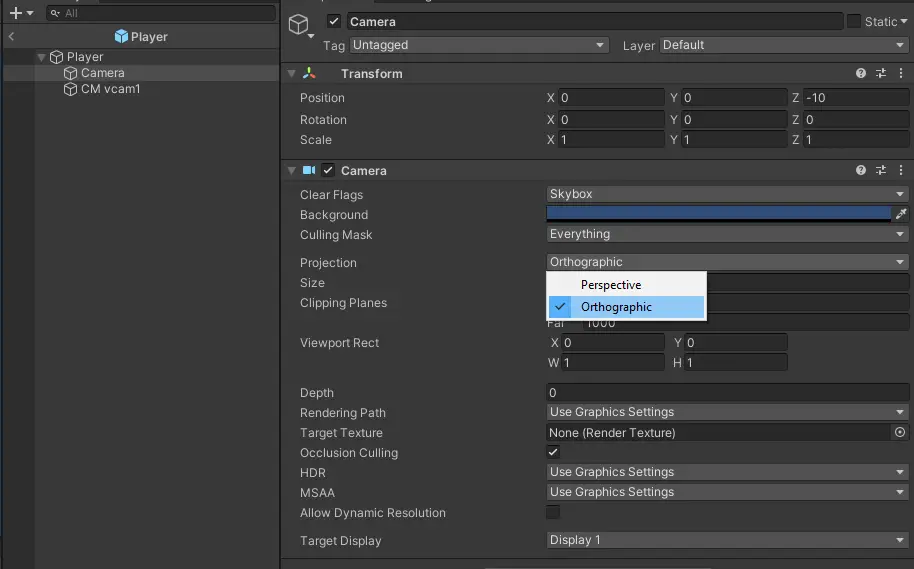
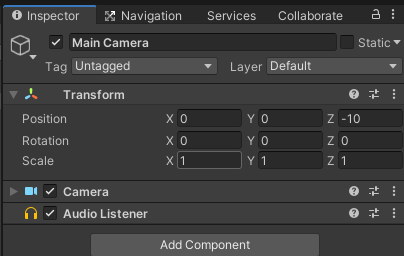
Make sure the camera projection is set to orthographic. Orthographic projection is being used here because we are using 2D objects and we do not need the depth perspective projection provides. Set the Z Position to -10 to pull the camera away from the sprite and bring it into view.
Create a Virtual Camera
Since we are using 2D assets we will also want to use the Unity Cinemachine 2D Camera. To create the camera, make sure your player is still selected in the hierarchy, and in the menu bar select Cinemachine > Create 2D Camera.
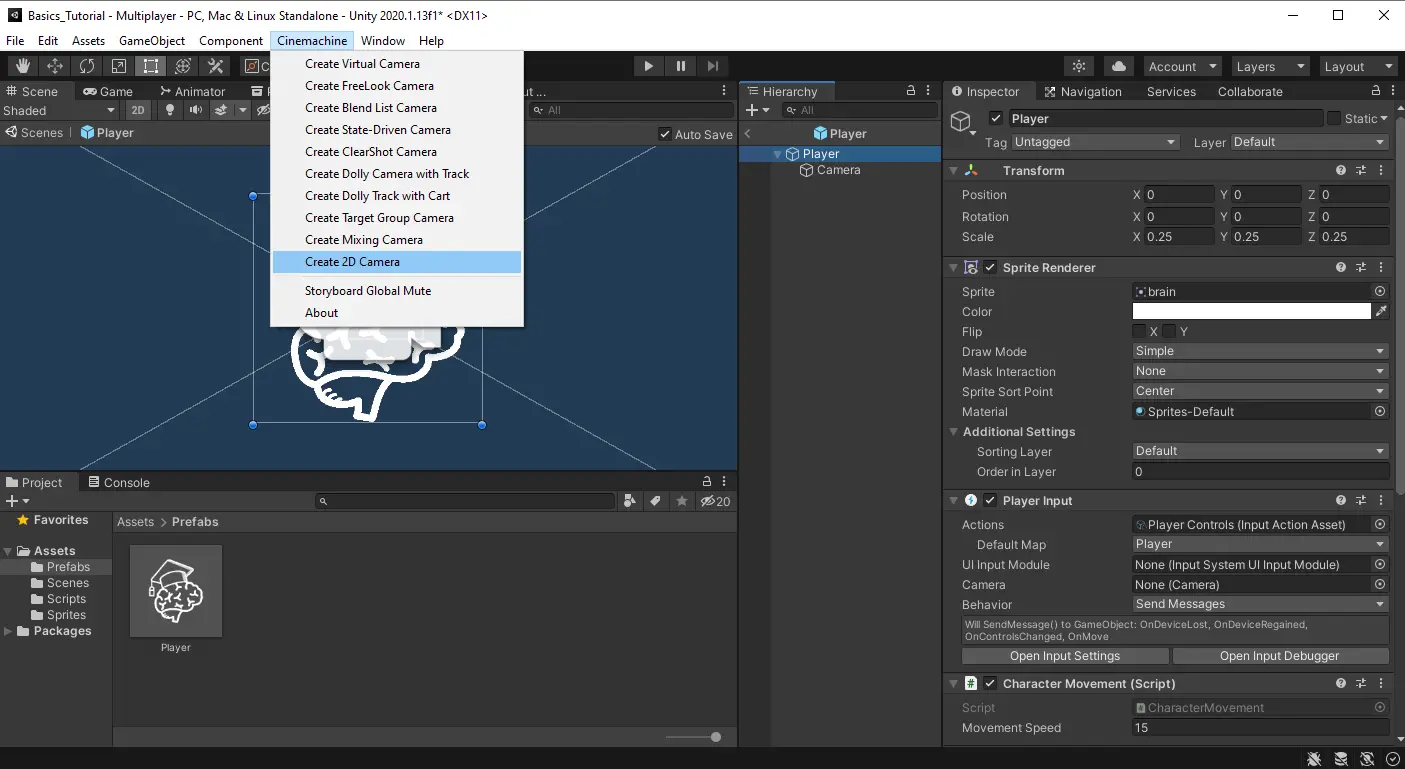
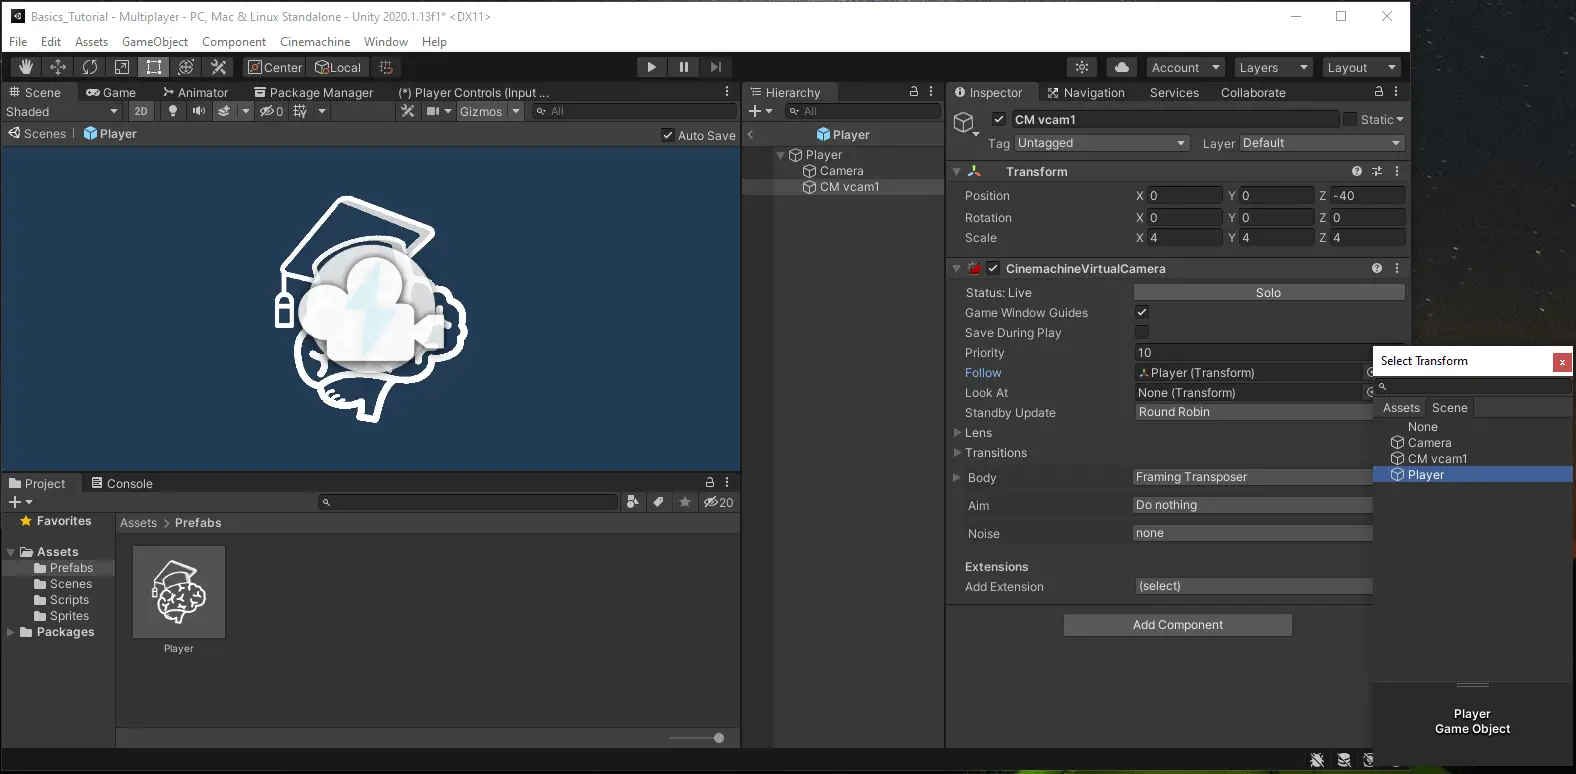
This will add a game object with the CinemachineVirtualCamera component attached. One of the best features of Cinemachine cameras is the ability to set up a follow camera with zero additional code. To do that we drag the object we want followed into the Follow field. For our purposes we will select the parent object, Player, as the object to follow.
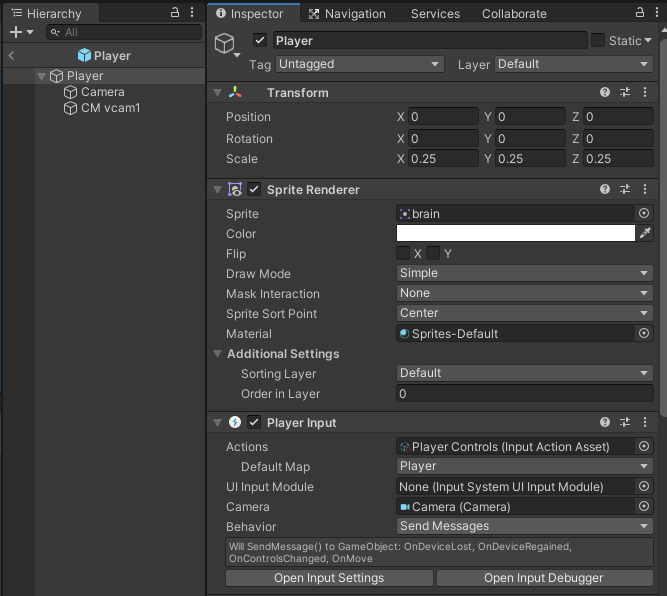
We also need a reference to the camera in our Player Input component that is attached to the Player object. Drag in the standard camera.
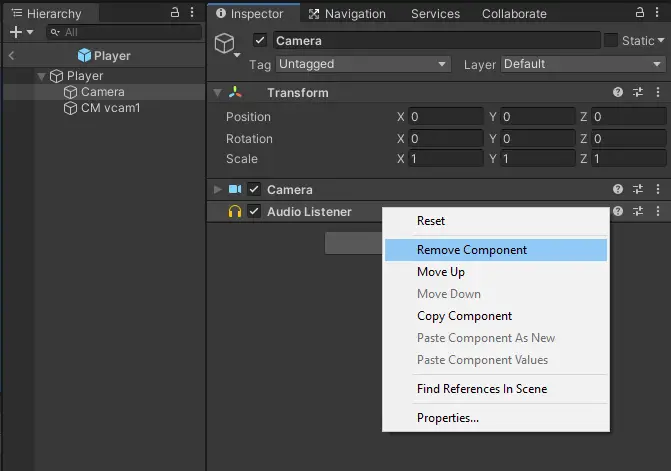
While still editing our prefab lets go ahead and remove the Audio Listener from our camera. We do this because we can only have one in our scene and it will conflict with other players when they join.
Now, exiting our Player Prefab, we no longer need our main camera in the scene. We also do not have to get rid of it.
If you only want the camera to appear when there is a player in the scene you can delete it.
If you want to have the camera in the scene showing the background until a player joins, remove the Cinemachine Brain, and set the Z Position to -10. The camera should look like so.
Turn on Split Screen in the Player Input Manger
At last, we can finally enable split screen. Go to your Player Input Manager on the Input Manager we created in the previous tutorial and select Enable Split-Screen.
If you play the game at this point you will see that the game functions as a split screen game. The problem is that we do not have the smoothing and other awesome features of Cinemachine working yet. You will notice that the camera moves as the player moves but that is only because we have nested it under the player. We can do better.

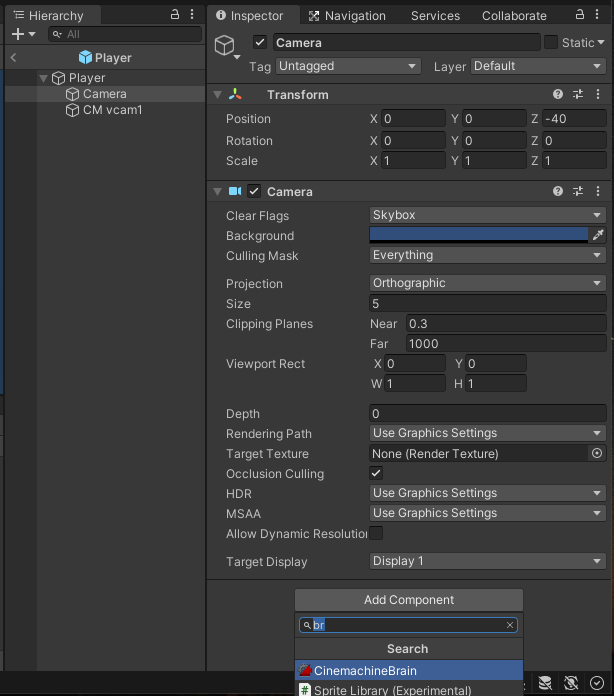
Add a CinemachineBrain
Open your Player Prefab one more time and add a CinemachineBrain component to your camera. This will enable the awesome features of Cinemachine cameras.
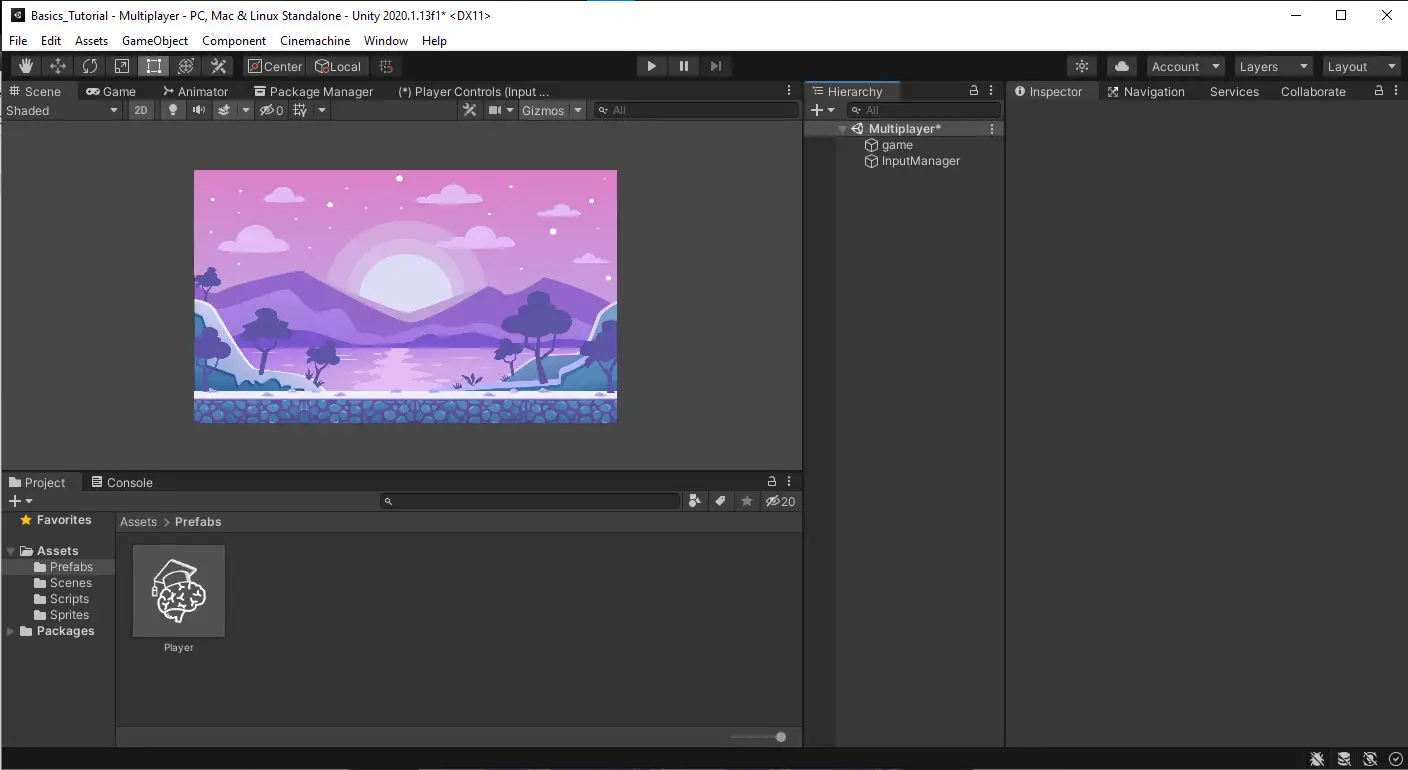
As a side, now that our cameras follow the player, it is more difficult to see the movement. So, to make this easier to see I am adding a background image. Feel free to attach any game art or image you have. I have accomplished this by just dragging the image into the scene view and resetting the transform to center the image. Nothing fancy here.
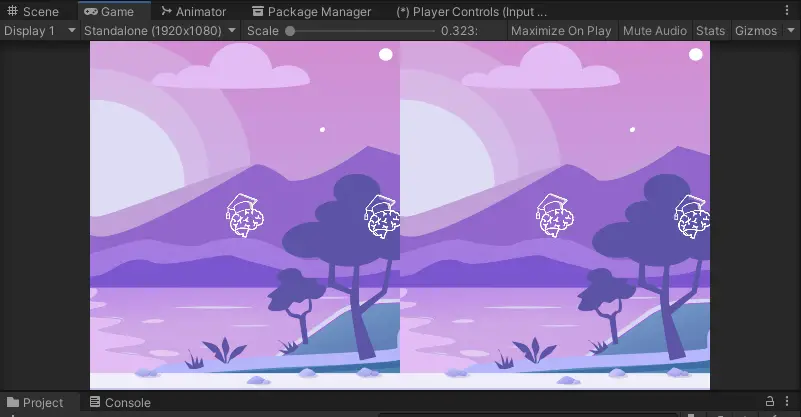
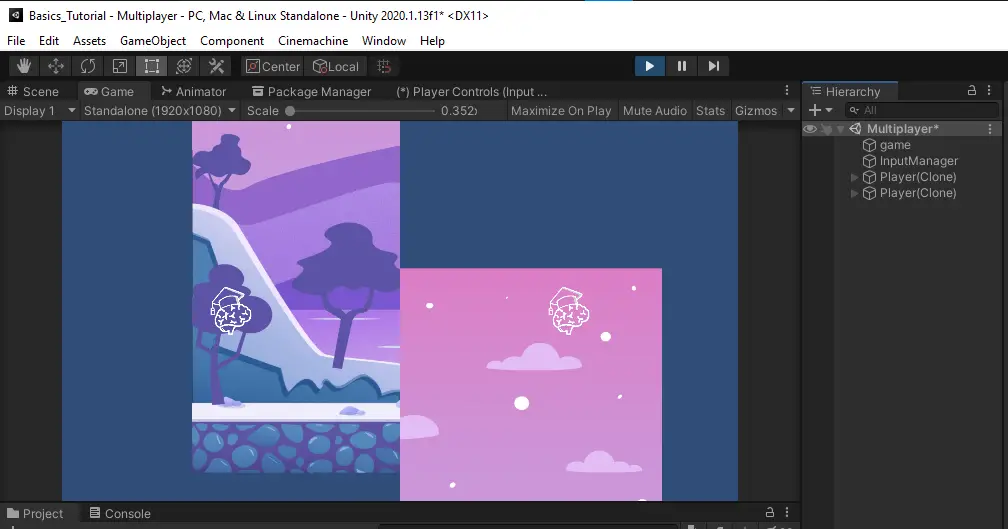
Run the game and you will notice that the camera works beautifully when there is one player. The camera follows the player, smoothly moves forward, and glides to the player’s position. Now, if you add a second player something strange happens. The first player’s camera will smoothly transition to follow the second player. That is no good. We need a way to tell the Cinemachine 2D Camera to only follow the player it is assigned to.
Create Layers
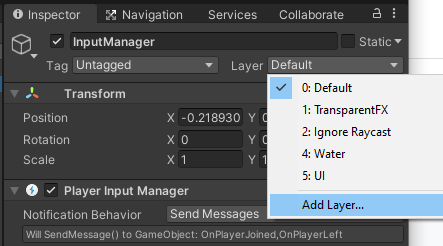
To do this we will create layers to use as culling masks for the cameras. Select an object in the scene and in the top right of the inspector you will see a property labeled Layer. Click the drop down and select Add Layer.
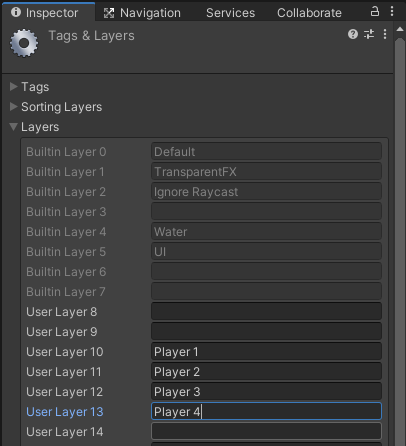
This will open the Tags & Layers window. We are going to allocate a few layers for players. I am going to start with layer 10 to make tracking the layers mentally easier to keep up with. I have identified four layers as Player 1 – Player 4. If you are going to allow more players, then you will need to continue identifying the layers as such.
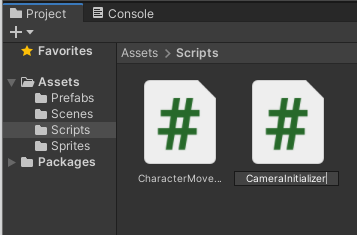
Create Camara Initializer Script
Now we will set up a script to tell the Cinemachine 2D cameras which player to follow. We will name this script CameraInitializer.
To be able to manipulate our Cinemachine camera we first have to import Cinemachine into our script. We do this by stating.
using Cinemachine; Next, we will need to create two fields for our camera and Cinemachine virtual camera. We want to make sure our data is properly protected but we also need to access it inside the editor. To do this we declare each field with the Private keyword and add SerializeField above each to signal we want these to appear in the Unity editor.
 [SerializeField]
 private Camera cam;
 [SerializeField]
 private GameObject virtualPlayerCam;
To track the number of players already in the game and thus determine what player we are, we need to find every CharacterMovement script currently in the scene. Since only players have CharacterMovement scripts and only one per player, we know that if we find one then we are player two.
We want to do this in the Start method so we can guarantee that if a player is in the scene their CharacterMovement script is enabled and we can find it.
CharacterMovement[] characterMovements = FindObjectsOfType<CharacterMovement>();We started our layers at 10 and since we will find our own CharacterMovement script on Start we will need to add 9 to the number found to equal our layer number. For example, if we are the third player CharacterMovement length will equal 3 and we add 9 to get to layer 12 which is labeled Player 3. We store this number in an int named layer.
int layer = characterMovements.Length + 9;Next, we assign our layer integer to the layer property on our virtual camera.
virtualPlayerCam.layer = layer;We will then store a bitmask variable using our layer integer.
 var bitMask = (1 << layer)
             | (1 << 0)
             | (1 << 1)
             | (1 << 2)
             | (1 << 4)
             | (1 << 5)
             | (1 << 8);
At last, assign the bit mask variable to the culling mask property of the camera and set its layer to our layer integer.
 cam.cullingMask = bitMask;
 cam.gameObject.layer = layer;
This is what your final script should look like.
using System.Collections;
using System.Collections.Generic;
using UnityEngine;
using Cinemachine;

public class CameraInitializer : MonoBehaviour
{
    [SerializeField]
    private Camera cam;
    [SerializeField]
    private GameObject virtualPlayerCam;

    void Start()
    {
        CharacterMovement[] characterMovements = FindObjectsOfType<CharacterMovement>();
        int layer = characterMovements.Length + 9;

        virtualPlayerCam.layer = layer;

        var bitMask = (1 << layer)
            | (1 << 0)
            | (1 << 1)
            | (1 << 2)
            | (1 << 4)
            | (1 << 5)
            | (1 << 8);

        cam.cullingMask = bitMask;
        cam.gameObject.layer = layer;
    }
}
Attach Script to Player Prefab
Open up the Player prefab one final time, I promise this is the last time… for this tutorial. Attach the script to the Player object and drag in the references to your camera and Cinemachine virtual 2D camera.
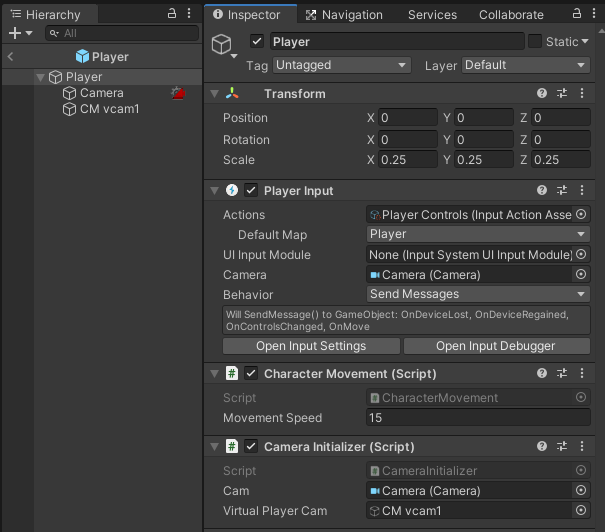
Hit play and join your two characters by pressing a key on two separate input devices. Now when you move around the camera will follow you and Cinemachine will apply all of its awesome magic to make your game feel smoother.
And now you are ready to make your own multiplayer games in Unity. Thank you for stopping by. Stick around and check out more of our tutorials or posts like our piece on Tips and Tricks: Unity Destroy. Also, leave a comment telling us what you liked or did not like about the tutorial. Was it easy to follow along? What do you want to learn next? As always check out some of our published apps below.
Heyho!
Thanks for the tutorial! 😀
I would love to create and see local splitscreen-game made with unity.
But the biggest problem i have is dealing with Audio itself.
And i could not find a solution except to use Wwise which provides more AudioListener and more Output-control.
Is there a way you know about?
does this work with3d projects
Yes, this should work with 3d projects. Cinemachine and the input controllers shouldn’t need modification.