

Tips and Tricks: Unity Instantiate Prefab as Child of GameObject
Introduction
Creating new GameObjects is a key component of many games. Oftentimes you will find yourself instantiating GameObjects for projectiles, enemies, or to attach items to your player. You may even be instantiating items and want them to be placed under an empty GameObject, as a child, for organization or to locate easier in your scripts. In this entry of Tips and Tricks we will show you exactly how you can do that.
- Unity Instantiate Documentation
- Unity Instantiate Prefab
- Unity Instantiate Prefab as a Child of GameObject
- Unity Instantiate Prefab as a Child of GameObject in World Space
- Unity Instantiate Prefab with Position and Rotation
- Unity Instantiate Prefab as a Child of GameObject with Position and Rotation
We are going to cover all of the topics but if you want to follow along with the code you can clone the GitHub repo for this project here.
Getting Started
Unity Instantiate Documentation
The Unity documentation lists four implementations of the instantiate method and a description of the values they can take.
public static Object Instantiate(Object original);

public static Object Instantiate(Object original, Transform parent);

public static Object Instantiate(Object original, Transform parent, bool instantiateInWorldSpace);

public static Object Instantiate(Object original, Vector3 position, Quaternion rotation);

public static Object Instantiate(Object original, Vector3 position, Quaternion rotation, Transform parent);
Original – The GameObject you want to copy/instantiate.
Position – The location of the new GameObject.
Rotation – The orientation of the new GameObject
Parent – The parent of the new GameObject.
instantiateWorldSpace – True if the position of the object should be relative to world space. False if the position should be relative to the parent. Only relevant if a parent transform value is provided. Defaults to False
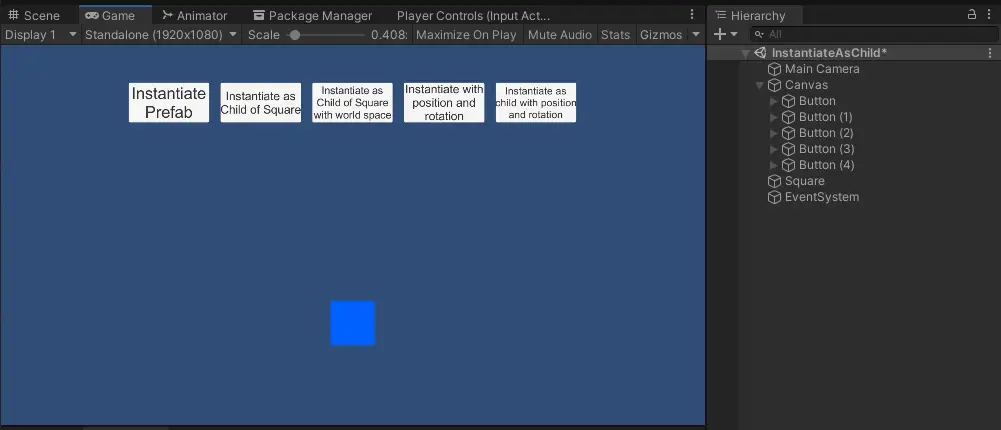
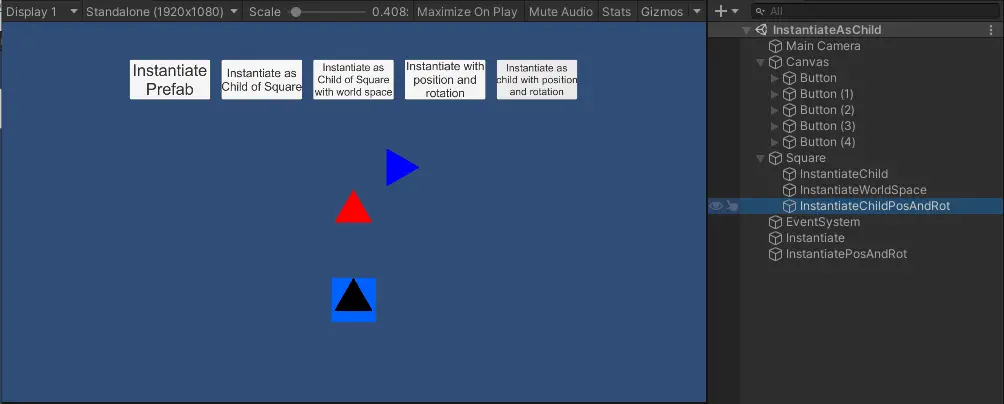
For this demonstration we have set up a parent object, Square, to assign the prefab, the triangle, to. We have also set up a few buttons to call the methods we will be creating in the next few sections.
Instantiate Prefab
To start, we will demonstrate what happens when you only specify the prefab you want instantiated. Here we pass in only the prefab and assign a name for our object, to make it easier to see in the hierarchy.
    public void childInstantiate()
    {
        GameObject childGameObject = Instantiate(prefab);
        childGameObject.name = "Instantiate";
    }
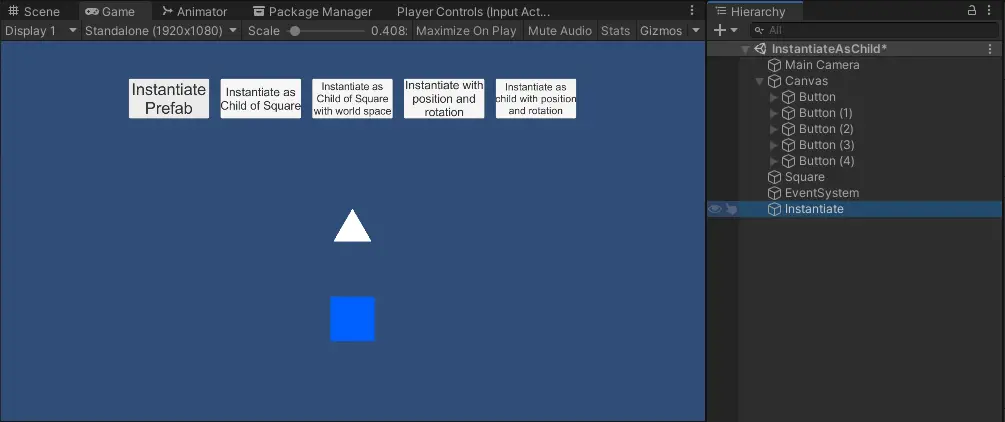
Now, if we click our ‘Instantiate Prefab’ button we see that our triangle spawns directly to the center of the world. Since we did not specify a parent or position it automatically goes to position (0,0). We can also see that in the hierarchy it was placed at the root of the scene. For smaller games or if you do not need to keep up with your objects this may be ok, but probably not the best solution.
Instantiate Prefab as a Child of GameObject
To solve this issue, we can specify a parent simply by passing in the transform of the object we want to be the parent. We again have set the name of the instantiated GameObject to keep up with it in the hierarchy and have set the color to black so we can see which object just spawned.
    public void childInstantiateAsChild()
    {
        GameObject childGameObject = Instantiate(prefab, parent);
        childGameObject.GetComponent<SpriteRenderer>().color = new Color(0,0,0);
        childGameObject.name = "InstantiateChild";

    }
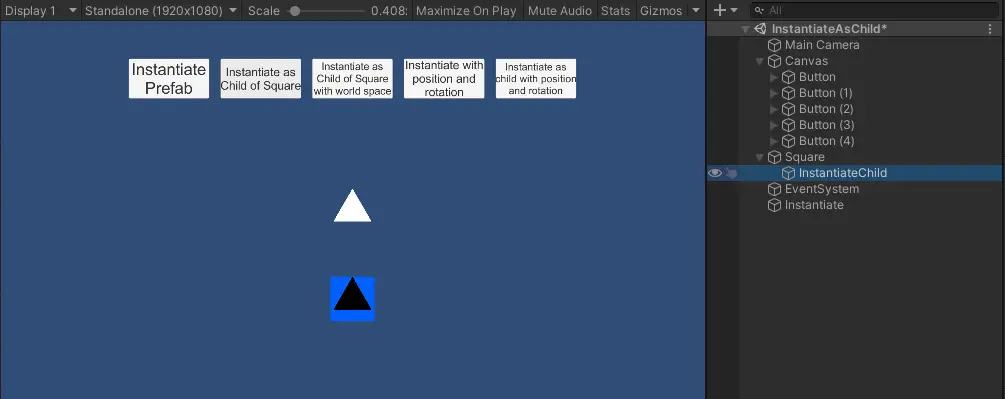
Now, if we press the ‘Instantiate as child of square’ button we can see the object spawned directly on top of our parent. We can also see that the new object is nested under our square in the hierarchy. If we inspect our new object you will notice that it still has a position of (0,0) but it is not in the same location as our previously instantiated prefab. This is because the position is relative to our parent GameObject, but we can change that.
Instantiate Prefab as a Child of GameObject in World Space
Next, we will pass in the boolean of True along with our parent object to tell Unity that we want our position to be relative world space. We also set the name and color to red.
    public void childInstantiateAsChildWorldSpace()
    {
        GameObject childGameObject = Instantiate(prefab, parent, true);
        childGameObject.GetComponent<SpriteRenderer>().color = new Color(255,0,0);
        childGameObject.name = "InstantiateWorldSpace";
    }
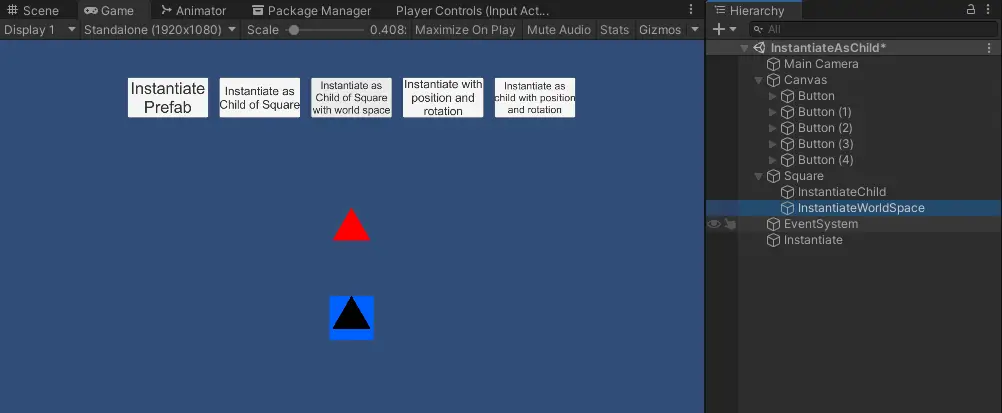
Now, we select the ‘Instantiate as child of square with world space’ button and the new object will appear now in the center of our screen directly covering our first instantiated object. Inspecting the new GameObject will reveal that the position is still at (0,0) and it is nested under our parent object, the square, but its position is different from the previous object.
Instantiate Prefab with Position and Rotation
Continuing, we can also pass in a vector for position and quaternion for rotation without needing a parent object. Again, we set the name and the color to green to make it easier to identify. We have also set the position value to a vector 2 of (1,1) and the rotation to (3,3,0,0)
    public void childInstantiateWithPositionRotation()
    {
        GameObject childGameObject = Instantiate(prefab, position, rotation);
        childGameObject.GetComponent<SpriteRenderer>().color = new Color(0,255,0);
        childGameObject.name = "InstantiatePosAndRot";
    }
Pressing the button for ‘Instantiate with position and rotation’ spawns a green triangle that is now rotated to the right. Inspecting the new GameObject shows that it is not parented to any object and the position and rotation are set accordingly.

Instantiate Prefab as a Child of GameObject with Position and Rotation
Next, we can specify the parent object and position and rotation, but something strange happens this time. We again set the name and color, blue.
    public void childInstantiateAsChildWithPositionRotation()
    {
        GameObject childGameObject = Instantiate(prefab, position, rotation ,parent);
        childGameObject.GetComponent<SpriteRenderer>().color = new Color(0,0,255);
        childGameObject.name = "InstantiateChildPosAndRot";
    }
If we click ‘Instantiate as child with position and rotation’, you will see that the object spawns at the exact same position as the previous, unparented, GameObject. Even stranger, if you inspect the object you will notice that it does not have the same position coordinates as the previous despite being in the same position. This is because the object is spawned at world position (1,1) and then parented under our square making the position relative and the coordinates change to (1,3). If we manually change the position to (1,1) in the inspector, you will see where the relative position should have been.
If you are wanting to instantiate a GameObject to a position relative to the parent, you will need to instantiate as a child first and then set the position in a second call. This will require you tracking your new object by assigning it to a variable as we have done in the examples.
The Full Script
If you want the full script for this demonstration feel free to copy below or visit our GitHub repo linked above.
using System.Collections;
using System.Collections.Generic;
using UnityEngine;

public class InstantiateAsChild : MonoBehaviour
{
    public GameObject prefab;
    public Transform parent;
    public Vector2 position;
    public Quaternion rotation;

    public void childInstantiate()
    {
        GameObject childGameObject = Instantiate(prefab);
        childGameObject.name = "Instantiate";
    }

    public void childInstantiateAsChild()
    {
        GameObject childGameObject = Instantiate(prefab, parent);
        childGameObject.GetComponent<SpriteRenderer>().color = new Color(0,0,0);
        childGameObject.name = "InstantiateChild";

    }

    public void childInstantiateAsChildWorldSpace()
    {
        GameObject childGameObject = Instantiate(prefab, parent, true);
        childGameObject.GetComponent<SpriteRenderer>().color = new Color(255,0,0);
        childGameObject.name = "InstantiateWorldSpace";
    }

    public void childInstantiateWithPositionRotation()
    {
        GameObject childGameObject = Instantiate(prefab, position, rotation);
        childGameObject.GetComponent<SpriteRenderer>().color = new Color(0,255,0);
        childGameObject.name = "InstantiatePosAndRot";
    }
    public void childInstantiateAsChildWithPositionRotation()
    {
        GameObject childGameObject = Instantiate(prefab, position, rotation ,parent);
        childGameObject.GetComponent<SpriteRenderer>().color = new Color(0,0,255);
        childGameObject.name = "InstantiateChildPosAndRot";
    }

}
And now you are ready to start instantiating prefabs as a child of GameObject in Unity. Thank you for stopping by. Stick around and check out more of our tutorials or posts like our piece on the Best Free And Open Source Game Engines. Also, leave a comment telling us what you liked or did not like about the tutorial. Was it easy to follow along? What do you want to learn next? As always check out some of our published apps below.