

Unity and C# Basics
Variables
Introduction
C# is a programming language created by Microsoft and used to develop games, mobile apps, and software for multiple other purposes and runs on the .Net framework. C#, pronounced ‘C sharp’, is the language of preference for developing software with the unity engine. C# is open source and entirely free to use. The syntax for language is very similar to other C languages and Java, making it very easy to pick up if you are experienced with these other languages. That is not to say that it is difficult to understand if you are completely new to the programming scene. C# receives tons of support across the web from syntax documentation, tips and tricks, tutorials, and deluge of experienced programmers answering questions on stack overflow. All of these resources and the popularity of Unity make the process of learning to code for game development a cinch.
When I first decided to start teaching myself how to code, I found all the information out there to be overwhelming, but I was soon able to find a way of learning that helped me wade through the sea of knowledge. First, I like to read over some of the basics, the fundamentals of the language. The point of this is to familiarize myself with what I am about to see in the next few steps. This is what we will be covering here. Afterwards I like to watch someone create a simple project. I say watch because it is difficult to find well documented code that is already prepared but when you watch someone code on something like YouTube or twitch, they naturally are explaining what they are doing and sometimes their thought process behind the decisions they are making. This is valuable info early on, thinking like a programmer. It is also important to find a simple project. You would not want to jump in at part 6 of a tutorial on creating an inventory system because you are going to be confused about what is going on and you are going to create the same code step by step with the person you are watching. What do you do when you find yourself in a strange situation? Look around and do what others are doing. Same principal here. Now for the most important part of learning to program. Take that code that you created by following along and butcher it. Delete stuff, modify things, crank the numbers high, and turn them low. Really dig into what it is you are playing with and test what effects are produced when you change things up. Trial and error are key to learning new things. The worst you are going to do is freeze up your computer and have to force close Unity or reboot your machine. But first we need to cover some of the basics.
This article is part of a series in which we are covering Unity and C# basics. This article aims to discuss variables and data types that are used to develop scripts for game development. These are universal terms, so they do apply to C# code in general. By the end of this article, you should be familiar with:
- How to create a script in Unity
- Creating variables/fields
- Data Types
- Encapsulation
- Protected Keywords
Getting Started
How to create a script in Unity
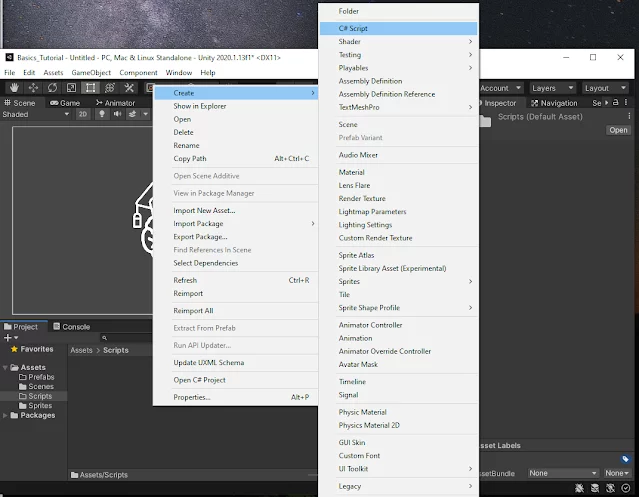
You can create scripts outside of Unity by creating a file with the extension .cs, such as example.cs, but the most convenient way to create them for use in Unity is to right click in the location you want to create the script and select Create > C# Script. (We covered setting up folder structures in previous article, so if you missed it check out Unity and C# Basics Editor.) This is more convenient because it structures the file for you.
The first thing you will do is name the file. Unity will take this name and use it as the class name inside the file, so it is important to pick a name that represents what the script aims to accomplish. So, if you are creating a script to control your characters movement, name the file/class CharacterMovement, if the file is for shooting name it something like ShootController. This will lead to a better understanding of what your project structure is and help easily identify scripts when it comes time to modify or attach a script to an object.
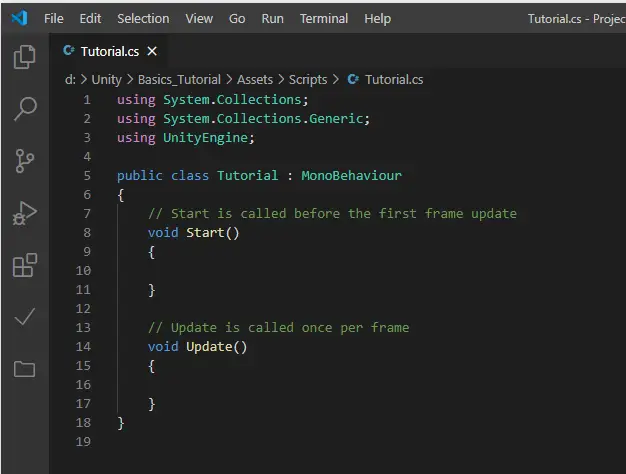
The top part of the script is for importing additional libraries. “Using” is the keyword that states that you want to use a namespace without having to write out the full namespace. It is out of scope for this tutorial but just know that these are needed for the moment.
After the using statements you will have the class. This is where we will see the name we selected when we created the script. The colon that follows the class name means that the class is inheriting properties from the class name that comes next. So, our class, tutorial, inherits from MonoBehavior. You will see this in almost every script you create for Unity, at least ones that are attached to objects in your game. This is another topic that can go a lot deeper, but we will not cover here.
Finally, we see the methods Start() and Update(). These are part of the unity lifecycle. Check out our two articles Unity Lifecycle: Update Vs FixedUpdate Vs LateUpdate (https://www.monkeykidgc.com/2020/08/unity-lifecycle-update-vs-fixedupdate.html) and Unity Lifecycle: Awake Vs OnEnable Vs Start (https://www.monkeykidgc.com/2020/07/Unity%20Lifecycle%20Awake%20Vs%20OnEnable%20Vs%20Start.html)
Creating variables/fields
Variables hold data we want to store, manipulate, and pass around. We can create these at many places in the code but if we know that we are going to need and use this data throughout the class, we will want to create them at the top of the class. These variables are known as fields and are scoped so that any methods within the class can access the data. Fields also have the potential to be accessible inside the Unity editor. This makes them extremely useful when tuning our game without having to hard code data in the script and editing the script when a variable needs to be tweaked. Good code tip, the less you hard code variables the less likely you will cause bugs/issues when you have to eventually update the variable.
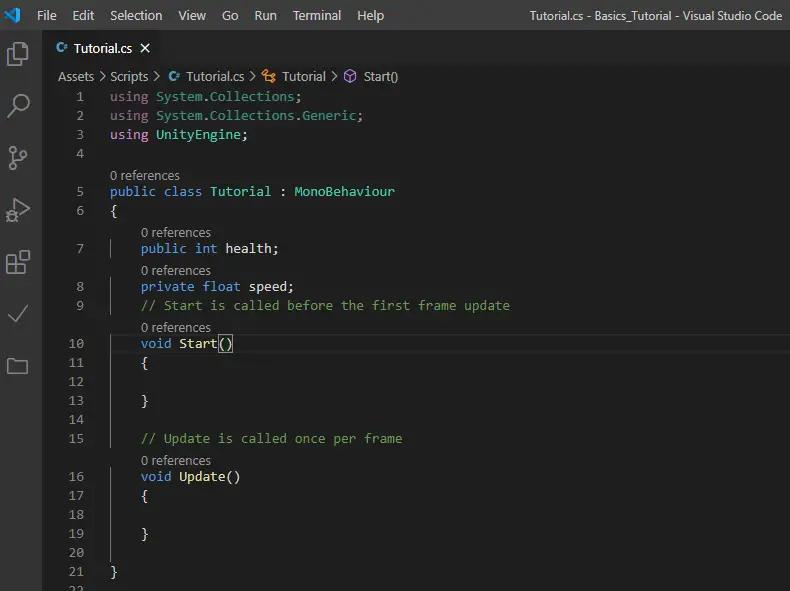
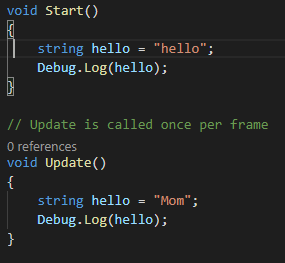
You can also stick variables inside of methods, such as Start() and Update() that were generated for you. These are scoped for the particular method you put them in. What does that mean? Well, you cannot use the data inside them anywhere else. If we place a variable called ‘hello’ in Start() and try to print that inside Update() you will see an error for ‘hello’ saying the variable is not defined.
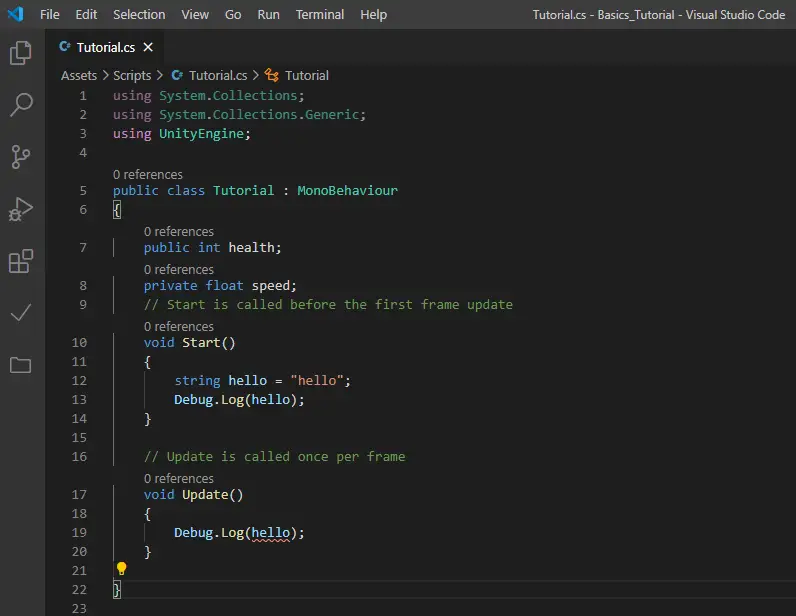
If we add a ‘hello’ variable to Update() the error goes away. This is the same as two people both calling their mom’s Mom, but they are not the same Mom.
Naming your variables something meaningful is another great practice to get in the habit of doing. It can be extremely difficult to name a variable, I have been involved in or seen numerous debates that spanned a quarter hour or longer over picking the “correct” name for a variable. It is really simple to name a variable ‘X’ or ‘something’ and move on, but it will most certainly come back to bite you when you need to modify the code or understand where a weird bug is coming from.
Data Types
The strange words you see preceding variable names represent the data type that variable holds. For instance, string represents a series of characters treated as text written on a page. Every piece of data has a type, C# is considered a strongly typed language because of this. There are two types of data types. That is confusing, let me try to explain.
Data types fall into two categories. Value types and Reference types. Value types hold an instance of the data that you put in the variable, int x = 4. Imagine this is like having cash in your pocket. You put the cash in your pocket and when you need it, you get it out, and spend it. If I have the same amount of cash in my pocket and I spend half of it, it does not affect the cash in your pocket.
Reference types are different. They hold references to the instance or data. Think of this like putting your money in a bank account and carrying a bank card. Now if you want to spend the money you give the cashier a card which holds a reference to your bank account. Now if we both have a card linked to that bank account, when I spend money the amount of money your card references changes at the same time. This is how reference types work.
This is important to know because if you have two variables that are reference types pointing at the same data and you modify one you may introduce bugs because you did not intend to modify the other.
Here are some of the commonly used value types used when creating games in Unity.
- Bool – represents true or false.
- Float, Double, and Decimal – represents real world numbers, precision and size distinguish these types from each other. Floats are normally OK for games but if you are writing financial software you will want to use Decimal.
- Int – represent whole integer numbers.
And some the more commonly used reference types.
- Object – represent classes.
- String – represent a series of Unicode characters.
Encapsulation
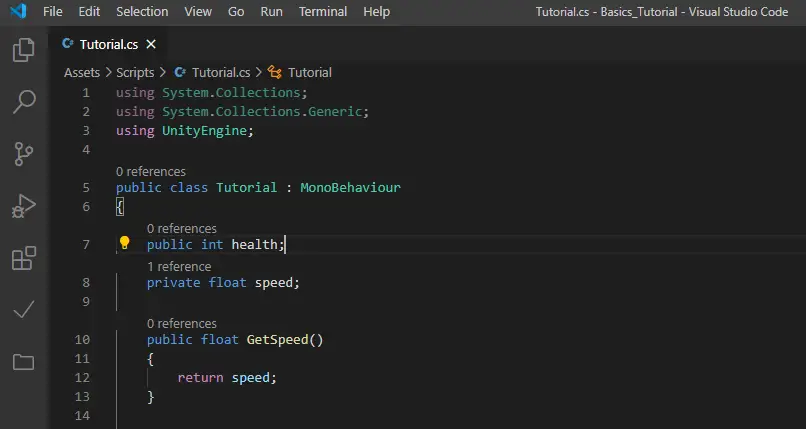
Sometimes you will see a third word preceding the data type. These control the access to the variables and are used on fields. If you see the keyword ‘Public’ before the data type that means that variable is open for other classes to access that data directly. Maybe you need your health class to access the damage field on a weapon, so you make it public and now you can access it by coding weapon.damage. This can be useful but maybe you are comparing the weapon’s damage, which you would write like so “weapon.damage == 12”, this means when damage equals 12 return true, but instead you write “weapon.damage = 12”, now you have a problem. Written this way changes the weapon damage to 12 instead of checking if it is 12.
There is an easy solution to stop those accidental changes outside the class and that is by using the keyword ‘Private’ when declaring your field. This will stop all outside scripts from accessing the data with “weapon.damage”. You might be thinking “Well I need to access that data, how do I do it now?” and the answer to that is by using what is called getter methods. We will not dive into methods now but quickly stated a getter method returns the value from the variable instead of returning the variable itself.
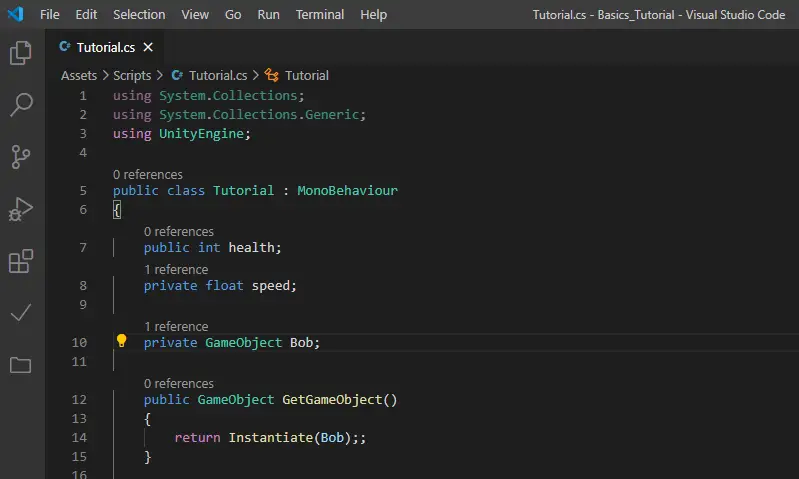
You still have one problem when using getter methods and that involves reference types. If you return a reference type inside a getter method just as we have done with the float ‘speed’ then the outside class could still modify it because it was handed the reference to the data and not the data itself, going back to the bank analogy, you just handed it a copy of your bank card. Again, we have a solution for this. We can hand back a copy of the reference type we need to access. For example, if we needed to hand out access to a GameObject but did not want it modified we would declare it in a private field and have the getter, GetGameObject(), copy the game object by using the Instantiate() method. Then the getter returns the copy. We can now hand out the GameObject to whatever class we want without ever worrying about it accidentally being changed.
If you want to know more about encapsulation, we have a much longer write up in our article on Encapsulation.
Protected Keywords
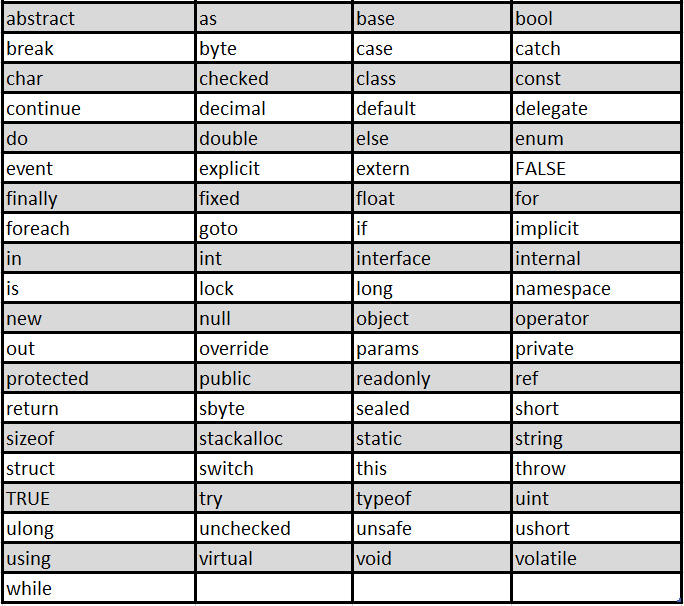
When creating your variable names, you can name them whatever your heart desires but there are a few words you cannot use for variable names. These are known as protected keywords. These are that are used by the system to signal for things like access, code blocks, and data types. If you find yourself staring at an error for your variable name you most likely have used one of these.
And now you are ready to start writing your game logic to manipulate these variables. In our next article in this series, we will continue this discussion on the basics in writing code for Unity. Thank you for stopping by. Stick around and check out more of our tutorials or posts like our piece on Unity and C# Basics: Editor. Also, leave a comment telling us what you liked or did not like about the tutorial. Was it easy to follow along? What do you want to learn next? As always check out some of our published apps below.