
Tips and Tricks: Unity’s Color32
Introduction
Unity’s Color32 takes a 32 bit RGBA value and converts it into a color. Giving you more precision when setting the colors in your game. Each RGBA value has a min value of 0 and a maximum value of 255. This allows for greater control over your color value in comparison to Unity’s Color option which uses floats as a percentage of a color.
Additionally, having a better understanding of how Color32 works will greatly improve your game’s art and UI. In this Tips and Tricks we are going to demonstrate how all of these factors come into play and how you can start using Unity’s Color32 inside of your Unity Games
Getting Started
What is Color32
First, Color32 in scripting represents RGBA colors in 32-bit format; (Red, Green, Blue, and Alpha for opacity). Color32 allows you to choose a specific color space and depth, so each component contains 8 bits (32-bits total) and each channel’s color can be manipulated by assigning each component a value between 0-255. A value of zero evaluates to 00000000 while a value of 255 will evaluate to 11111111. This means that you can’t set integers directly to a RGBA value. For example, ‘int x = 5’ can not be put in as ‘(x,x,x,x)’ as it will not evaluate to ‘(5,5,5,5)’. To be able to use integers inside of our RGBA value they must be cast as bytes first.
Furthermore, a value of zero would mean no color (Example, Black = 0,0,0,255) and a value of 255 would contain 100% of that color. For Alpha, 255 would make the color completely opaque, while zero would make it completely transparent.
Color32 Example
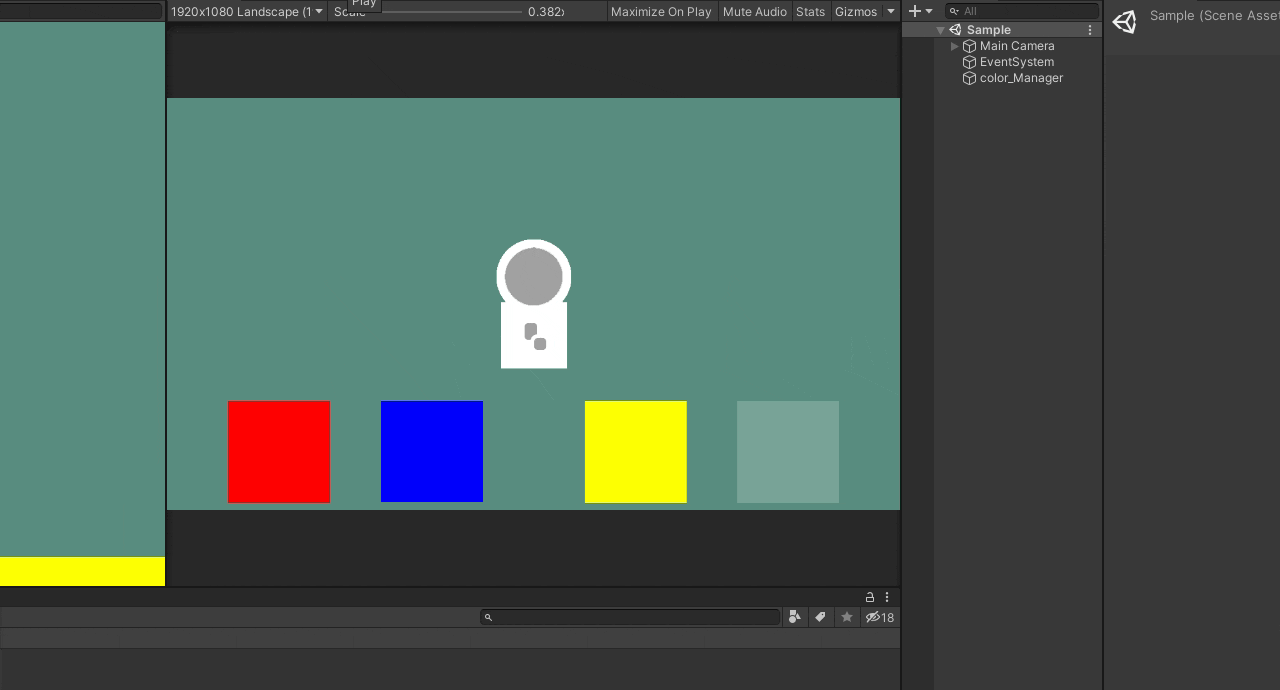
Next, our example contains a scene where we are picking a color for our MonkeyKidGG test sprite. There are 3 preset color options and the fourth is a random color, random opacity button.
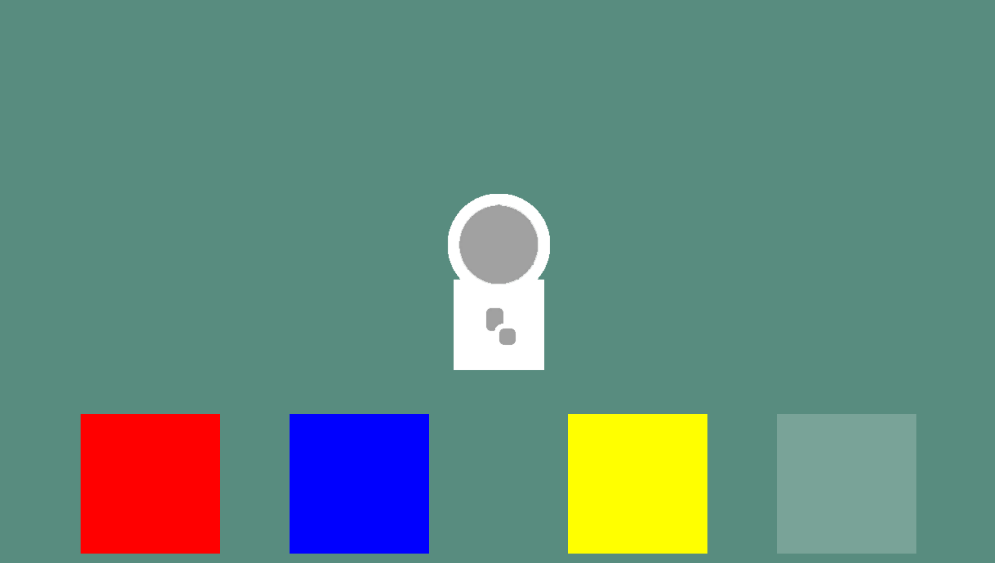
In this test scene, our canvas consists of six UI images; one for the background, our sprite (choose any image here), and four color option buttons. To start off create a new Image.
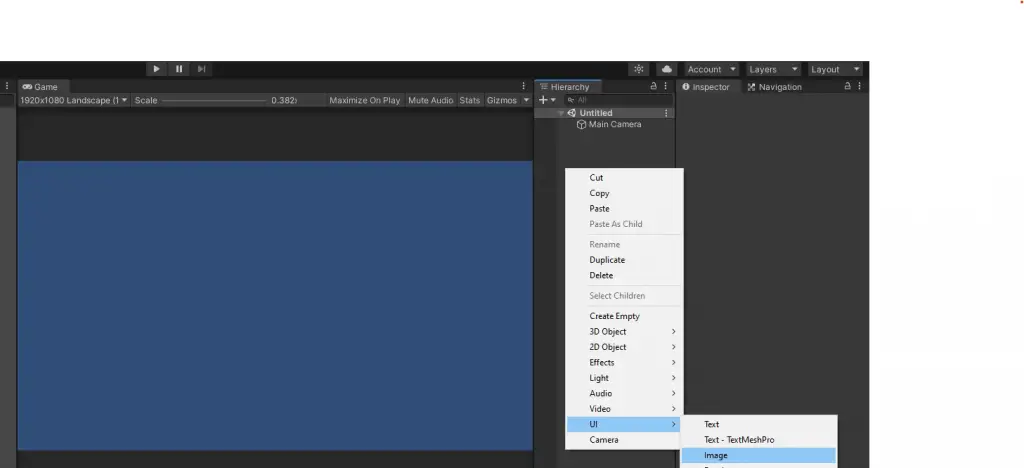
Right-click the newly created image and duplicate five times, rename the original image to Background.
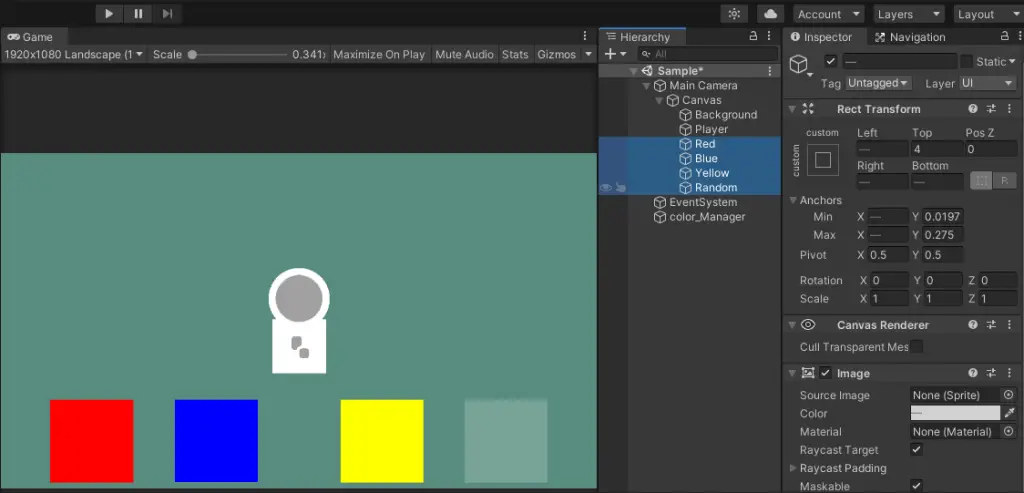
Now, rename one image Player, then rename the next three images with your selected colors, and the last will be Random.
Once the images are named, highlight your four colors in the hierarchy and click add component, select button.
Next create an empty object, name it color_Manager. This will contain our color script. Select color_Manager from the hierarchy and click add component, New script and name the script color. Open the script.
using System.Collections;
using System.Collections.Generic;
using UnityEngine;
using UnityEngine.UI;

public class color : MonoBehaviour
{
    [SerializeField] private Image color_;

    public void change_color_Red() => color_.GetComponent<Image>().color = new Color32(255, 0, 0, 255);
    public void change_color_Blue() => color_.GetComponent<Image>().color = new Color32(0, 0, 255, 255);
    public void change_color_Yellow() => color_.GetComponent<Image>().color = new Color32(255, 255, 0, 255);
    public void change_color_Random() => color_.GetComponent<Image>().color = new Color32(GetRandom(), GetRandom(), GetRandom(), GetRandom());
    private byte GetRandom() => (byte)Random.Range(0, 255);
}
As you can see on our script, we have [SerializeField] private Image color_; and a public void for each of our buttons.
Each preset color will have its appropriate RGBA value for the colors chosen, while the last button will assign a random color and opacity each time it’s clicked.
Save the script and head back to Unity. Select the color_Manager and assign the Player (Image) to the color script we added earlier.
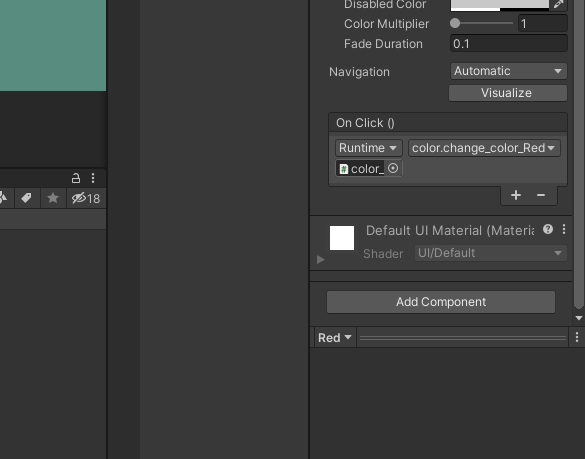
In Unity, select the four buttons we created in the hierarchy and drag the color_Manager to the On Click (). Then select each button individually to assign the color change function from our script.
Save and test it out. Each button should change the Player to the assigned color and random will give a random color option.
Now you are ready to start using Unity’s Color32 to set the color of objects inside of your games. Thank you for stopping by. Stick around and check out more of our tutorials or posts like our piece on What is a Game Developer’s Salary. Also, leave a comment telling us what you liked or didn’t like about the tutorial. Was it easy to follow along? What do you want to learn next? As always check out some of our published apps below.