
SETTING UP VSCODE FOR UNITY
A responsive editor that packs a punch
Introduction
Visual Studio Code is one of the more popular code editors out there. It is lightweight and extensible making it one of the more versatile options when programming. Getting it set up to use with Unity requires a few configuration changes and the installation of an extension.
About
- Subjects: VSCode and Unity
- Objective: The purpose of this post is to walk you through how to install VSCode and get it setup to work with Unity.
- Time Allotment: 15 min
Getting Started
Installing VSCode
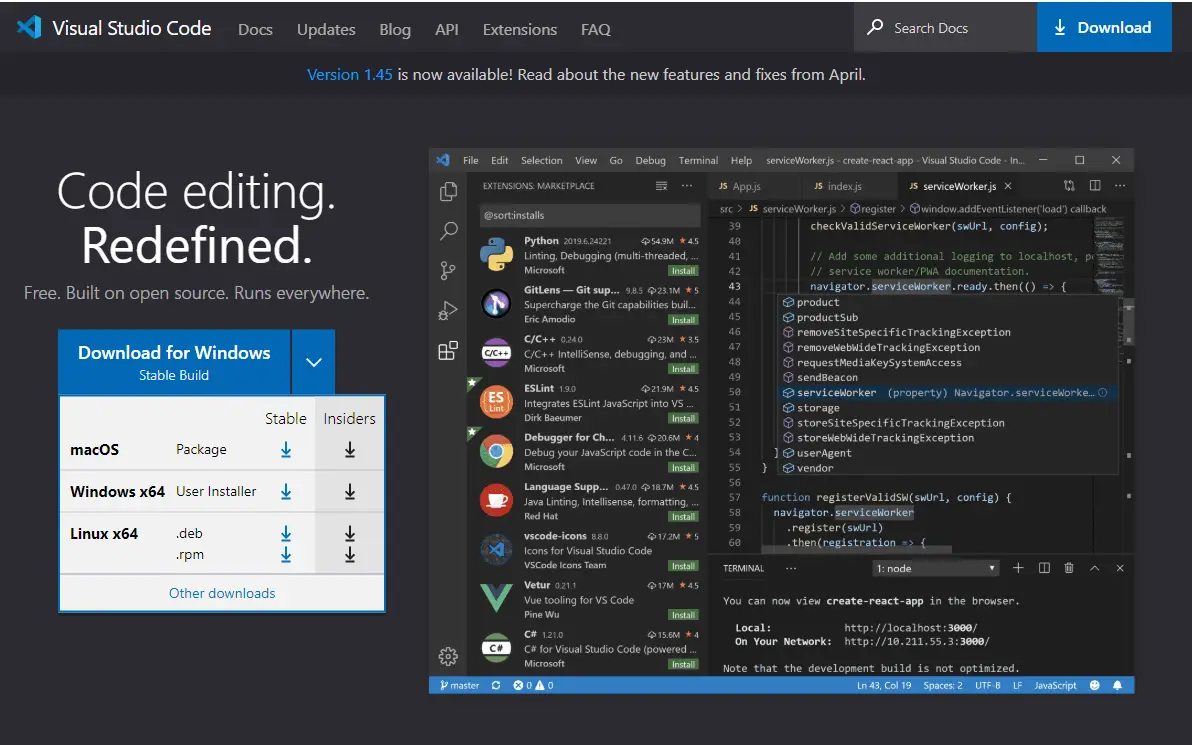
First thing you will need is a copy of VSCode. You can download the latest version of Visual Studio Here. Find the version you need from the dropdown and select the stable version.
Install Unity
Next, you will need Unity. There are quite a few options when selecting your plan for Unity, you can read over all the details here, or check out our article on setting up Unity here.
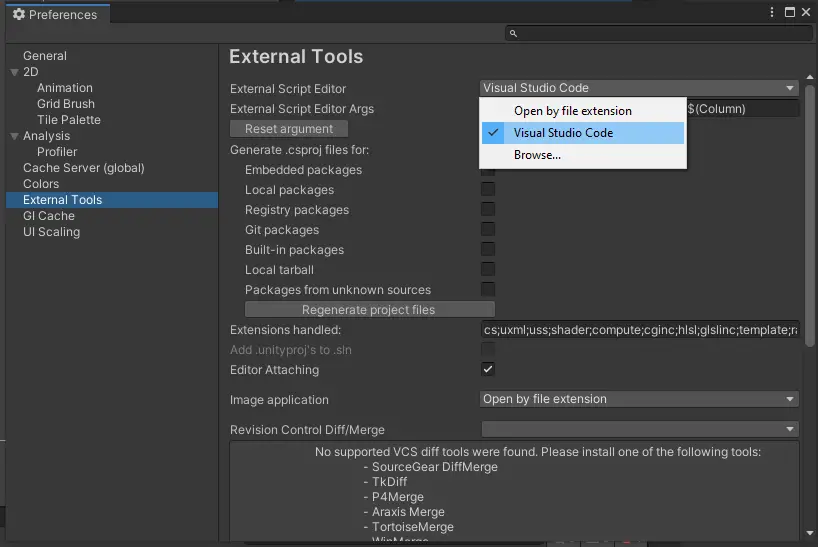
Update Unity Preferences
Once you have your project opened inside of Unity, select Edit and then Preferences.

This will open up a window that has a few general settings. We are looking for External Tools. In the panel on the right, you will now see the External Tools settings. Locate the External Script Editor setting and change the drop down to Visual Studio Code. Just close the window to save these changes.
Installing the C# extension
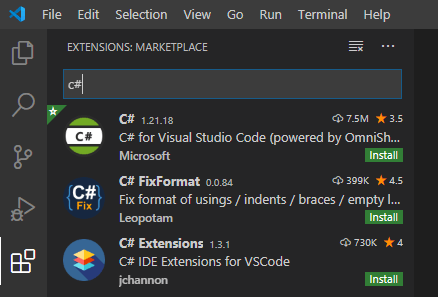
Now you will want to install the C# extension for VSCode to gain access to more features with intellisense, code snippets, and refactoring for C#. To get the extension locate the extensions marketplace on the left side of the editor, it is the one that looks like four cubes.
From here search for C# in the search bar. You will then see a list of extensions related to C#. The one we are looking for is simply titled C# and is developed by Microsoft.
Click the install button located in the bottom right corner of the C# search result and installation will begin. The editor will need to refresh before the extension can take effect. This can either be done by selecting reload when prompted or by closing and reopening the editor.
Try it out
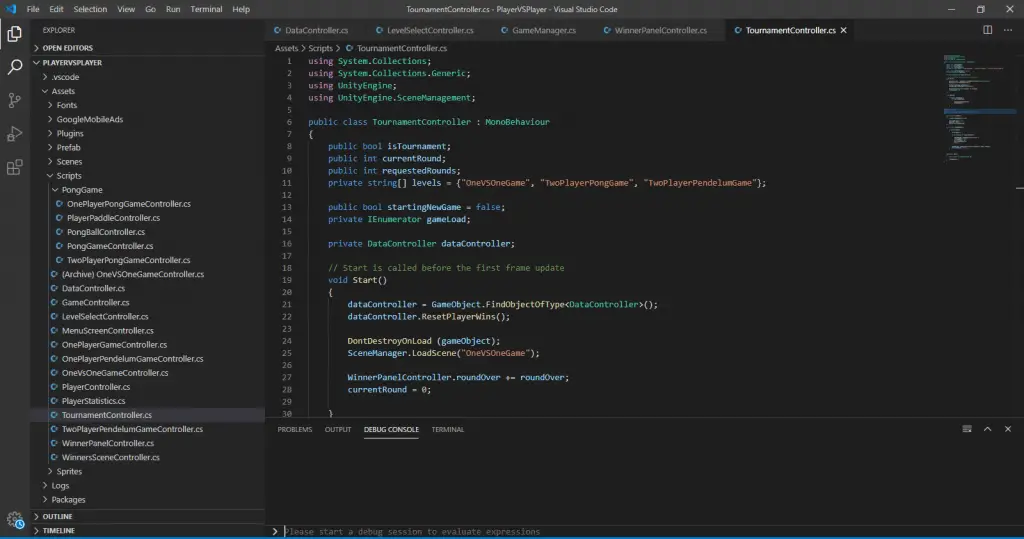
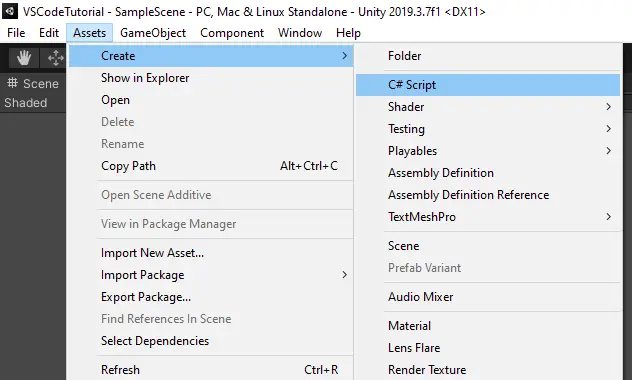
Now we are able to test out our new editor from Unity. Head over to Unity and select Assets > Create > C# Script. This will generate a C# script in projects asset folder.
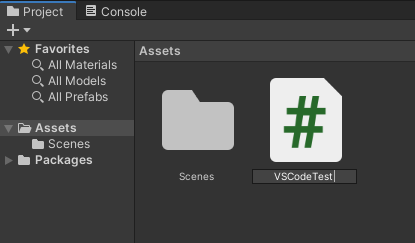
The script will be selected automatically and selected for renaming. Name the script whatever you would like and double click the file.
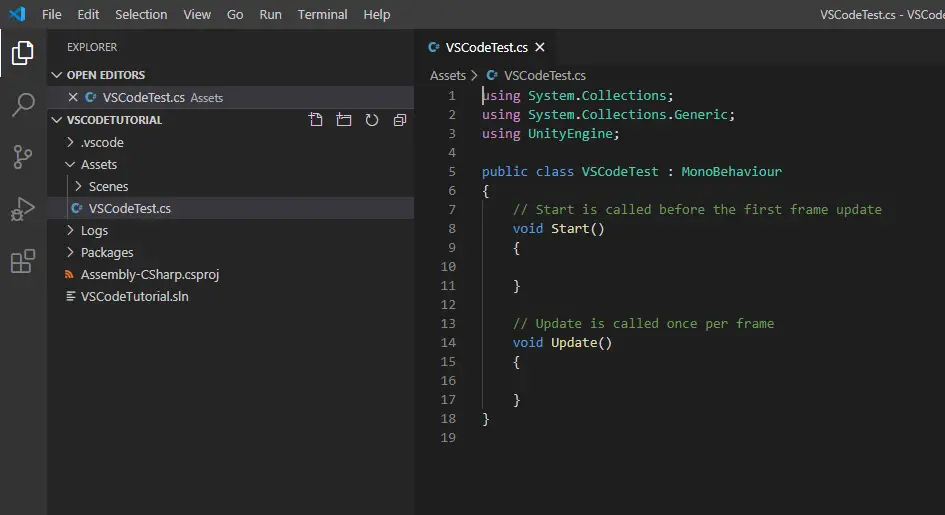
This will open up the file in VSCode and automatically load the project folder into the workspace on the left side of the editor. From here you can edit the file or create new files and when you go back to Unity the updates will be loaded instantly.
Errors
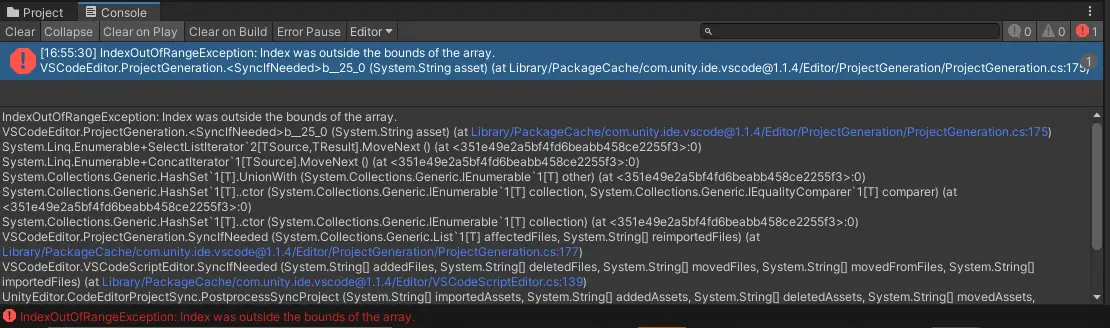
Occasionally, normally after software updates, Unity will show an error stating IndexOutOfRangeException and lists VSCodeEditor.ProjectGeneration as the issue.
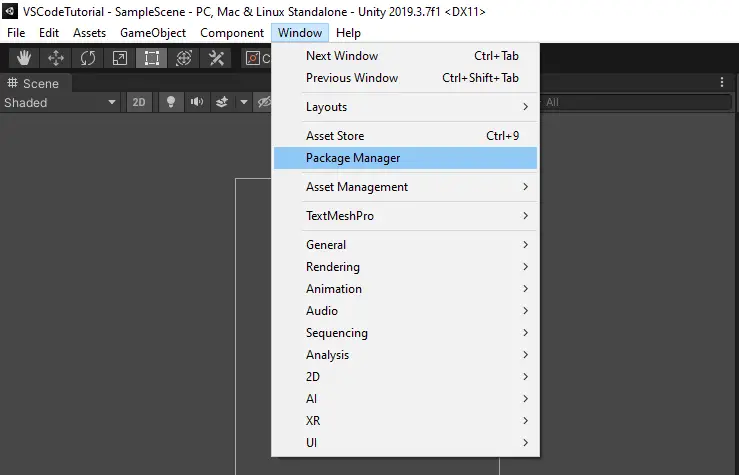
To solve this error, in Unity go to Window > Package Manager.
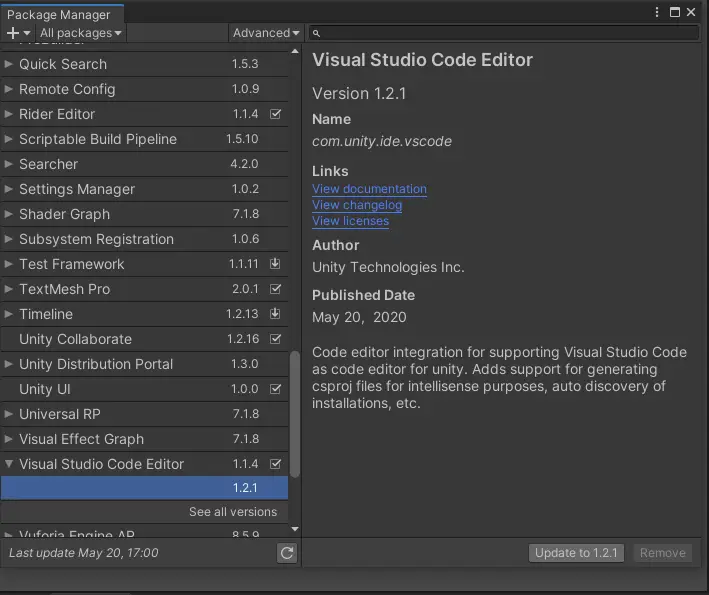
This will open a new window. From here make sure that All Packages is selected in the top left. Scroll down until you see Visual Studio Code Editor. There should be multiple versions listed. Select the latest version, which will display the version information on the right-side panel. At the bottom select Update to the selected version number. Once this is done clear the console and the error message will not reappear.
Another common error that can occur is when importing UnityEngine.UI into your scripts you will get an error that the namespace cannot be found. This will not cause issues with your scripts running inside of Unity but can be annoying since you will have red showing in any file using the package.
The fix for this is quite simple, just follow the steps listed above for the IndexOutOfRangeException with one exception. If upgrading the Visual Studio Code Editor does not fix the issue then you may need to downgrade to the previous version. This can be done by selecting See all versions and looking for a version number lower than the currently enabled version.
That is all for this tutorial on setting up VSCode for Unity. If you found this helpful leave a comment down below letting us know. Having a problem beyond what we talked about here? Tell us what it is in the comment section and we will find a solution and add it to the list of error fixes.