
How to Build a Calculator in Unity
Part 2 – Building the Components
Introduction
This is part 2 of a multi-part tutorial focused on designing, building, and deploying a basic calculator in Unity. If you missed part 1 you can check it out here, How to Build a Calculator in Unity Part 1. While Unity is probably not the best tool to use to build a calculator, it will certainly get you more familiar with the engine and help you practice designing functionality before implementing the code.
About
- Subject(s): Unity
- Objective: The purpose of this tutorial is to walk you through how to add the components needed for a calculator to Unity.
- Development Time: 30min
Getting Started
Start a New Project
Now that we have an idea of what we need to build out our calculator let us begin adding the components we will need in Unity. Begin by opening up Unity Hub and starting a new 2D project, giving it a name and hitting create.

Unity will put together everything we need to start building our 2D calculator and provide us a sample scene.

There is not much here at the moment. Let us rename the sample scene to Calculator and hit enter.

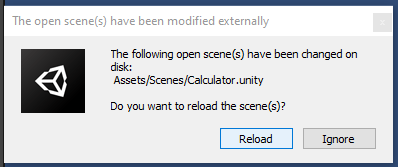
You will be greeted by this pop up stating that the scene will need to be reloaded. Go ahead and reload the scene.
Setup the Canvas
We need a place to put buttons for our users to interact with so the first thing we will need to do is add a canvas. You can do this by right clicking on the scene and navigating to UI > Canvas.

We will then setup the canvas to fill and attach to our camera. To do this select the Canvas and locate the Canvas component inside the inspector and change the Render Mode to Screen Space – Camera.

A new option for Render Camera will appear below Render Mode. Select the circle on the right of the empty field. This will bring up another window to select the camera. In the Scene tab of the new window select Main Camera.

Now that the camera is added to the canvas, let us change the background color of the camera. Select Main Camera from the Hierarchy and in the inspector change the Background to a more interesting color.
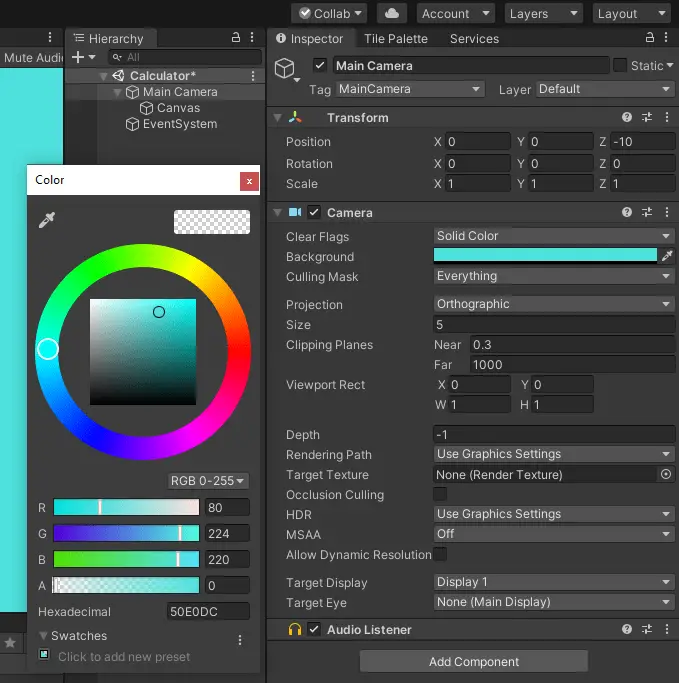
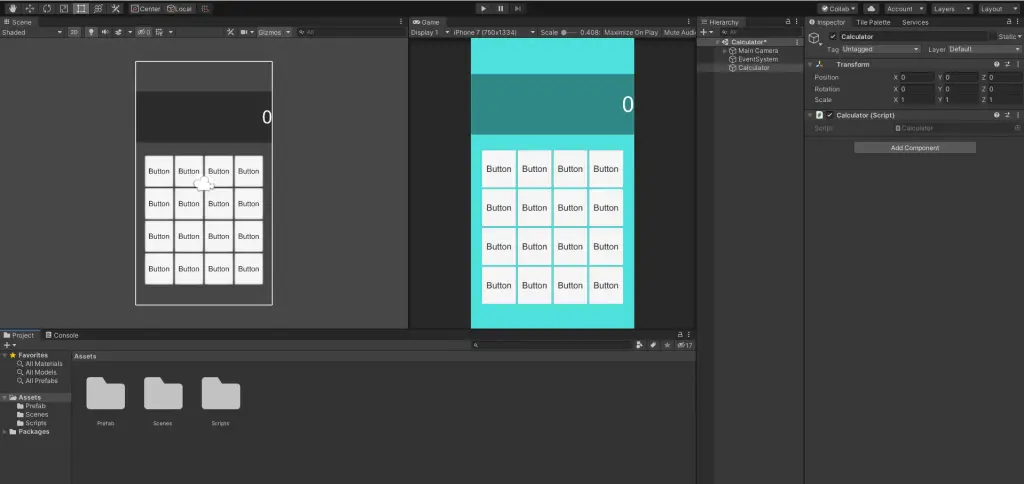
Finally, we set up a resolution to match the final layout of the software. I personally and am imagining this as a mobile app and therefore created the resolution of 750 by 1334 to match the screen size of the iPhone 7. This is not a default of Unity so you will have to set it by selecting the Add New Item button and entering the resolution you want. Now our canvas is all set to begin adding the user interface.

Creating the Buttons
Calculators have a lot of buttons and we do not want them scattered through our project. We also need them to be similar in size and shape, but we do not want to manage all of them individually. So, let us set up some containers to help keep things neat and allow us to control the layout.
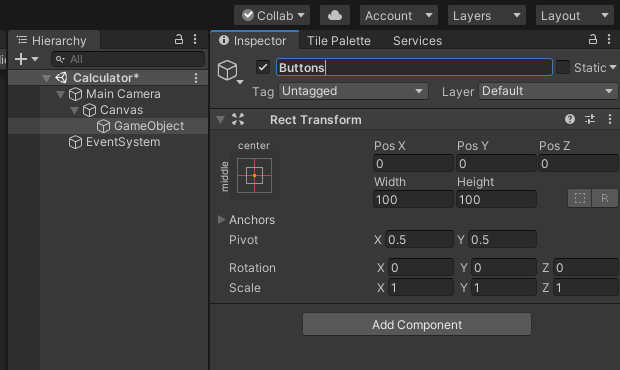
First, right click on the Canvas object and select Create Empty. This will give us a “folder” to put all of our buttons under.
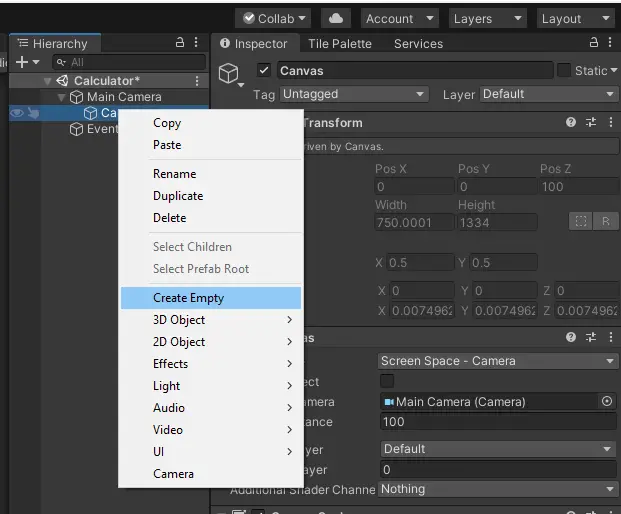
Let us name this empty game object “Buttons”
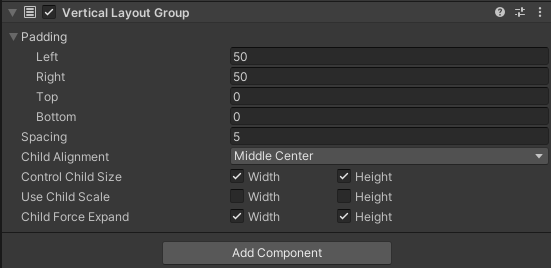
We want our buttons to exist in a grid so let us add a Vertical Layout Group component to our Buttons object. To do this select Buttons and in the inspector select Add Component and search for Vertical Layout Group. Select the component to add it.

Think of this as a column we will eventually add rows to. We do not want our buttons sitting right against the edge of the screen so let us add some padding to the left and right sides. We also do not want them sitting on top of each other so let us add some spacing as well. We do not want to manually control the sizes of the rows so check the boxes for Control Child Size, both Height and Width. Then do the same for Child Force Expand.
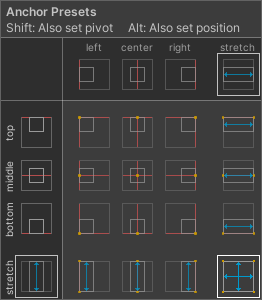
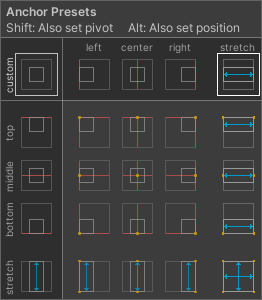
Next, we need to specify the area of the canvas the buttons can occupy. To do that in the Stretch settings for Buttons.

When you click the Stretch button you will get a pop menu like so.

We need to move the anchors as well as the position. Hold down Alt, on the keyboard, and you will see the options change to what is listed below. Select the bottom right option to expand the Buttons object to the full screen.
In the Scene view, with Buttons selected in the Hierarchy, you can see that the anchors and corners of the rectangle are now in the corners of the camera.

We do not need the full height of the screen for the buttons so let us move the rectangle corners down a little.

Once we have done that we will need to do move the anchors as well to make sure the Buttons container does not move around if we resize the screen.

Let us do the same for the bottom.

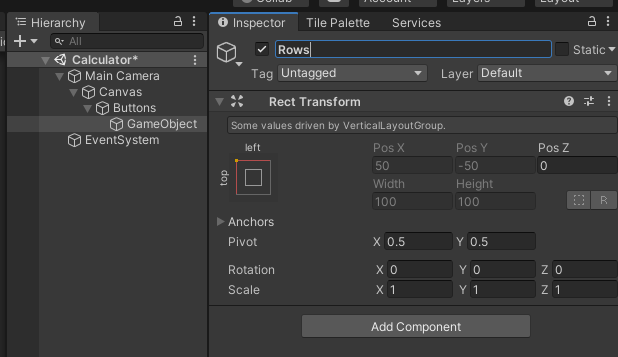
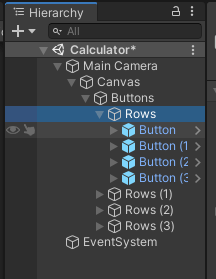
Next we need to add rows for our buttons to live in. Create a new empty game object under Buttons, this can be done by right clicking on Buttons and selecting Create Empty. Rename this object to Rows.
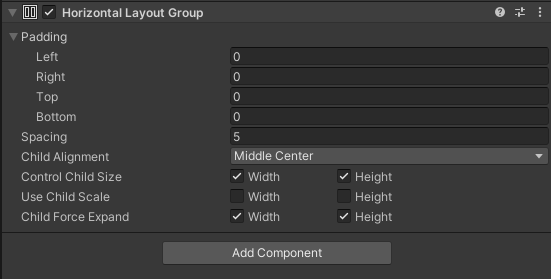
Once again we do not want to individual control the size of the buttons but this time we want the buttons to go left to right so we will add a Horizontal Layout Group.

We do not need any padding on the left or right as our Buttons container is taking care of that for us. We do, however, need some spacing on the left and right sides of the buttons. To do this we add 5 to the spacing setting. Same as before check both boxes for Control Child Size and Child Force Expand.
With our layout setup we can now begin adding buttons. Right click the Rows container and select UI > Button. This will create a button game object under the Rows container.

Expand the Button object and you will see that there is a Text object that was created as well. Select the Text object and select the check box for Best Fit. This will allow the text to expand or shrink as needed to fill the button.

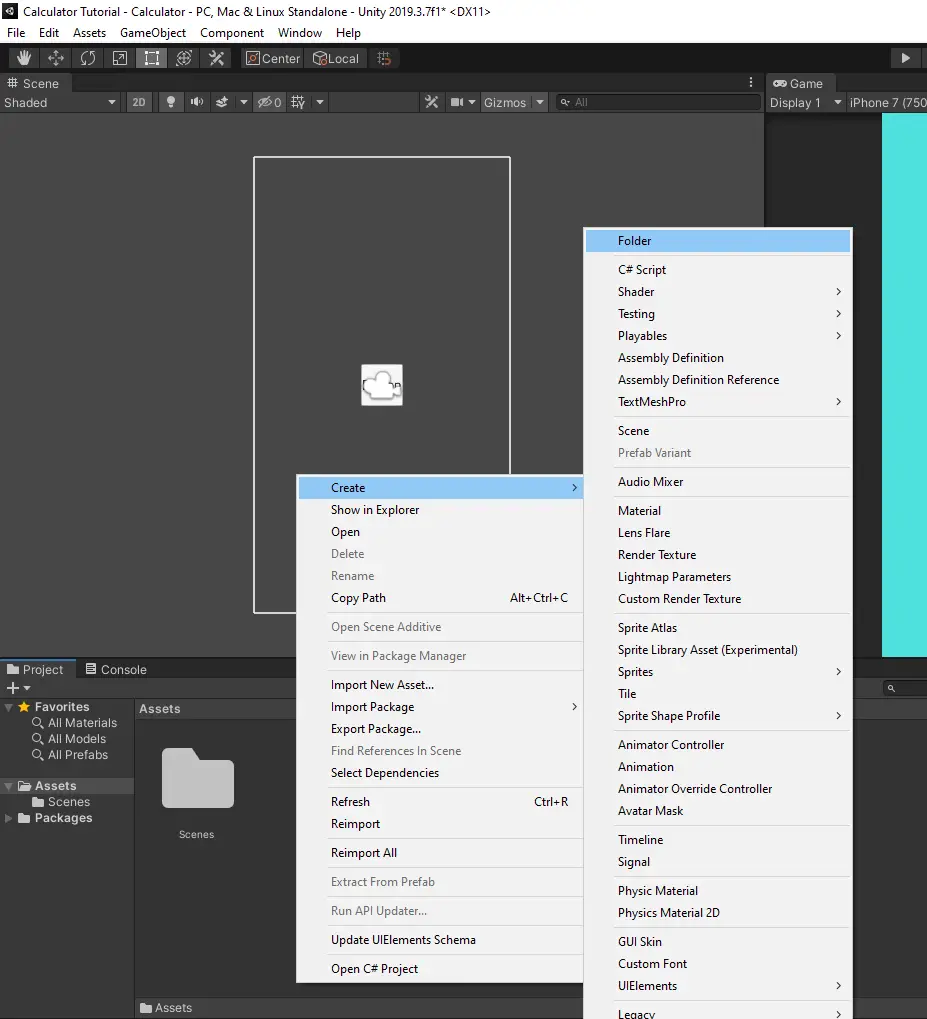
We will need a script for our button so let us create a folder in our project view for scripts. Right Click inside the assets folder and select Create > Folder. Name the folder Scripts.
Back on the Button, at the bottom of the inspector select Add Component and type ButtonController. This will leave the only option to select as New Script.

Select the New Script option and the search text will be carried over to the New Script Name. Hit enter to create the new script.

The script will be created at the root of the Assets folder as default. Just drag it over to the scripts folder to keep things organized.

We have a lot of buttons and we do not want to have to keep creating them by hand every time we need one. We could just duplicate the Button but that means if we need to make changes that will affect all buttons we will have to go through every button to make updates. To avoid this, we will turn the Button into a Prefab. To do this create a new folder named Prefab.
Now drag the Button into the Prefab folder. The Button object will turn blue in the Hierarchy and the Prefab folder will now contain a Prefab object.

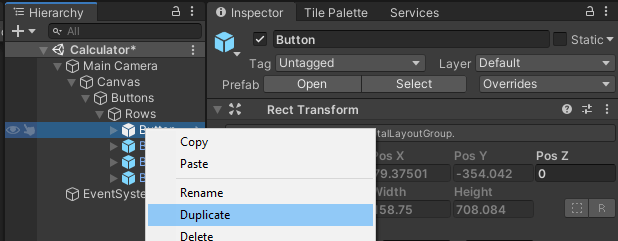
Now we can duplicate the Buttons. You can do this by right clicking the Button and selecting Duplicate or by selecting the object and hitting CTRL + D on the keyboard. Let us create four buttons for now. Notice how all of them are now blue indicating they are all tied to the prefab we just created.
With the buttons in the row, we can now duplicate the row. Duplicate the row, using the same process as before, to create four rows.
You can see how the layout groups have automatically filled out the grid with buttons and we did not have to specify any locations, heights, or widths.

Creating the Display
Now we can move on to creating a display for our inputs/calculation. Right click the Canvas object and select UI > Panel. Rename the panel to DisplayPanel.

We want the background of the panel to contrast with the text that is printed on it, but we still want to show our background color that was set on the camera. So, with the DisplayPanel selected change the color of the Image component to all back, R,G,B values set to 0, and lower the transparency, the A value, to 100.

Also, set the Stretch value of the DisplayPanel to the setting shown here by holding Alt on the keyboard.
We can then move the corners and anchors of our rectangle to a more desirable location. Here I have moved it slightly above the buttons and stretching to both sides. I have also lowered the top to give it more of a traditional calculator look.

Now we will need to add a Text object to our DisplayPanel. Do this by right clicking the DisplayPanel and selecting UI > Text.

Rename the component to DisplayText. Change the Text to the value “0”. Set the Alignment to Right for vertical but leave it centered for horizontal. Check the box for Best Fit and update the max size to 100. This will allow our text to fill out the space but still shrink to fit as the text gets longer.

We will need a script to control how the text is updated. Add a script named DisplayController to the DisplayPanel. Remember to move the script to the Scripts folder to keep things organized.

Creating a Calculator Script
The last object we need does not do anything visually. So, for this we will add an empty game object to the Calculator scene and not to the Canvas. Right click the scene name and select Create Empty.

Name this new object Calculator and add a script component with the same name. This script will hold all of the methods related to calculations.

That is all we need for our Calculator view.
So far we have designed our calculator, laying out the different features and functions, and we have created the project in Unity and added the user interface. Check out How to Build a Calculator in Unity Part 3 where we will begin building out the scripts and hooking them up to the different game objects.