

Tips and Tricks: Unity Transparent Material
Introduction
Oftentimes when creating a game, you will need to create transparent objects. This can be anything from glass windows, walls, ice or maybe just a see-through treasure chest to entice the player to open it. Making an object see through requires using Unity’s transparent materials.
To create a transparent material in Unity you will need to set the render mode to transparent and reduce alpha value, inside the albedo color picker. You can then apply the material to make your objects transparent. In this Tips and Tricks: Unity Transparent Material we are going to walk you through, step by step, and show you how to implement your own transparent materials in Unity.
Getting Started
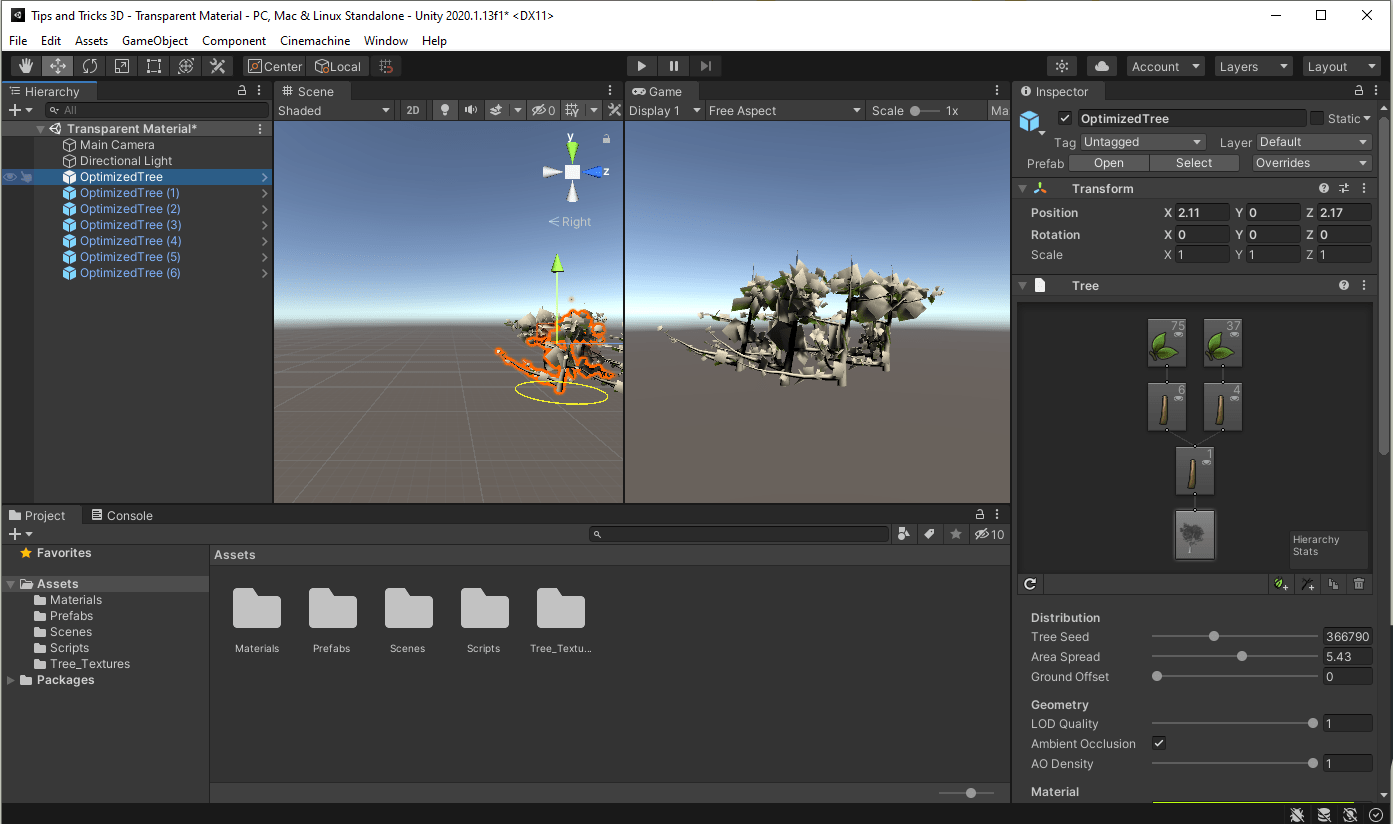
To begin, we have set up a basic scene in Unity to implement our transparent material. Our scene has a handful of trees that have been placed in front of the camera. These will serve to gauge how well we can see through our object.
Creating Unity’s Transparent Material
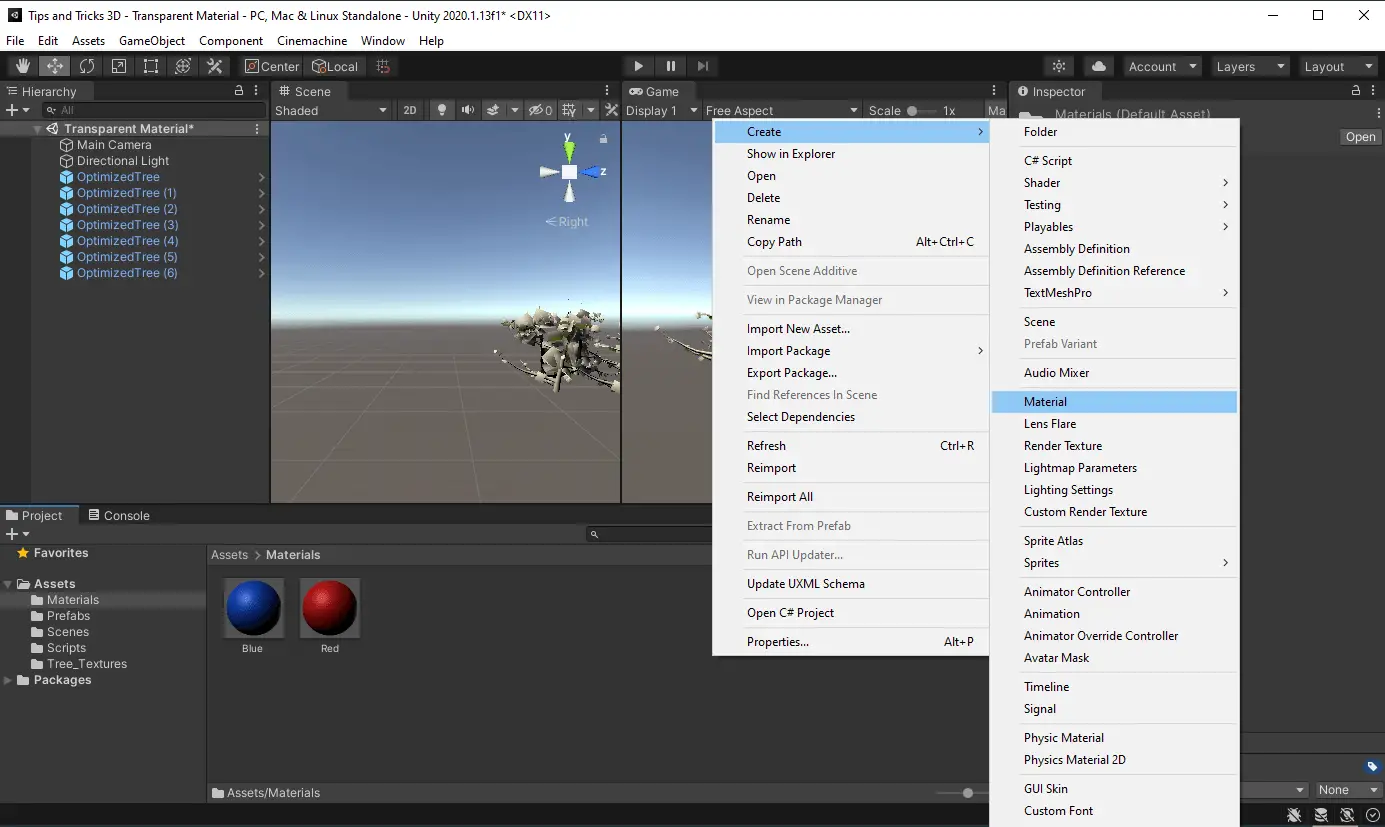
To create Unity’s transparent material in Unity we first need to create a materials folder to store our materials. This will help maintain the project’s structure and will ensure that we can locate assets as we build out our projects. This is especially helpful when we are working on large scale projects.
Inside of our materials folder, right click and select Create > Material. This will place a nameless material in our folder. Give the material a name to signify what its purpose is. For this unity tutorial, we will name our material “transparent”.
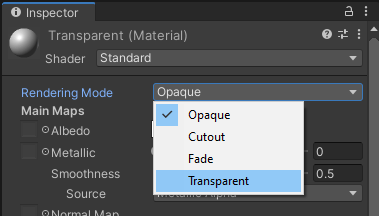
Select our material and the properties for the transparent material will appear in the inspector. The first thing we need to do is change the rendering mode. The rendering mode defaults to Opaque and this works great for solid colors, but Unity does not render the transparency despite there being an alpha value in the albedo color selector. This is because calculating transparency is a computationally expensive process, and you would not want all of your materials doing that if it was not needed. Set the render mode to Transparent to tell Unity that you want it to be treated transparent.
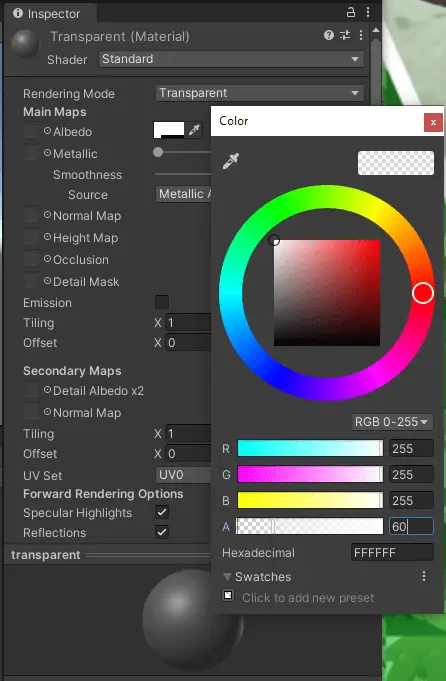
Next, we will need to lower the alpha value of the Albedo color. Select the white box with the eyedropper tool in the inspector. You will then be greeted with a color picker. The A value is for your alpha which controls transparency. Lower this to something around 60. The lower you go the more transparent the object will become. If you lower it to zero the object will disappear.
Creating a Transparent Object in Unity
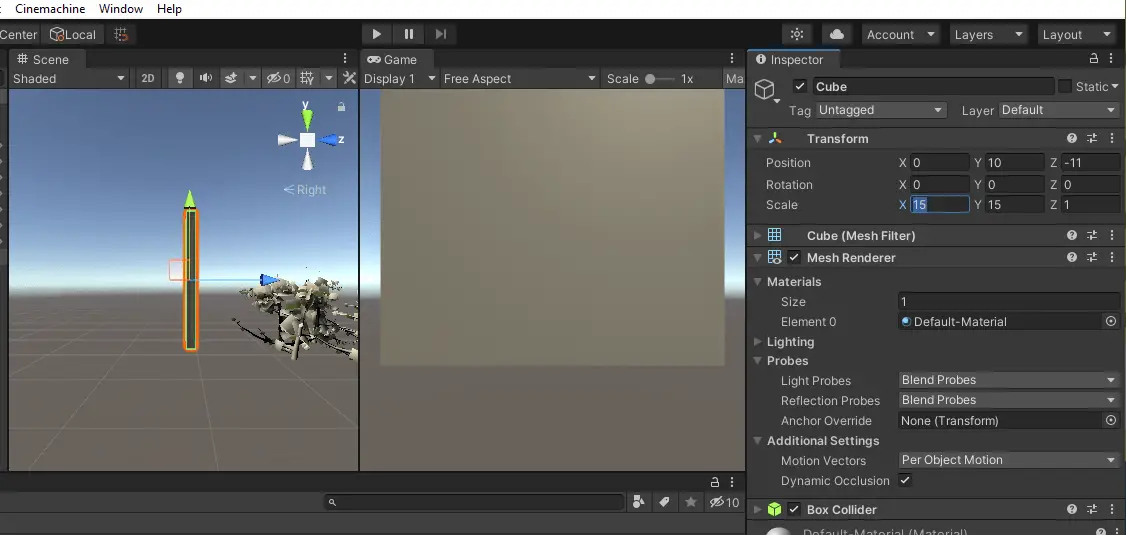
Time to create something we can see through. Inside of the scene’s hierarchy, right click and select 3D object > Cube. This will place a cube in our scene. Select the cube and in the inspector increase the X and Y scale to 15. This will turn our cube into a wall. Position your camera so that it is looking at the largest face of the wall.
Apply the Transparent Material to the Object in Unity
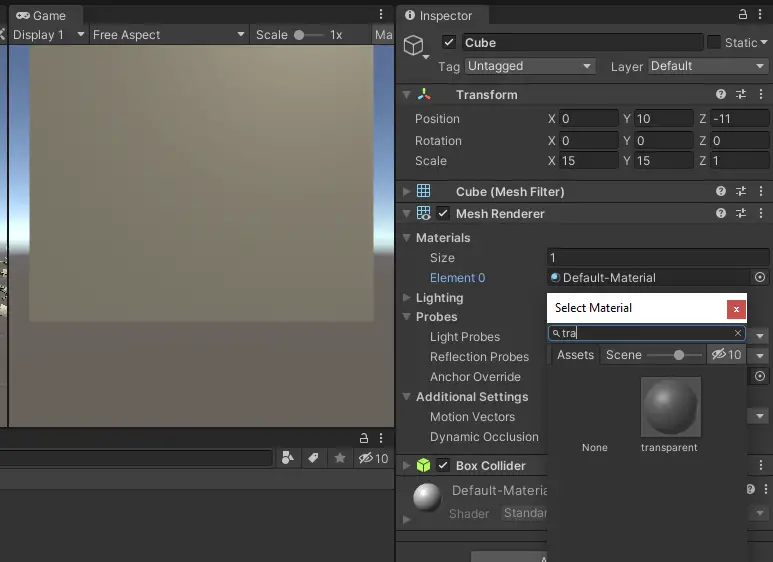
It is now time to apply the transparent material. With the Cube selected, expand the Mesh Renderer component in the inspector window. The first property will be Materials. If this is the first material you are applying to the object then you will see an Element 0 field. Click the circle next to default material and type transparent in the search bar to locate the material. You can also drag the material from the project folder into the field or onto the object in the scene view to apply it.
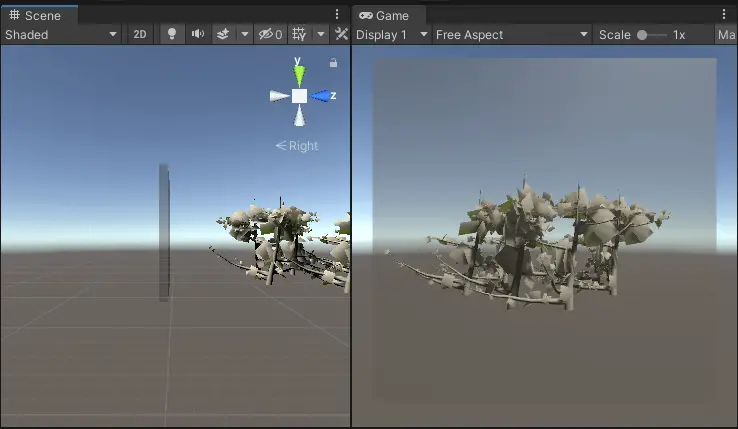
At last, you can see through your cube wall. The only problem is that it does not quite look like glass, water, or any other transparent material.
Creating a Glass Material in Unity
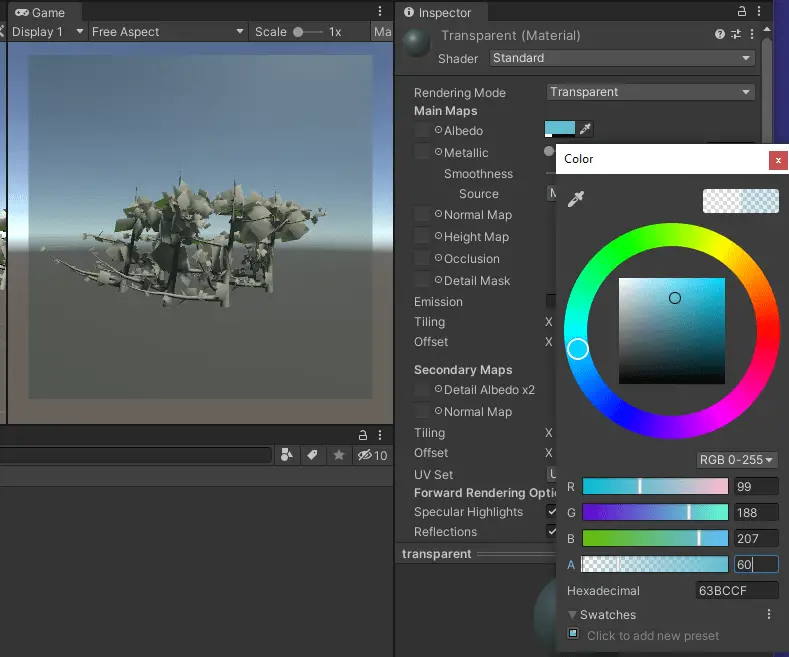
Open up your material in the inspector once again. We can adjust the hue of our material to make it look slightly more like the material we are imitating. Select the Albedo color picker and change the hex value to #63BBCF this will give the material a bluish tint that looks like you are staring through a glass window. Feel free to adjust the color and transparency to your liking.
And now you are ready to create Unity’s transparent materials to apply to walls, windows, and other objects within your own games made in Unity. Thank you for stopping by. Stick around and check out more of our tutorials or posts like our piece on Unity Cube Color. Also, leave a comment telling us what you liked or did not like about the tutorial. Was it easy to follow along? What do you want to learn next? As always check out some of our published apps below.