
Unity Tutorial: How to Make a Multiplayer Pong game for Android
Introduction
In this Unity tutorial we will create a Pong-like game for Android. We will walk you through the creation process from beginning to end including how to create the sprites in Unity, write the code, implement multiplayer controls and build the apk to distribute. At the end of the tutorial, we will have a link to our GitHub repo for this project.
Getting Started
Set Up Unity for Making Android Games
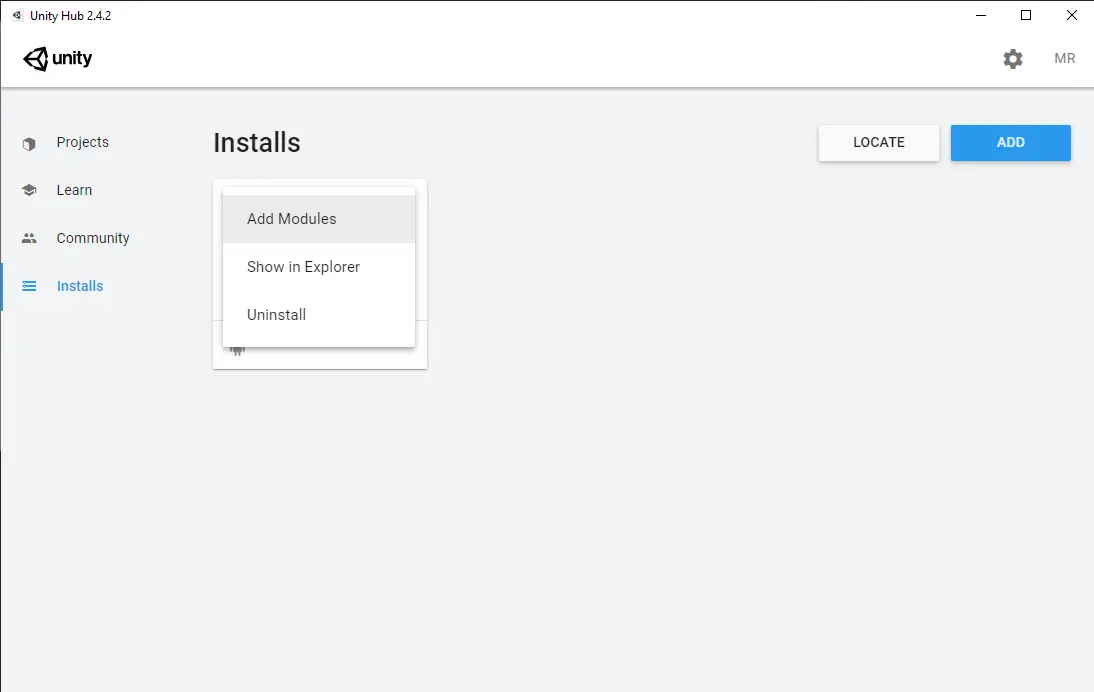
The first thing you need to get started making games with Unity is, well, Unity. Make sure you have downloaded and installed Unity Hub and the Unity Editor. If you need help with getting things set up check out our article on Setting Up Unity. We need to make sure we have the tools installed to develop for Android in Unity. If you are setting up Unity for the first time you will be prompted to add modules. Already have Unity installed? No problem. Open up the Unity Hub and navigate to Installs and click the three dots on your editor version. This will open a menu that allows you to add modules.
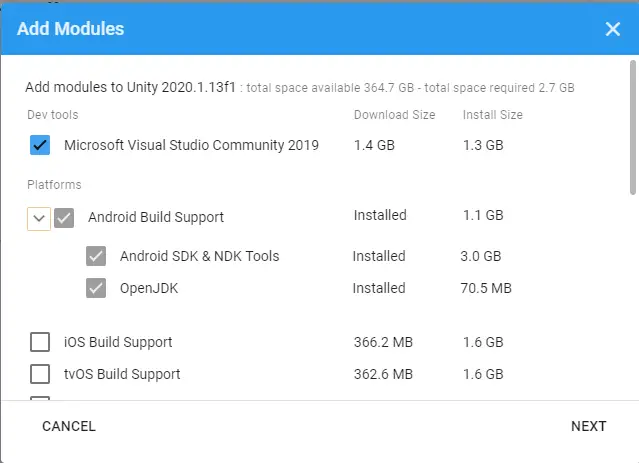
Select the Android Build Support Module. Make sure to expand it out and add the Android SDK & NDK tools and OpenJDK to the module selection. Continue through the prompts to install the new modules.
Create a 2D Project in Unity
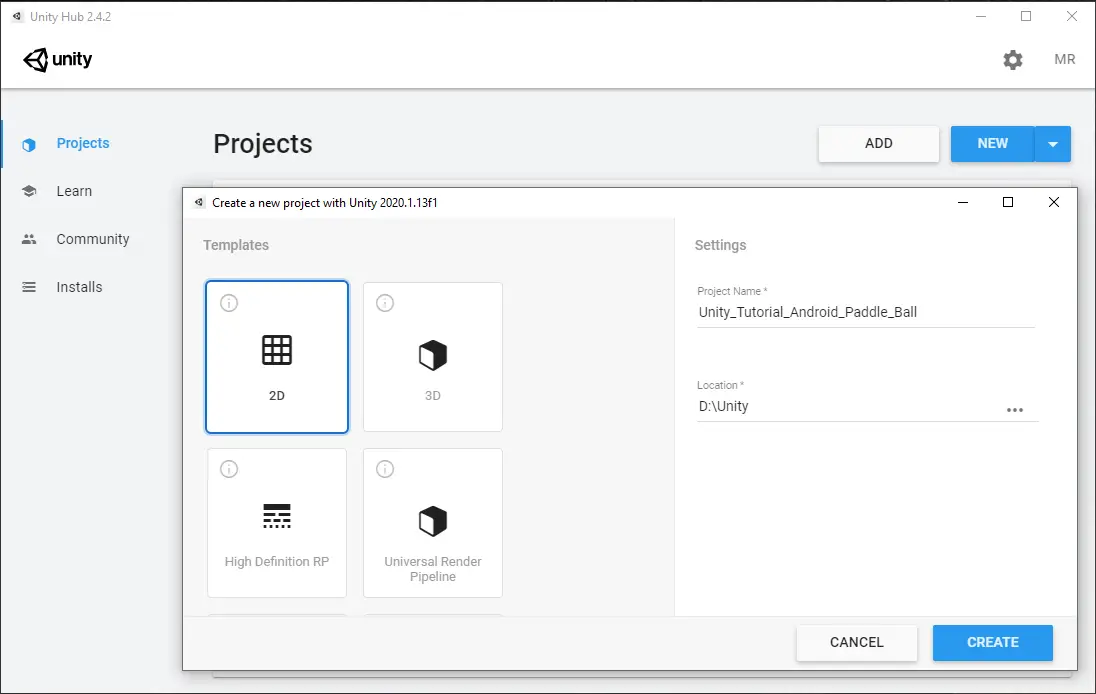
Start a new project in Unity by selecting New in the Unity Hub. We are going to create our game in 2D space so we can start by selecting the 2D template. You can also enter the name of your project and choose the location to store project files. Select create and Unity will get the project ready for us.
Create Game Resolution for Mobile
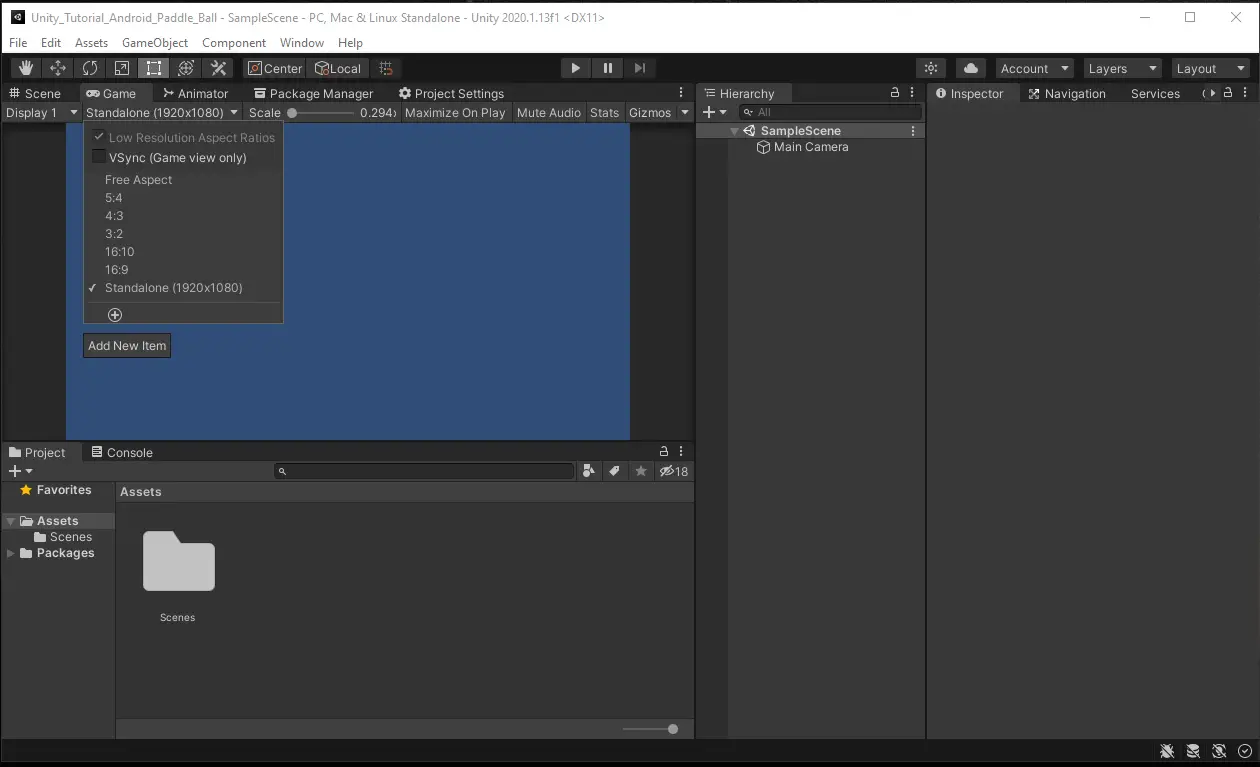
Because we will be creating a game for mobile, it is best to start by setting the correct screen resolution to work in. This will keep us from having to go back later and move things around to fit them on to the screen. In the Unity Editor select the Game window and click the drop down for resolution. Select the plus sign to add a new resolution.
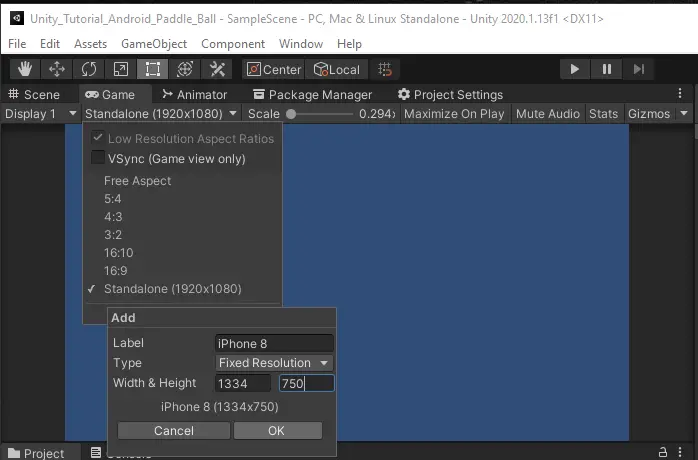
Obviously, there are a ton of different brands and models of phones out there and each may have a slightly different resolution. Here I have created a resolution for the iPhone 8 since it has a resolution that is more common. As you will see later, we will anchor our UI elements to make our game work with differing resolutions. For now, create a label of iPhone 8 and a fixed resolution of 1334 by 750.
Create a Circle and Square Sprite
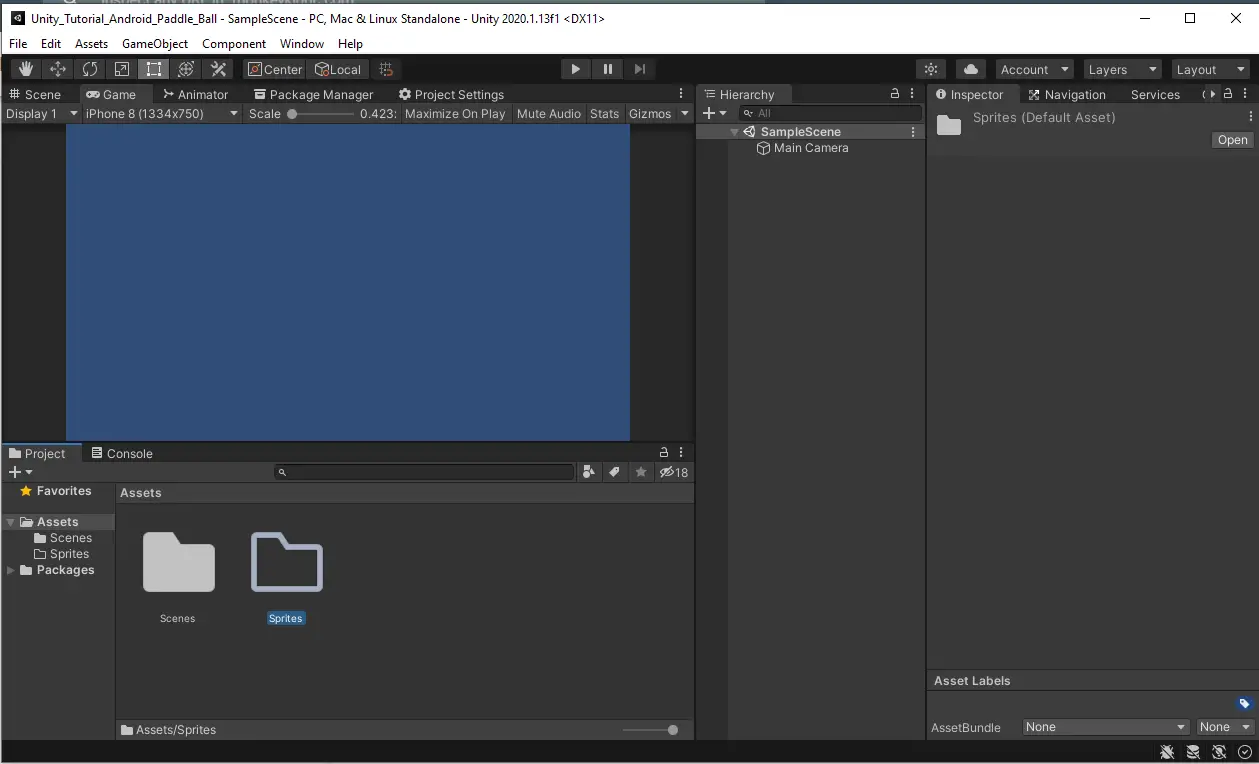
Creating art is probably one of the most time-consuming parts of making a game. Luckily, Unity provides us with some base sprites to work with. In this tutorial we will only use the sprites that Unity provides. To keep our project organized, create a Sprite folder in your project directory.
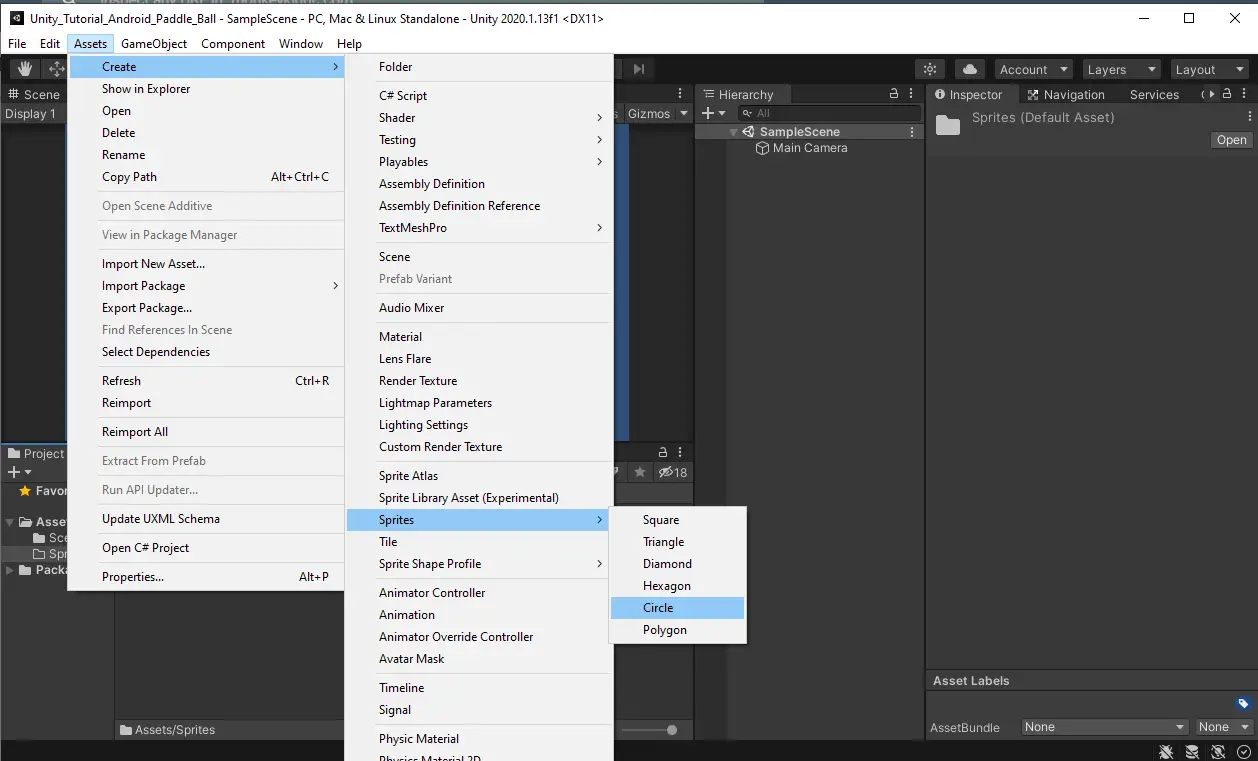
With the Sprite folder selected, go to the menu bar and select Assets > Create > Sprites > Circle.
This will generate a new sprite in the sprite folder. Name the sprite Circle and press enter.

Repeat the same process and create a Square sprite.
Rename the Default Sample Scene
Back in the Scenes folder, you will see a default scene that was created when Unity built our project. Rename this scene to Arena to represent our game’s scene.
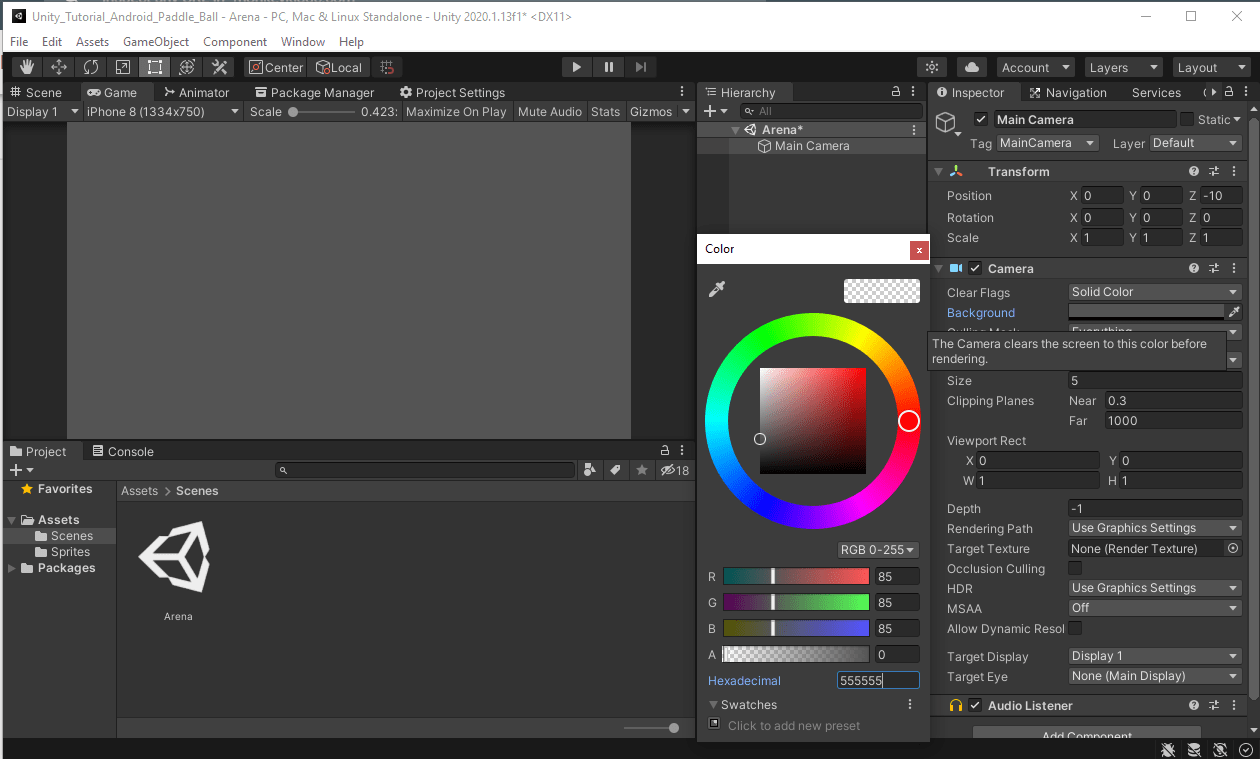
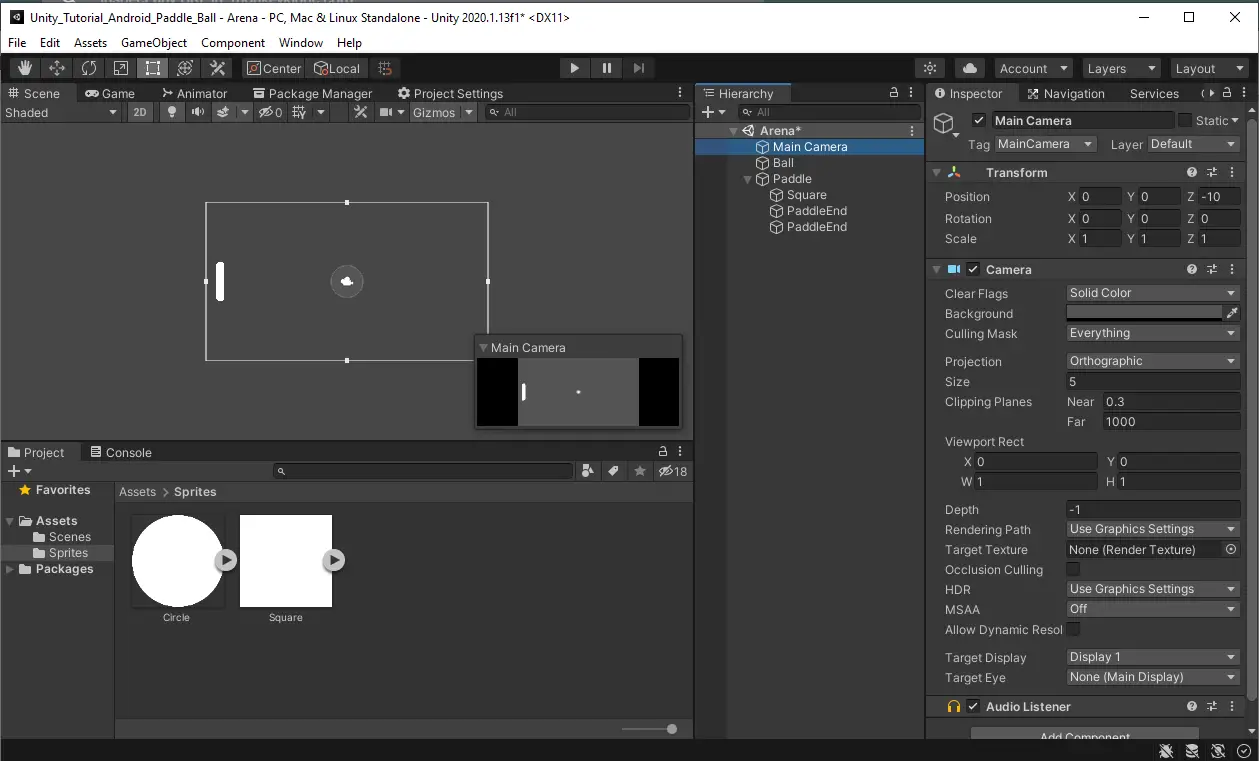
Change the Camera Background Color
The default blue color Unity places in the background can be a little boring. To make it fit the style of our Pong like game, set the Background color to hexadecimal value to 555555.
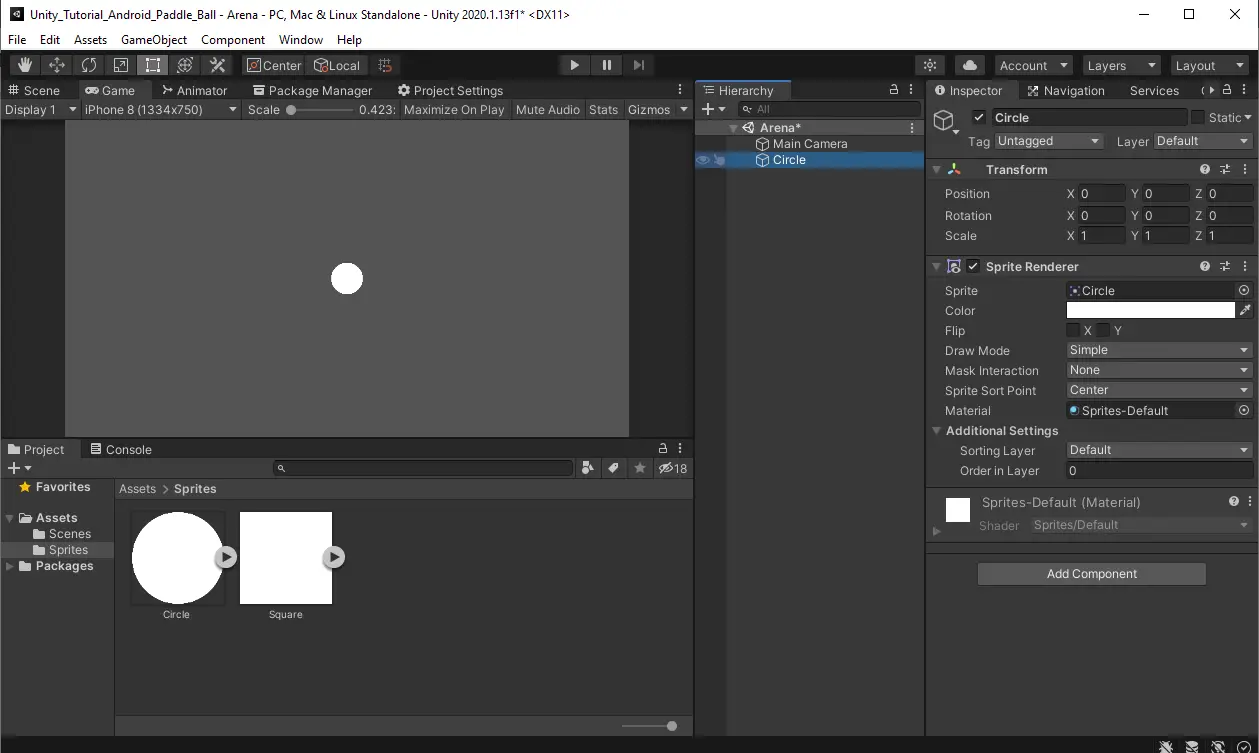
Create the Ball and Paddle
Next, we need to create two key elements of any Pong like game, a Paddle and a Ball. We will start with the ball. Drag the circle sprite we created earlier into the Hierarchy window. This will create a GameObject with a sprite renderer that displays our circle sprite. If you did this right the Transform component in the inspector will have 0s for all three Positions. If they are not 0s you can manually change them to 0s to center the object in the game world.
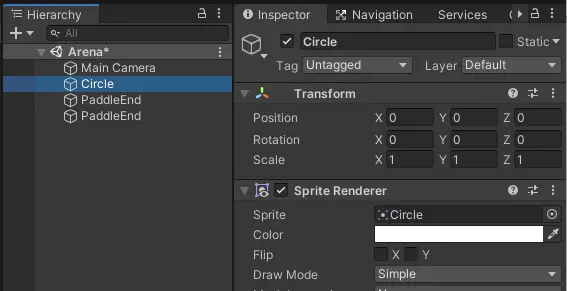
Right click the Circle GameObject in the Hierarchy window and select duplicate or highlight it and press ctrl + D. Do this a second time and rename new Circle objects to PaddleEnd.
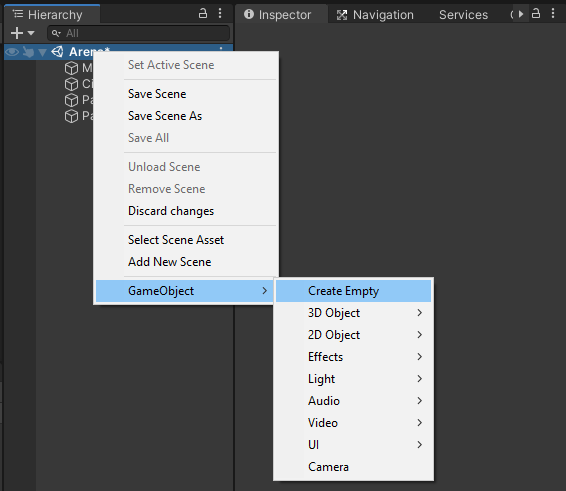
Since our paddle will be made up of several parts, we will want to create a hierarchy structure to keep things looking neat. Create an empty GameObject to hold the paddle Objects.
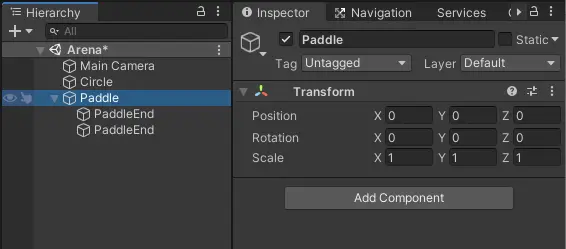
Name the newly created empty GameObject Paddle and drag two PaddleEnds into the Paddle object. Since the Paddle object now has objects nested inside it, it is called a Parent Object and the PaddleEnds can be referred to as Child Objects.
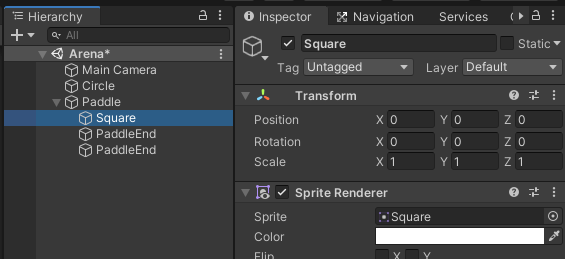
Now, drag the Square sprite into Paddle Object to create a new GameObject, this will make up the center of our paddle.
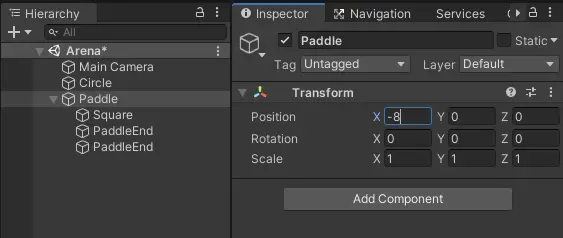
Select the Paddle object and move it to the left side of the screen by setting the X position to -8 in the Transform component in the Inspector window.
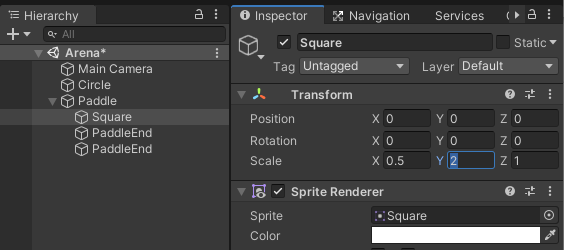
We need to make the paddle a bit longer. To do this, select the Square and change Scale X value to .5 and Y value 2. The Square will now be half as thick and twice as tall.
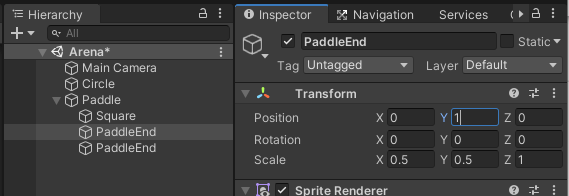
The two PaddleEnds we created earlier will, if you have not guessed already, act as the ends of our paddle, but first we need to make them a little smaller and move them to the ends of the paddle. Start by selecting the first PaddleEnd and change scale to .5 and .5. This will make the circles half the size. Since this is a child object of the Paddle parent the position values are now relative to the Paddle. To move this Paddle end to the top end of the paddle, change Y position value to 1.
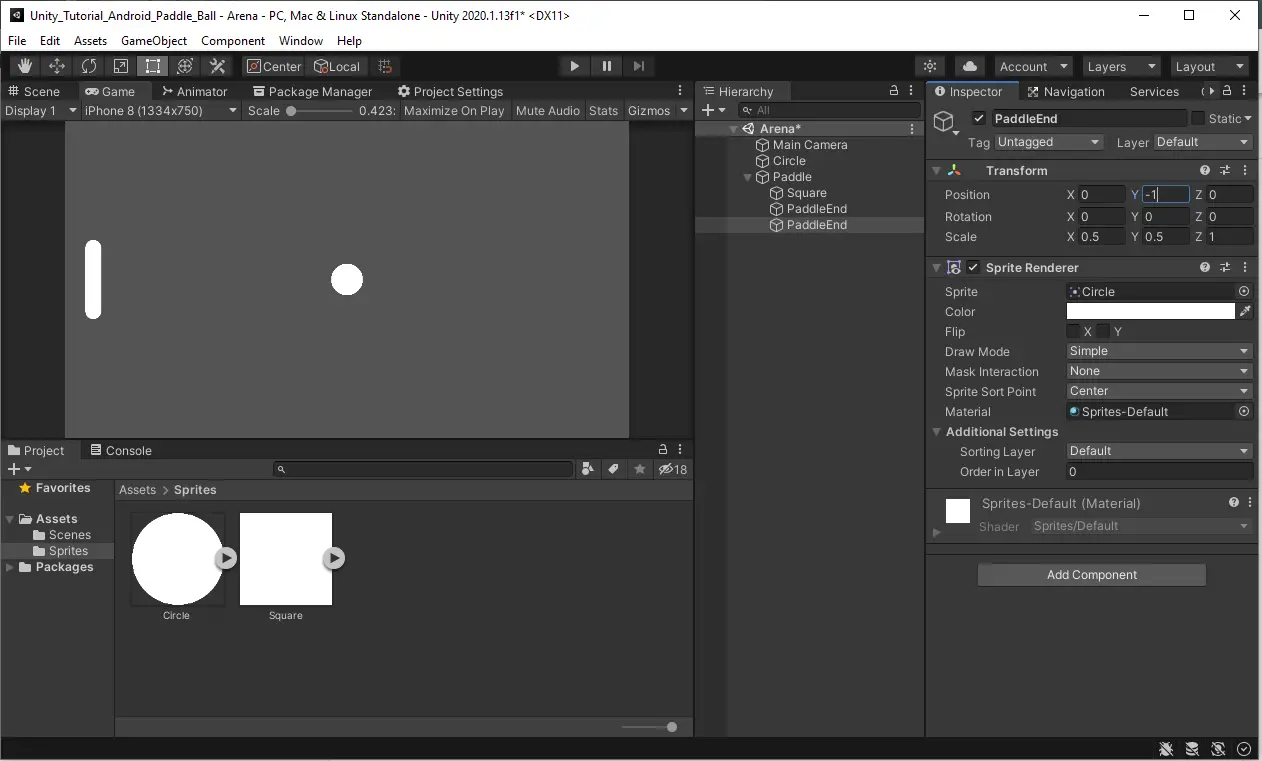
Now, let us do the same for the second PaddleEnd, but this time change the Y position to -1 to move it to the bottom end of the paddle. At this point you will have what resembles a Paddle.
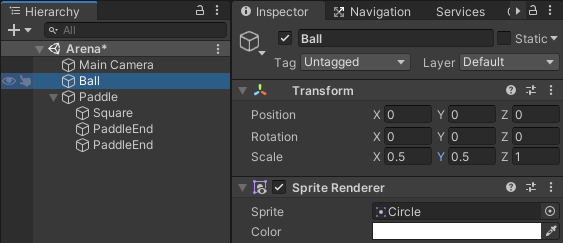
We still have the original Circle GameObject left in our Hierarchy. Rename the Circle GameObject, make sure it is the Circle in the hierarchy and not the sprite in the project folder, to Ball and change the scale X and Y to .5 and .5 to shrink the ball size a little.
Create a Border Around the Camera
In our scene view we can see the edge of the camera. This will be the border of our game. If the ball hits the border it should bounce off. The issue is the border around the camera just shows what is in the camera view and is not an actual border, but we can use it to line up borders we create.
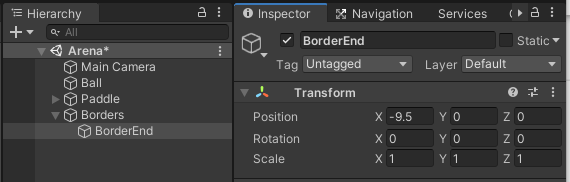
Again, we want to keep things organized so let us start by adding an empty GameObject and name it borders. Create another empty GameObject inside and name it BorderEnd. Set the X position to -9.5 to move it to the left end of the camera border.
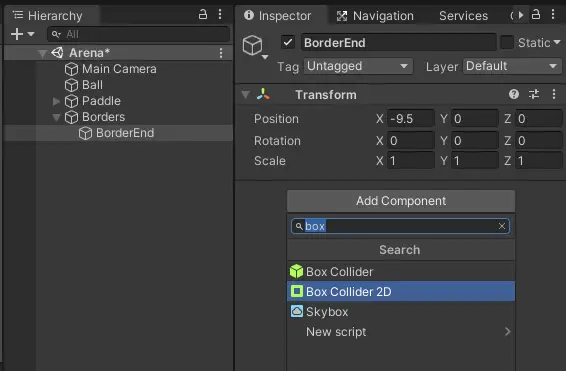
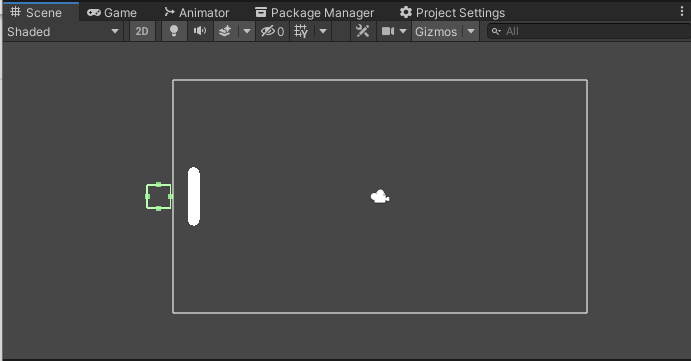
Since this object is empty nothing will happen if our box hits it. We can fix this by adding a Box Collider 2D to check for collisions. With BorderEnd selected go to the inspector and choose Add Component. Search for Box to find the option for the Box Collider 2D. Click it to add the component.
In the Scene window you will see a green square sitting at the left border wall. This is our collider but as you can tell it does not cover the whole side.

To manipulate the collider, click the Edit Collider button in the inspector. It is hard to tell but you will know it is activated when it is a lighter color of grey.
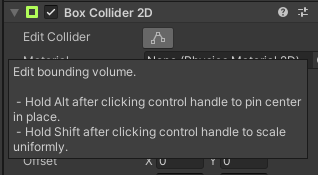
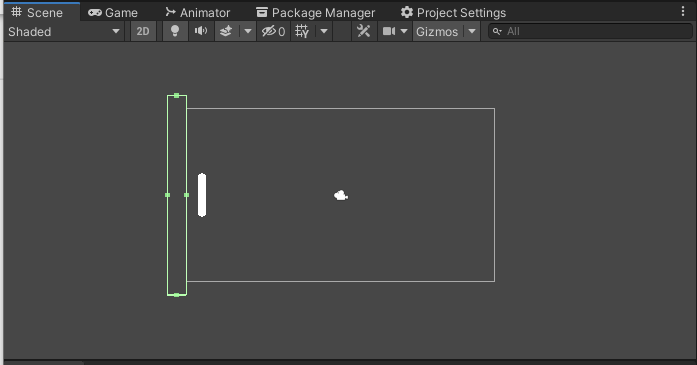
Once the Edit Collider button is activated, green squares will appear on the edges of the collider. These allow you to change the size of the collider.
Click on one of the top or bottom squares and drag it past the camera border and then do the same for the other side. We do not need to worry about the thickness of the collider.
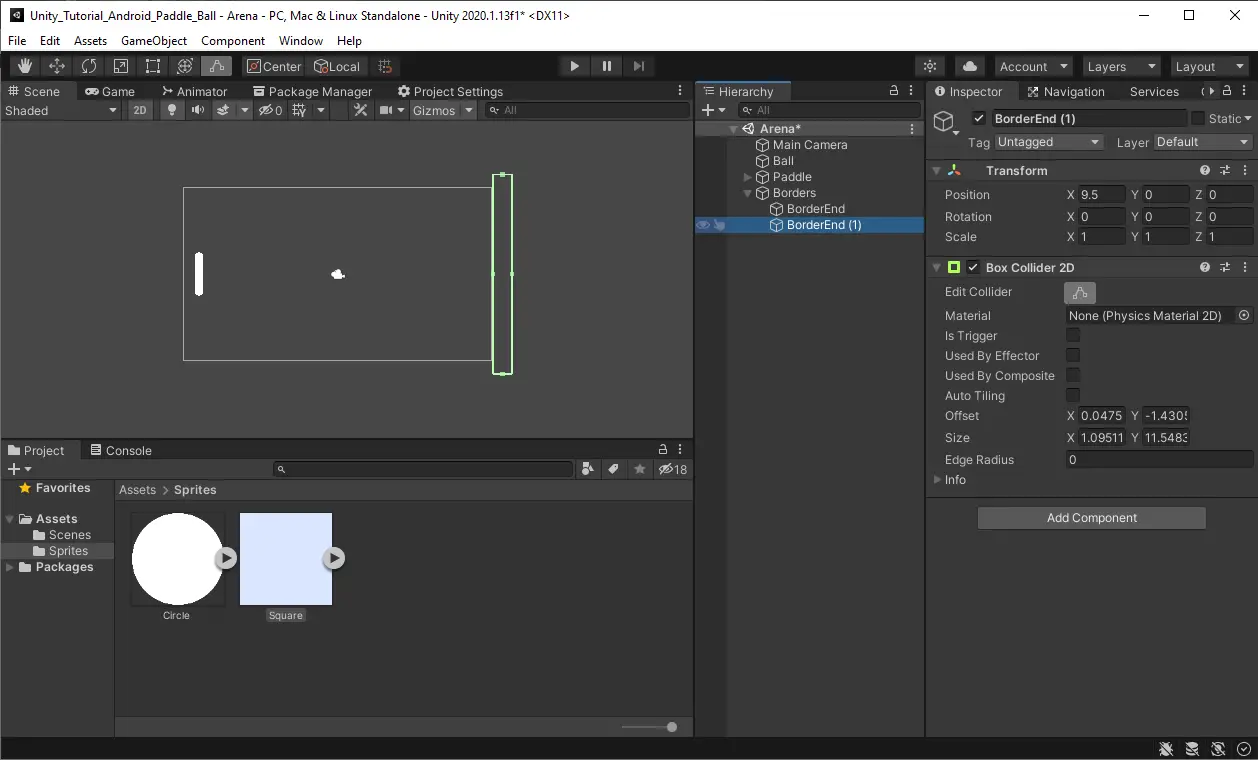
We can save ourselves some work by duplicating this GameObject and setting the new object’s X position to 9.5 to move it to the right side of the camera.
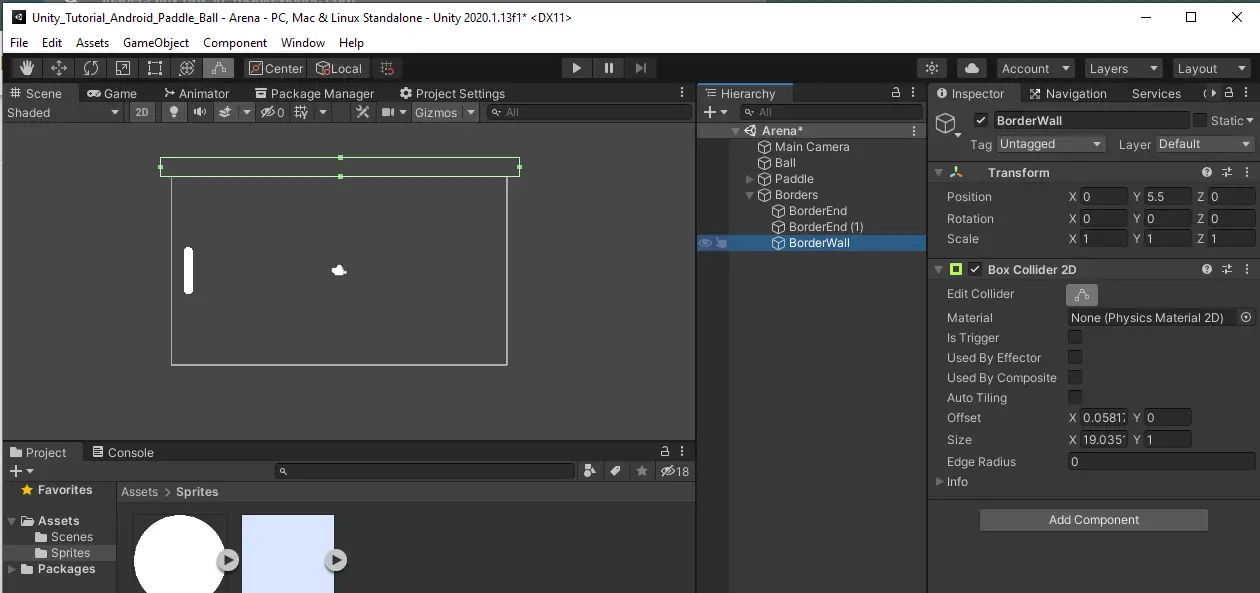
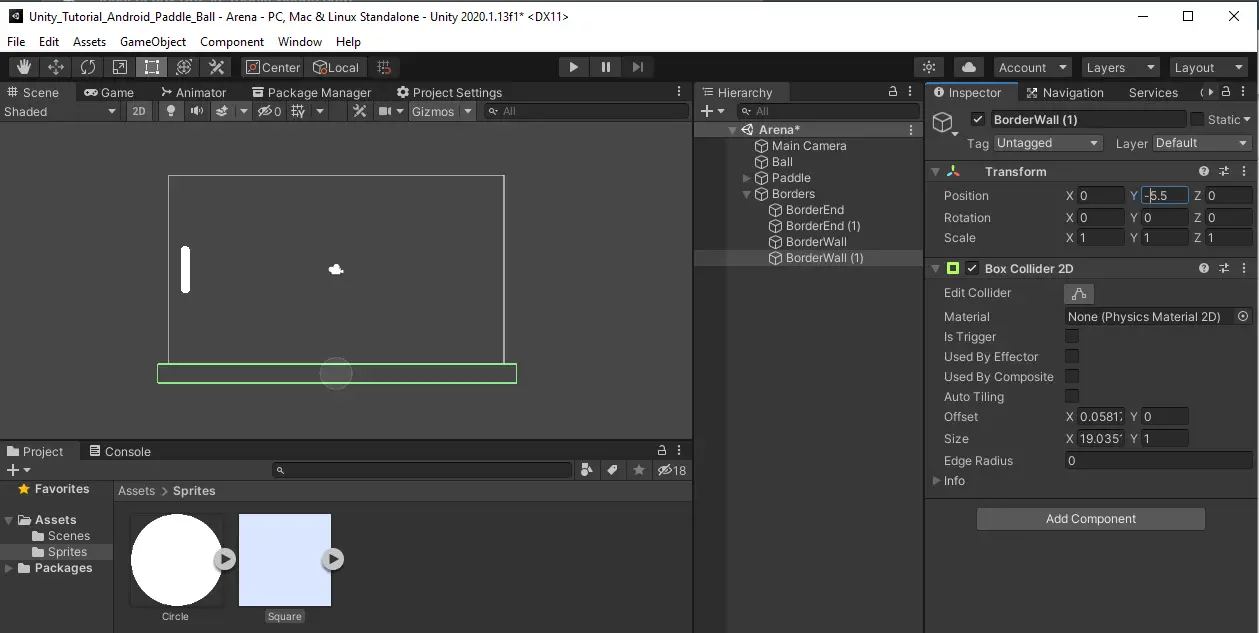
To create the top borders, create a new empty GameObject, inside the Borders object, and name it BorderWall. Set the Y position to 5.5 to move it to the top border. Add a box collider 2D and stretch it to cover both the left and right ends of the top camera border.
Again, duplicate it and set the Y position to -5.5 to move it to the bottom of the camera.
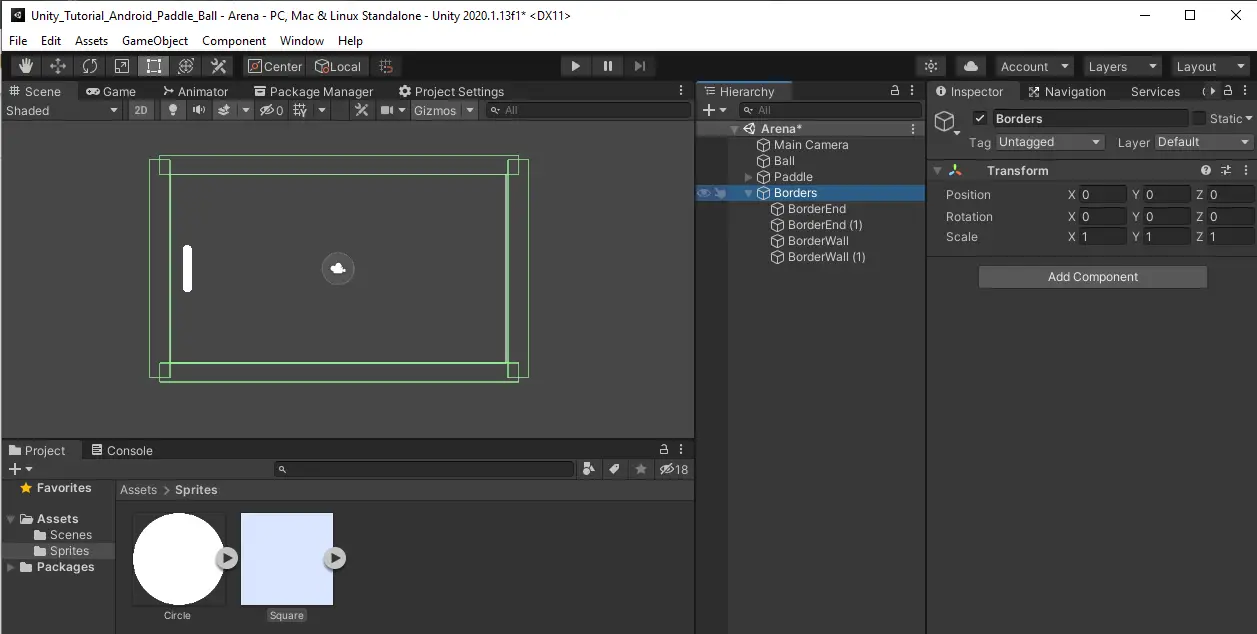
Select the borders GameObject and you will see that the camera border is now completely covered.
Add colliders to the Ball and Paddle
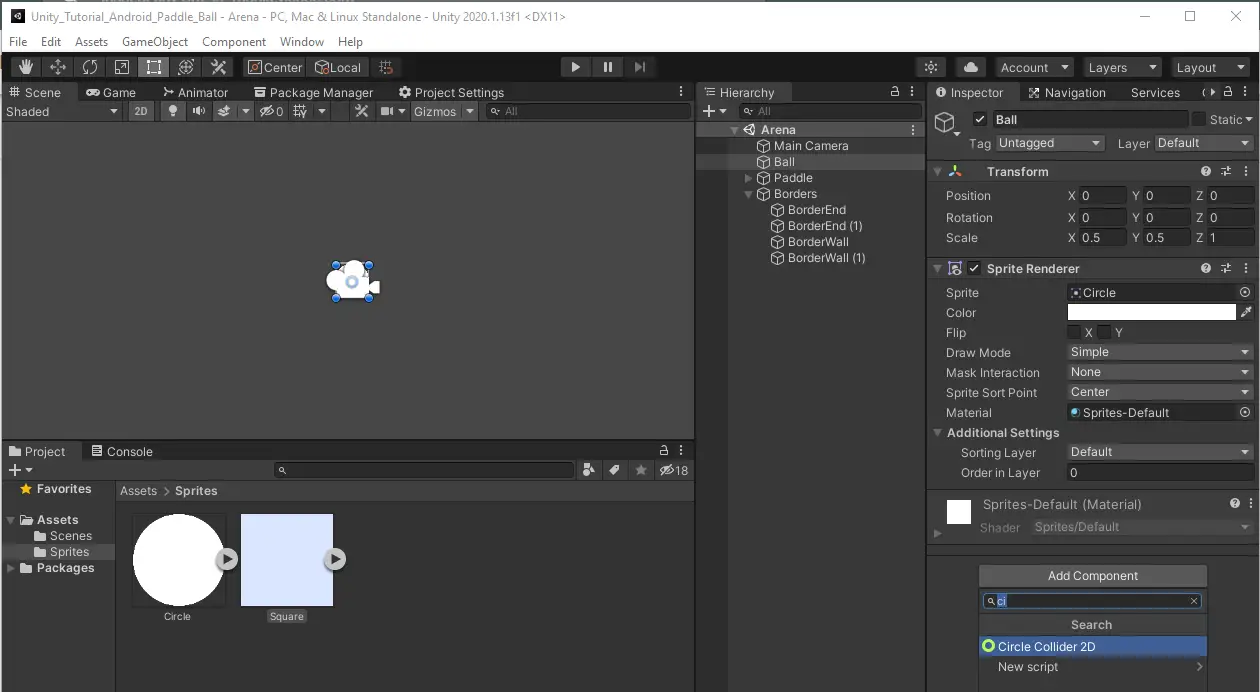
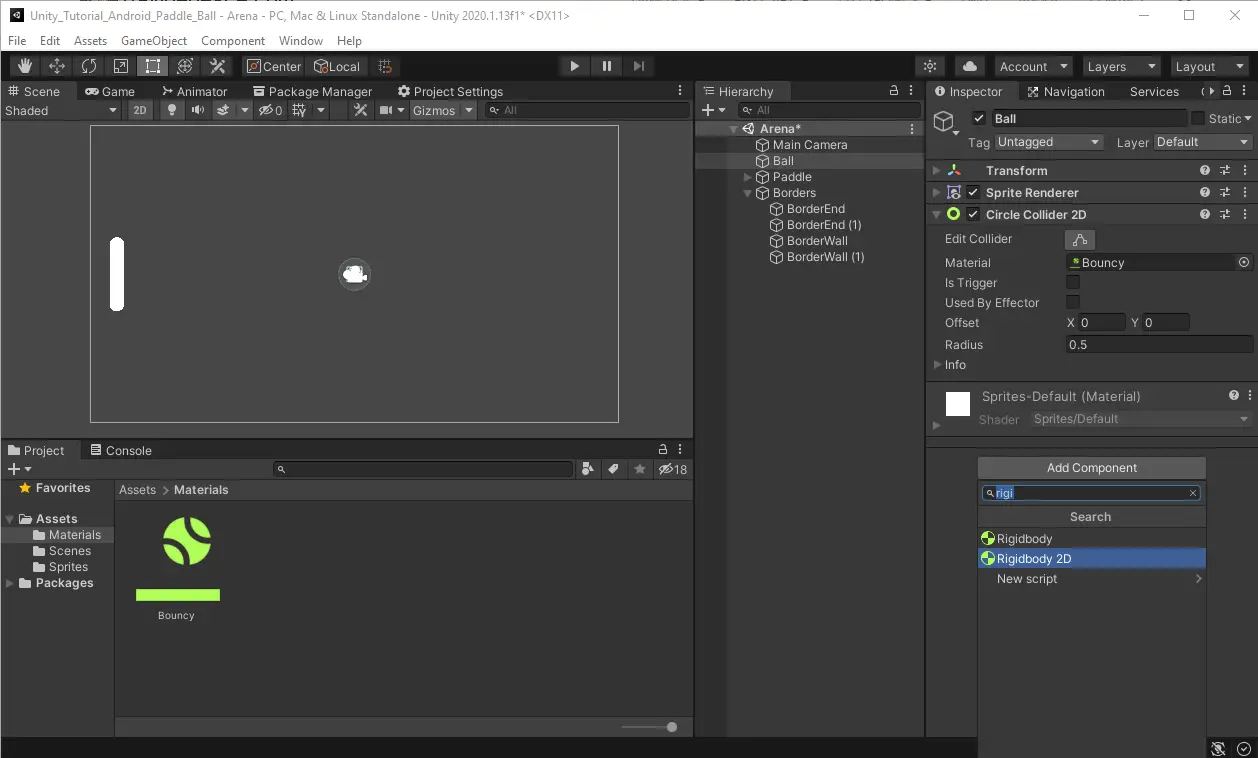
At last, our walls can detect collisions, but our Ball and Paddles cannot. We will need colliders on both to solve this. Add Circle Collider 2D to the Ball by searching for it in the add component search bar.
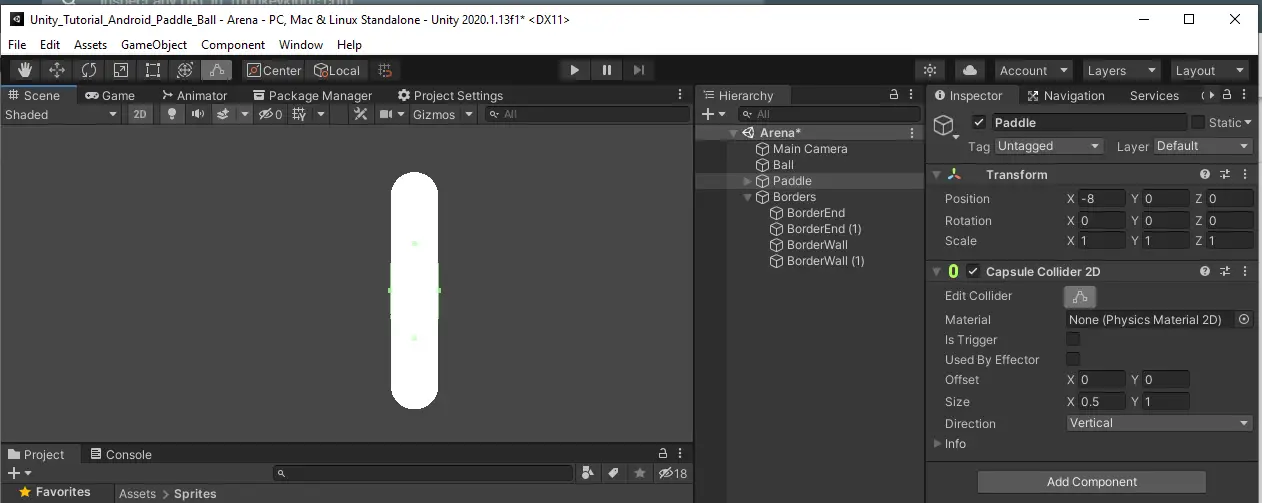
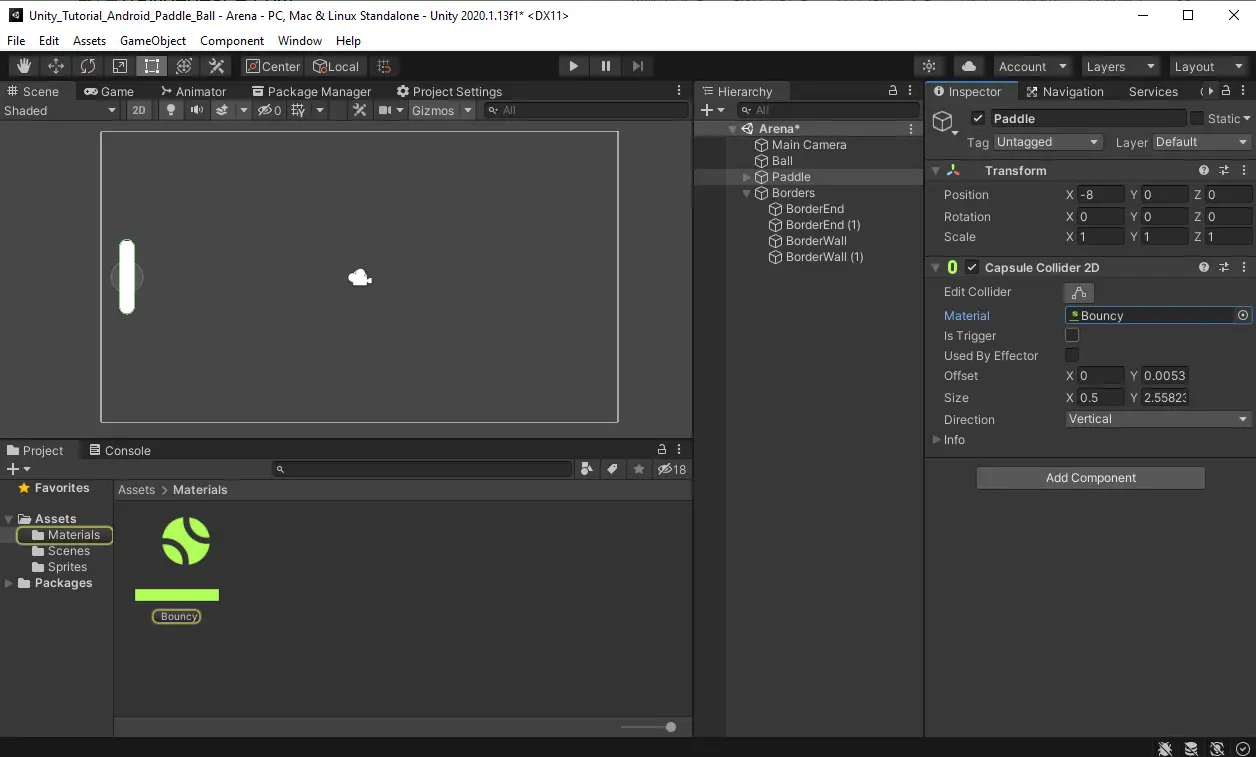
Similarly, add Capsule Collider 2C to the Paddle. If you have not noticed already, Unity has already created colliders for a multitude of shapes to make applying them to your objects much easier.
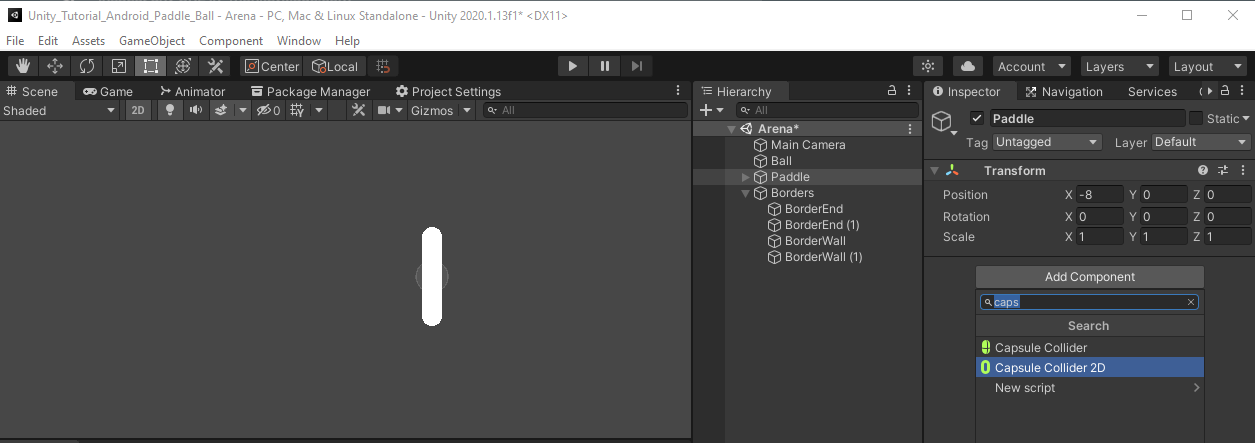
However, it is hard to see, but the Capsule Collider 2D does not cover the entire Paddle object.
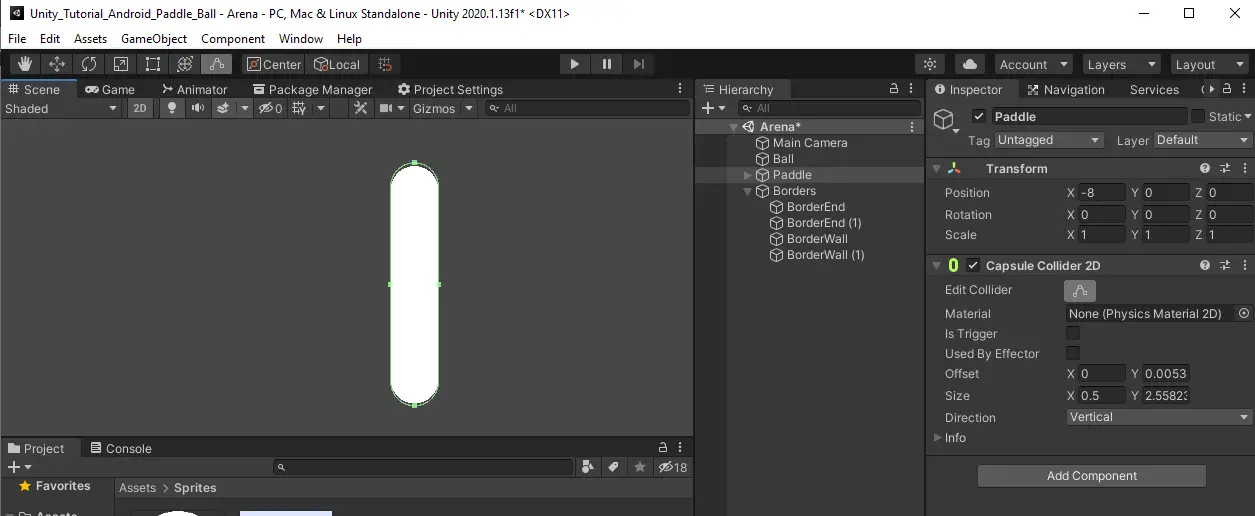
We can solve this the same way we fixed the borders. Select the Edit Collider button and drag the top and bottom of the collider to cover the Paddle. It is ok to go a little over the sprite. It may even provide a better experience for the player if they have a little bit of an advantage. It is definitely better than frustrating them with near misses they thought they made but you made your collider too small.
Create a Bouncy Physics Material 2D
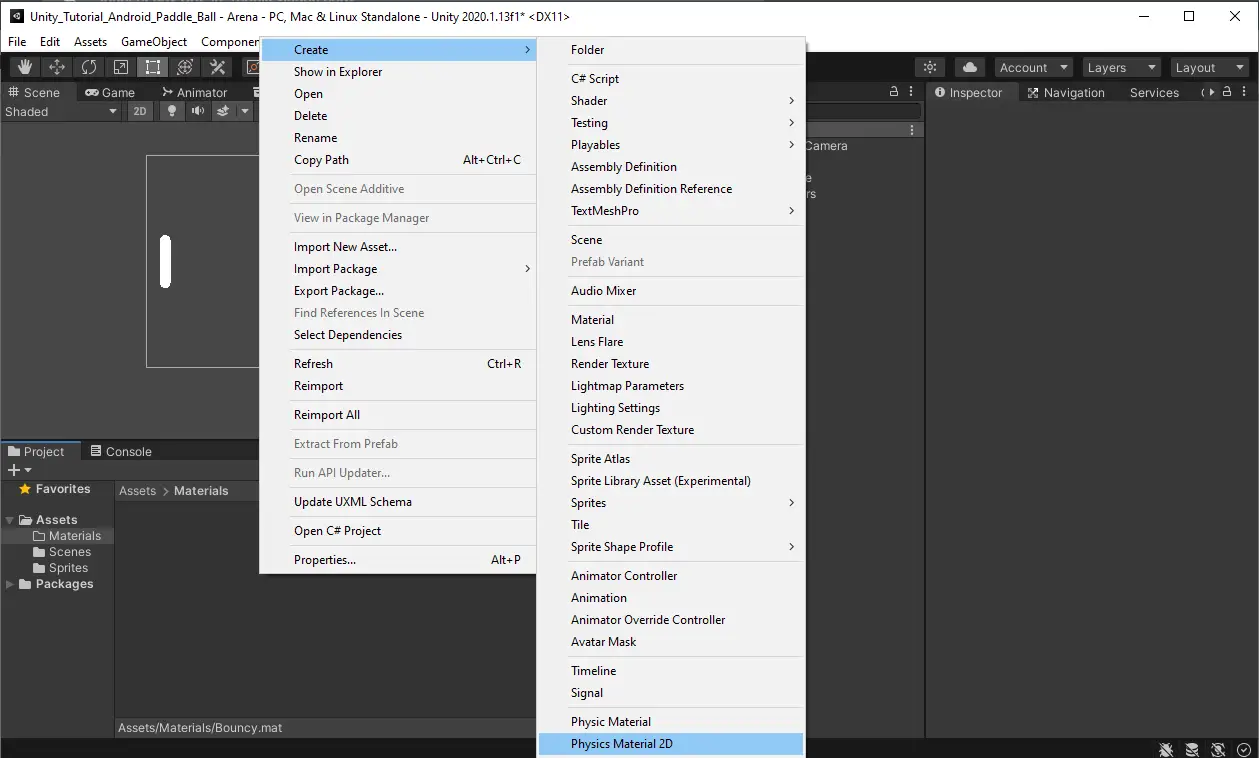
It would not be very fun if our ball hit our borders or paddles and just stopped. We need it to bounce around. Luckily, there is an easy solution that keeps us from having to write a lot of physics code and it is called Physics Materials. We want a clean project structure, so we start by creating a new folder named materials. To make our new material, right click inside the folder and select Create > Physics Material 2D.
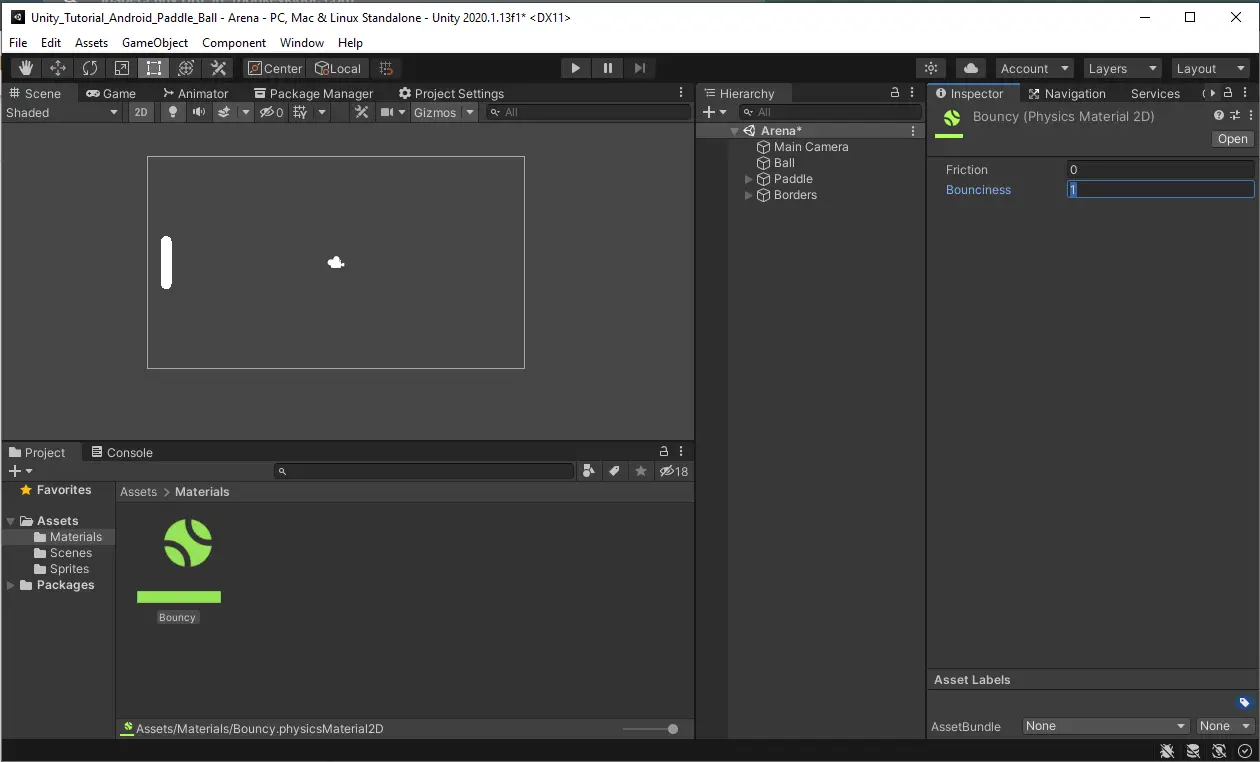
Name the new material Bouncy. Select it and the properties will appear in the inspector window. Set the Friction to 0 and the bounciness to 1. This will cause whatever collides with this material to not slow down and bounce off with the correct trajectory and speed.
In order to take advantage of the bouncy properties it must first be applied to the colliders. Add the bouncy Physics Material 2D to the colliders on the Ball, Paddle, and Borders in the material slot.
Add RigidBody2D Components to the Ball and Paddle
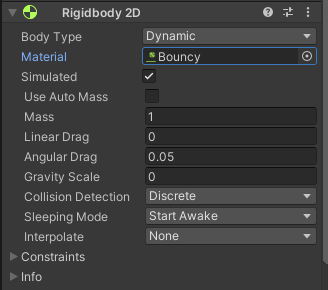
To manipulate the physics of the Ball and Paddle, including position and velocity, we need to add a RigidBody2D component to each. Use the Add component search box and search for RigidBody and add the 2D version.
Rigidbodies simulate physics for us but for the ball we do not want things like gravity to cause the ball to fall to the bottom of the screen. To fix this, set the Gravity Scale on the RigidBody2D to 0 and add the bouncy physics material.
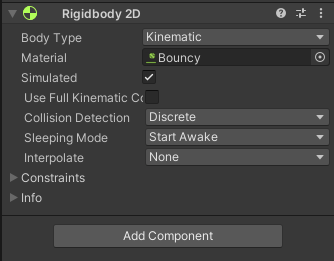
Now, for the Paddle we do not want the ball to push our paddle around when it bounces off of it. Set the Body Type to Kinematic which means that we can still detect collisions and move positions but are not impacted by the forces of physics. Add the bouncy Physics Material to the Material slot as well.
Create the Ball Script
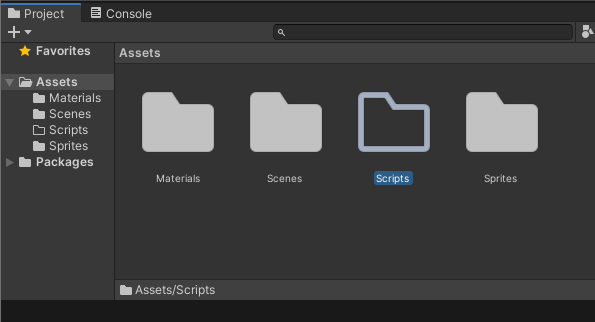
Now it is time for the meat and potatoes of the game, scripts. We need a script to control our ball. Because, again, we are orderly game developers, create a new folder to hold our scripts.
To create our new script, right click inside the folder and select Create > C# Script.
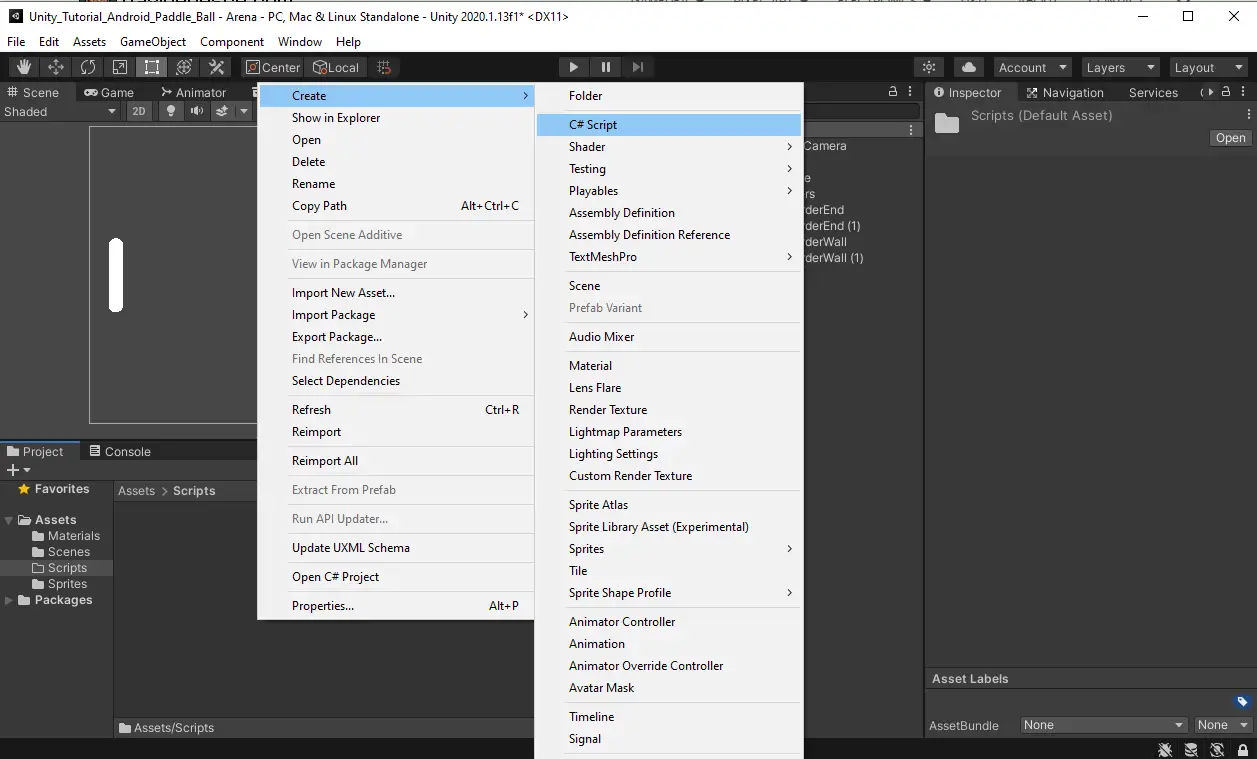
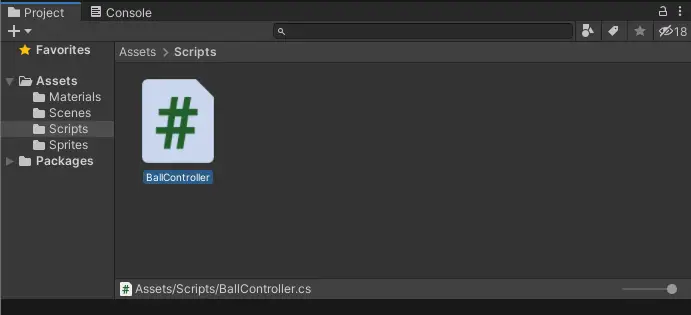
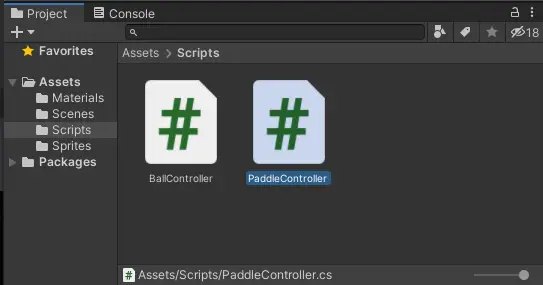
The new script will appear in the new folder ready for a new name. Name the script BallController, which Unity will use to generate a C# script template with the class name BallController.
The first thing we want to create is a private field named thrust. This will hold an integer that will manipulate how fast our ball is going. Normally, private variables cannot be accessed outside the script but since we may want to adjust this value in the editor, without having to edit code, we can declare SerializeField in brackets before the private variable to make it appear in the inspector.
When Unity runs your game, it goes through a loop or lifecycle in which it calls multiple built-in methods which you can use in your scripts. Start() is one of those. To learn more about this, check out our article on the Unity Lifecycle.
Inside of the Start method we are going to get a reference to the Rigidbody2D and add a force equal to our new Vector2 multiplied by our thrust. We then apply that force in ForceMode2D.Force.
You can change the angle of the ball’s velocity by adjusting the Vector2. A higher Vector2 will require a lower thrust or the ball may move too fast for the collision with the walls to be detected.
Here is the entire script.
using System.Collections;
using System.Collections.Generic;
using UnityEngine;
public class BallController : MonoBehaviour
{
[SerializeField]
private int thrust;
void Start()
{
GetComponent<Rigidbody2D>().AddForce(new Vector2(3, 15) * thrust, ForceMode2D.Force);
}
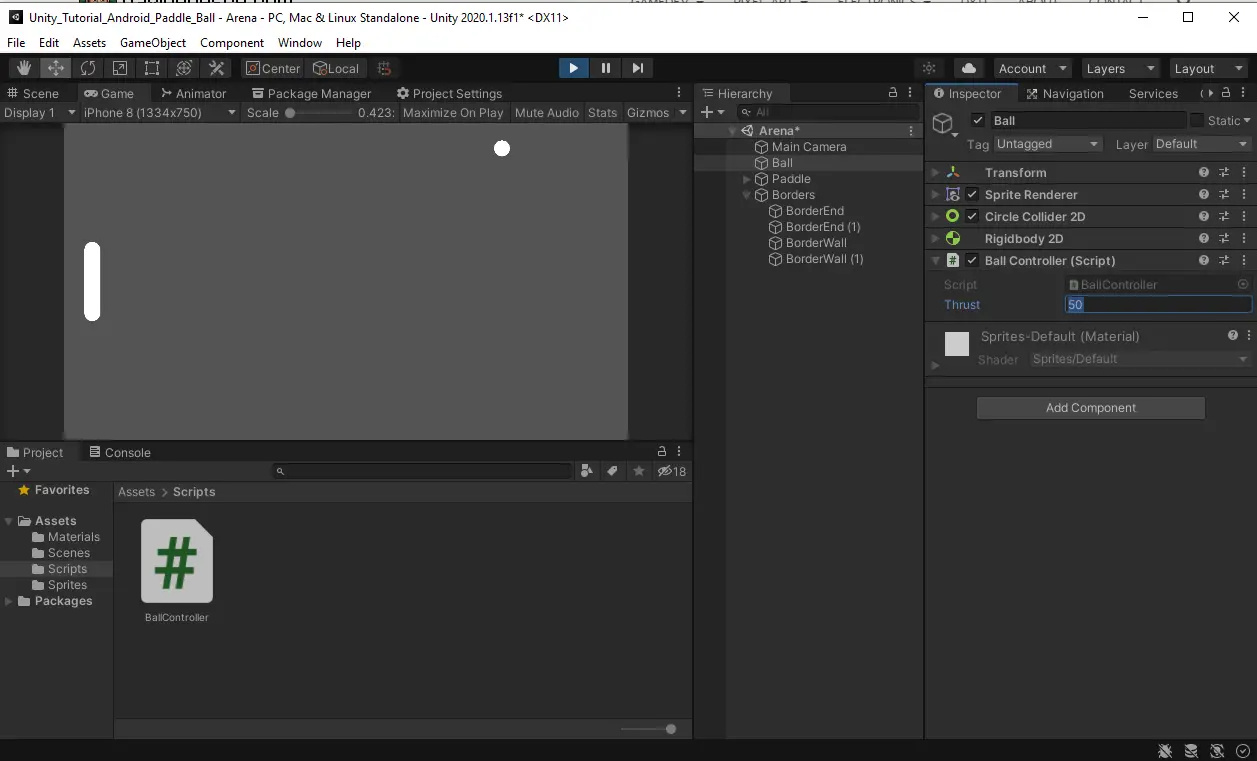
}Add script to Ball using Add Component or dragging it onto the object. With the values we used for our Vector2, set the thrust to 50. Hit play to see the Ball bounce around the arena and off the Paddle.
Create the Paddle Script
Next, we need to create a new script for our Paddle. Create the script using the same process as above but name it PaddleController. It is important to pick names that have relevance to their purpose because it helps locate errors and connect things logically, especially as a project grows.
Here, we also start by getting a reference to the Paddle’s RigidBody but this time we will store it in a variable because we will need to use it every time we move our Paddle. It is less expensive to store the variable than it is to get the component fresh each time we move.
We next call our Movement method inside of Update, which is another Unity Lifecycle method.
Movement handles all of our calculations for moving. First it gets a reference to the mouse position using screen to world point. Then, we get the current position of the Paddle. Then we lerp between the two Y positions, which is a way to provide smoothing between the two positions instead of appearing to jump from one point to the other. We then clamp the Y position to stay between -3.7 and 3.7 to make sure the Paddle stays on screen. At last, we set the position of the paddle to our new calculated position.
Here is the whole script.
using System.Collections;
using System.Collections.Generic;
using UnityEngine;
public class PaddleController : MonoBehaviour
{
private Rigidbody2D rigidBody;
void Start()
{
rigidBody= GetComponent<Rigidbody2D>();
}
void Update()
{
movement();
}
private void movement()
{
Vector2 mousePosition = Camera.main.ScreenToWorldPoint(Input.mousePosition);
Vector2 myPosition = rigidBody.position;
myPosition.y = Mathf.Lerp (myPosition.y, mousePosition.y, 10);
myPosition.y = Mathf.Clamp(myPosition.y, -3.7f, 3.7f);
rigidBody.position = myPosition;
}
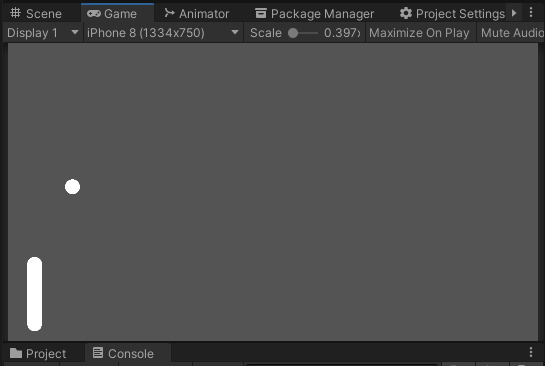
}Play the game and now the paddle will follow your mouse up and down on the Y axis but does not leave the screen. You can hit the ball around and bounce it off all of the walls. Even after creating multiple pong-like games, bouncing a ball around never gets old, especially when you are the one who created it.
Create the Second Player Paddle
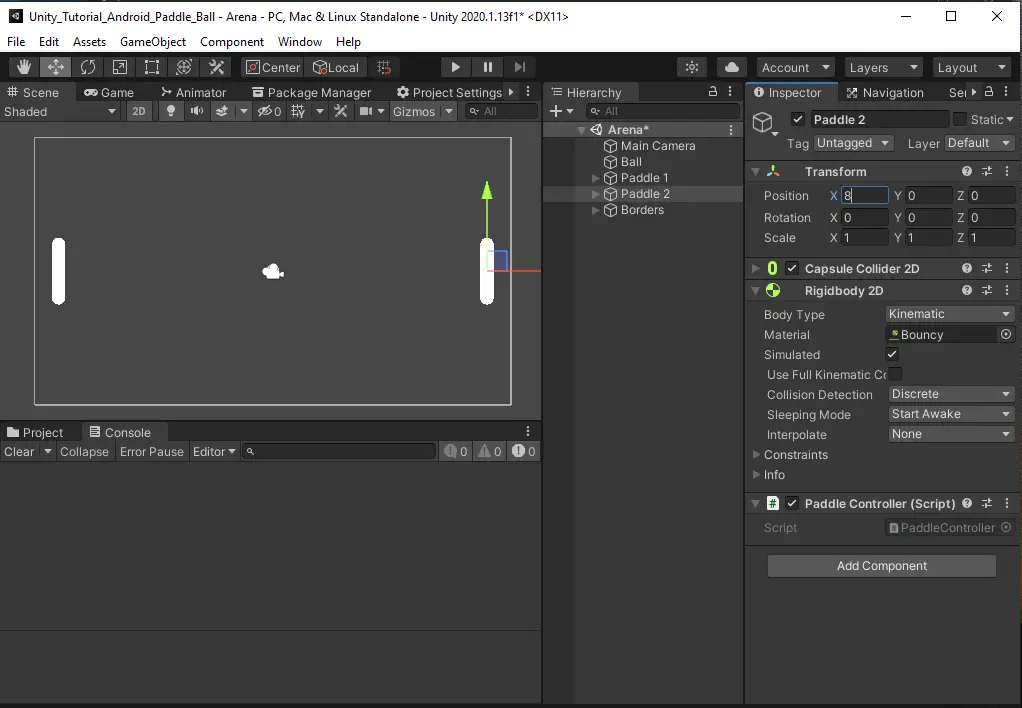
Next, it is time to create a second paddle. Since we have already done all the hard work on the first Paddle, we can just duplicate the paddle by pressing ctrl + D or right clicking and selecting duplicate. Rename the paddles to Paddle 1 and Paddle 2 to better track which is which. Set the X position of Paddle 2 to 8 to move it to the right side of the screen.
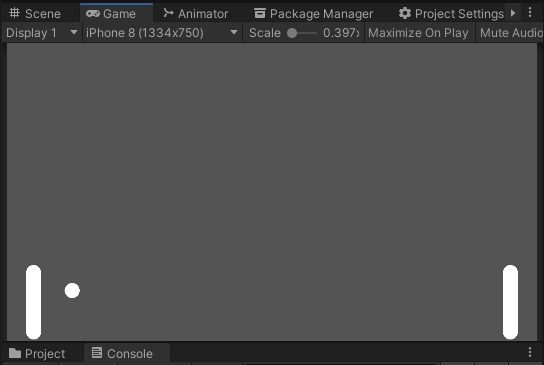
Now, we have something that resembles a game. Play the game and now both paddles will follow the mouse on the Y axis.
Scoring Display
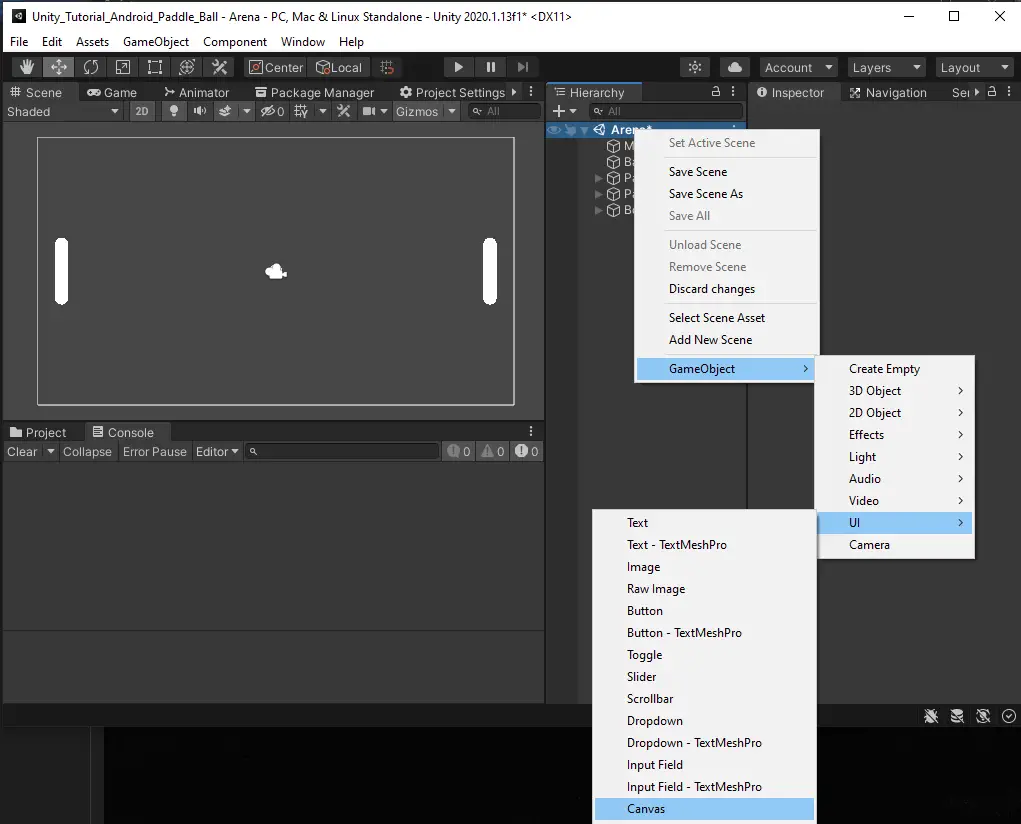
Since we can hit the ball back and forth, let us start keeping track of our score. Create a UI Canvas by right clicking the Arena in the hierarchy and selecting GameObject > UI > Canvas. This will hold all of our UI objects like scores and buttons.
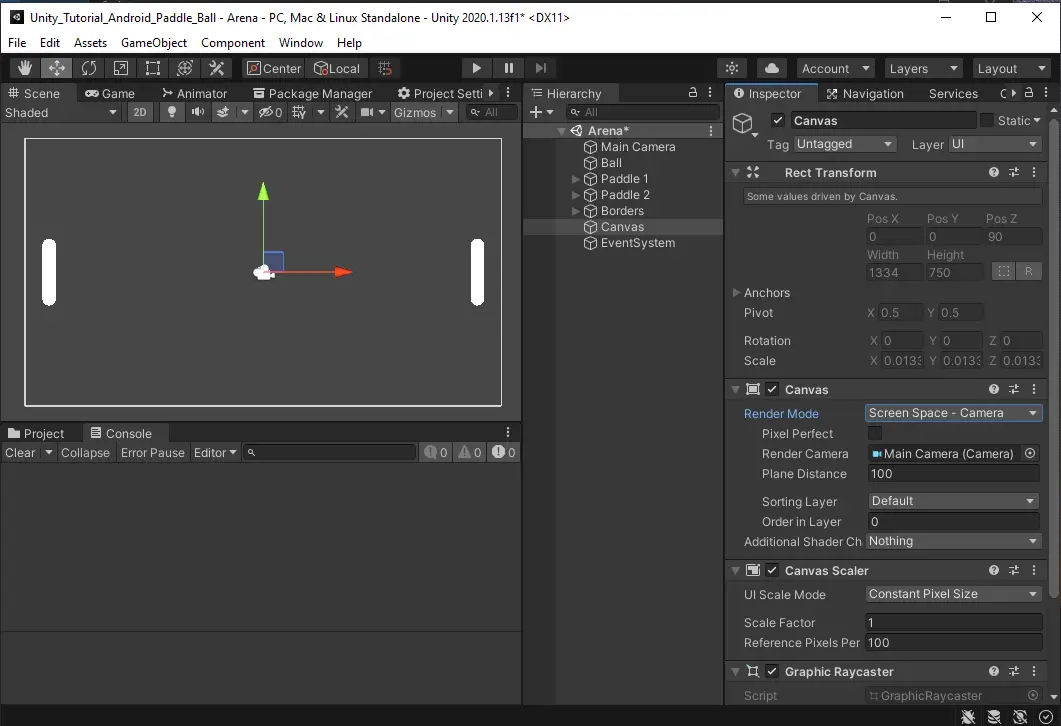
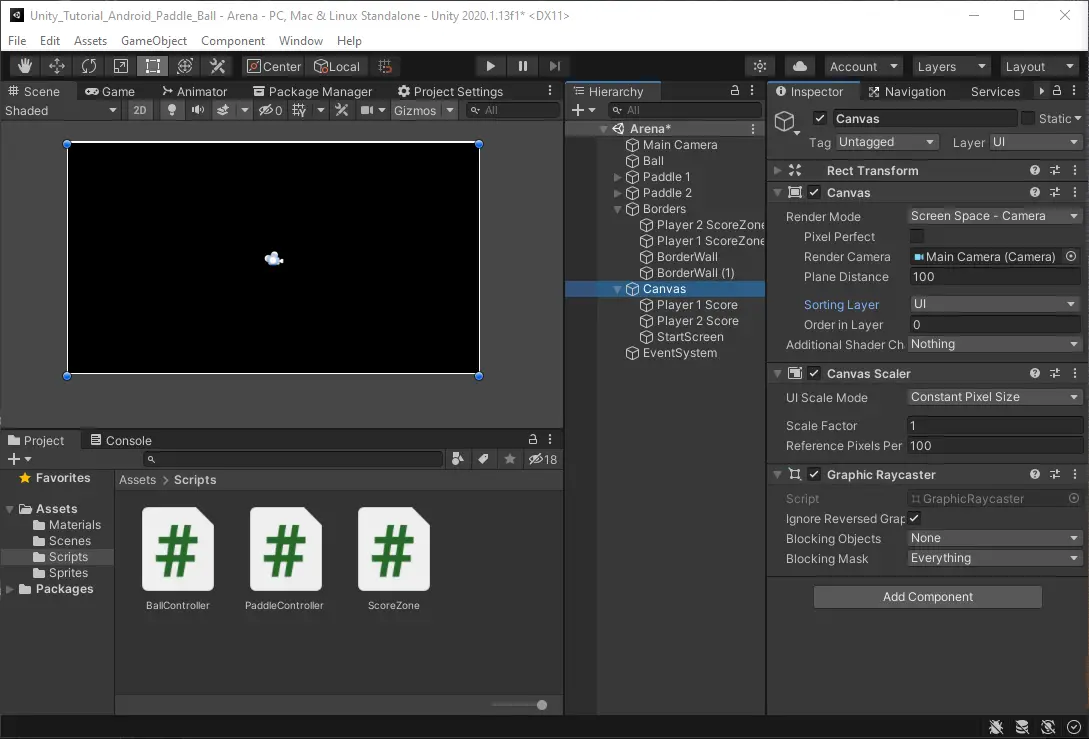
Select the Canvas in the Hierarchy and in the Inspector set the render mode to Screen Space – Camera. Drag the Main Camera into the Render Camera field to define the camera the UI will stick to.
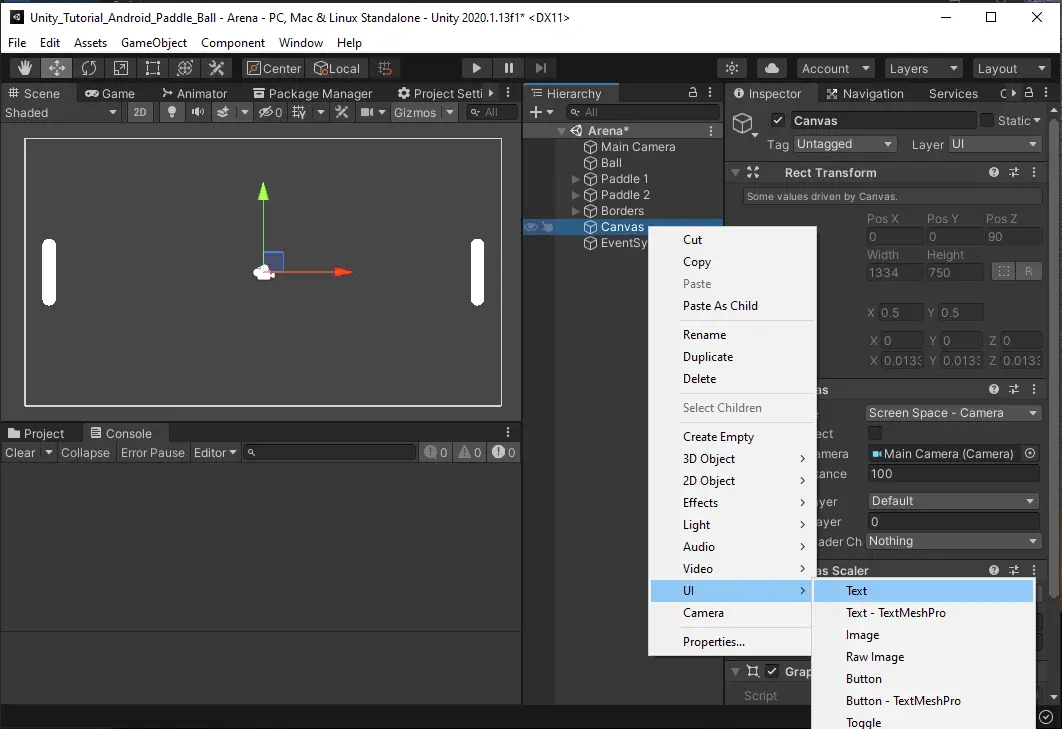
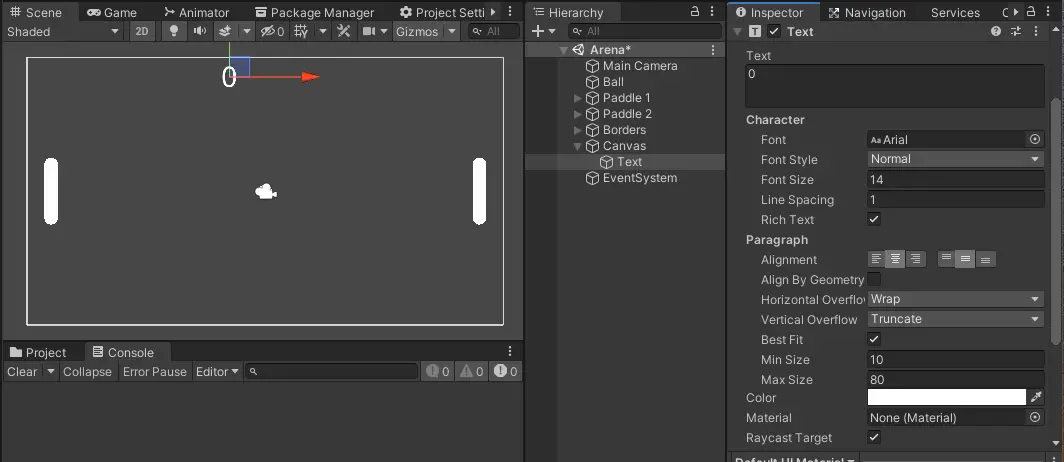
Next, create a text object to hold the score. Do this by right clicking the Canvas and selecting UI > Text.
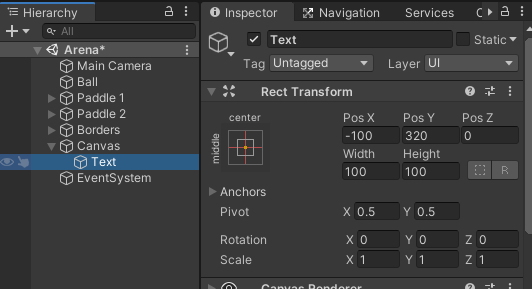
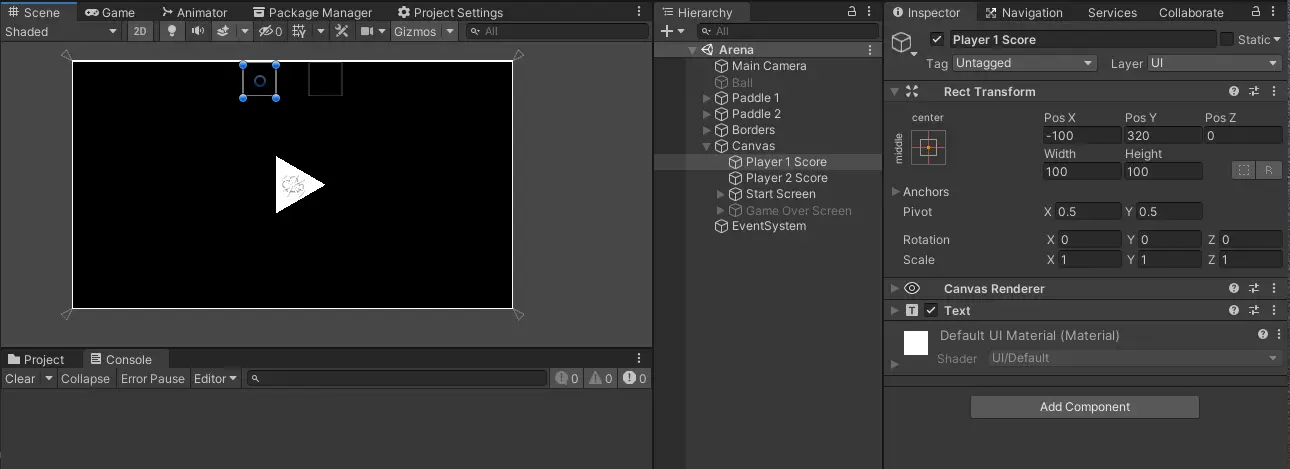
We want the score to sit at the top of the screen so, with the Text selected, set the X position to -100 and the Y position to 320 in the inspector. Also, set the height and width to 100.
We want to display a numeric score here so change the text in the text component to 0. To help keep the text the right size on screens with different resolutions, check the box for Best Fit, which will make the text size responsive. Set the max size to 80.
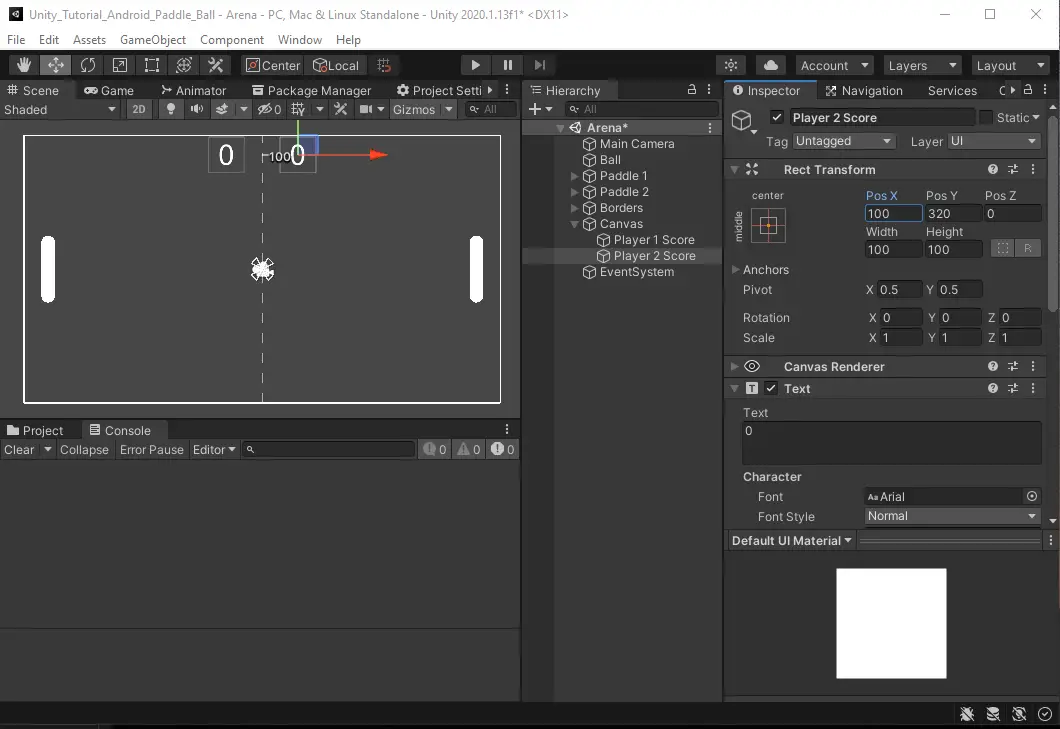
We need scores for player 1 and player 2, so duplicate the Text object and rename it to Player 1 Score and Player 2 Score. Change Player 2 Score X position to 100 to move it to the other side of the center line.
Create a ScoreZone script
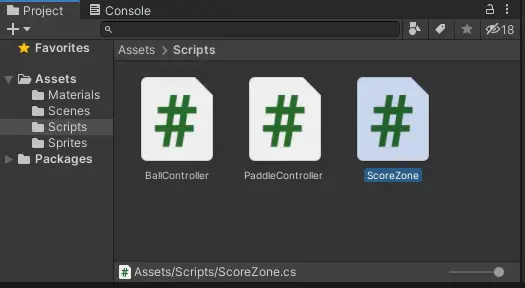
It is time to create a script to keep track of our scores and update the UI score text. Inside of our scripts folder create a script called ScoreZone.
We will need to import UnityEngine.UI to access the Text field in our script. Also, we will need to store the score text in a field to manipulate later. Then we need an integer to store the score.
In our Start() method we make sure that the score is set to 0 when the game starts.
Next, we detect when there is a collision with our collider and if so, we increment the score by 1 and update the UI text display.
Here is the full script.
using System.Collections;
using System.Collections.Generic;
using UnityEngine;
using UnityEngine.UI;
public class ScoreZone : MonoBehaviour
{
[SerializeField]
private Text scoreText;
private int score;
void Start()
{
score = 0;
}
void OnCollisionEnter2D(Collision2D col)
{
score++;
scoreText.text = score.ToString();
}
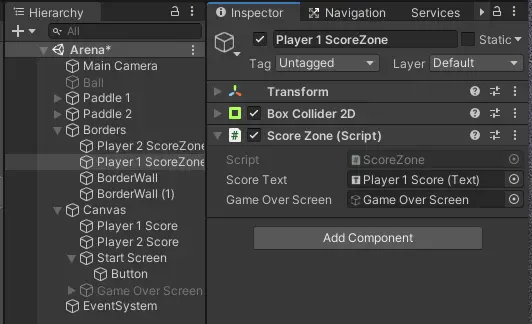
}Back in the editor, rename the left BorderEnd to Player 2 ScoreZone and the right BorderEnd to Player 1 ScoreZone to better track which is which. Add the ScoreZone script to each of the ScoreZones. Now assign the corresponding Player Score text to the Score Text Field, Player 1 Score to Player 1 ScoreZone and Player 2 Score to Player 2 ScoreZone.

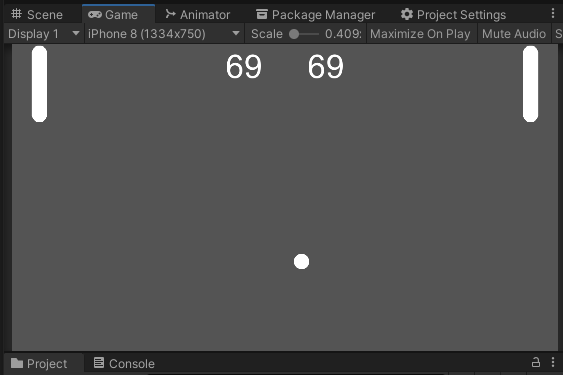
Hit Play and now when the ball hits the wall behind a player the opposing player gets a point and the score text is updated.
Resetting the Ball with Random Direction
Up to this point, when the ball hits it just bounces off, but we want the ball to reset after scoring. So, let us update the BallController script to handle our new feature.
Since we are now using our rigidbody more often let us store a reference to it in a field. Once again, we will set that reference when the game starts.
Also, we have added a random direction variable, which evaluates to -1 or 1, to make the ball spawn with the options of up or down X velocity and left or right Y velocity. This adds some variability to the game, so the same player does not always get the ball first.
ResetBall is a public method that does just that. It sets the Ball to the center of the game world and reduces the velocity to 0. Then, it adds force to the ball the same way we do when we start the game, now with a random direction.
using System.Collections;
using System.Collections.Generic;
using UnityEngine;

public class BallController : MonoBehaviour
{
    [SerializeField]
    private int thrust;

    private Rigidbody2D rb;
    void Start()
    {
        rb = GetComponent<Rigidbody2D>();
        float randomDirection =  Random.Range(0,2)*2-1;
        rb.AddForce(new Vector2(3 * randomDirection, 15 * randomDirection) * thrust, ForceMode2D.Force);
    }

    public void ResetBall()
    {
        transform.position = Vector2.zero;
        rb.velocity = Vector2.zero;
        float randomDirection =  Random.Range(0,2)*2-1;
        rb.AddForce(new Vector2(3 * randomDirection, 15 * randomDirection) * thrust, ForceMode2D.Force);
    }
}
We also need to update our ScoreZone to handle when the ball hits a ScoreZone. Now when there is a collision, we check to make sure it was the ball, even though we know our paddles would not hit it, then we update the score and call ResetBall on the object that collided, the Ball.
Update the ScoreZone script to the following.
using System.Collections;
using System.Collections.Generic;
using UnityEngine;
using UnityEngine.UI;

public class ScoreZone : MonoBehaviour
{
    [SerializeField]
    private Text scoreText;
    private int score;

    void Start()
    {
        score = 0;
    }

    void OnCollisionEnter2D(Collision2D col)
    {
        if(col.gameObject.GetComponent<BallController>() != null)
        {
            score++;
            scoreText.text = score.ToString();
            col.gameObject.GetComponent<BallController>().ResetBall();
        }
    }
}
Game Start Screen
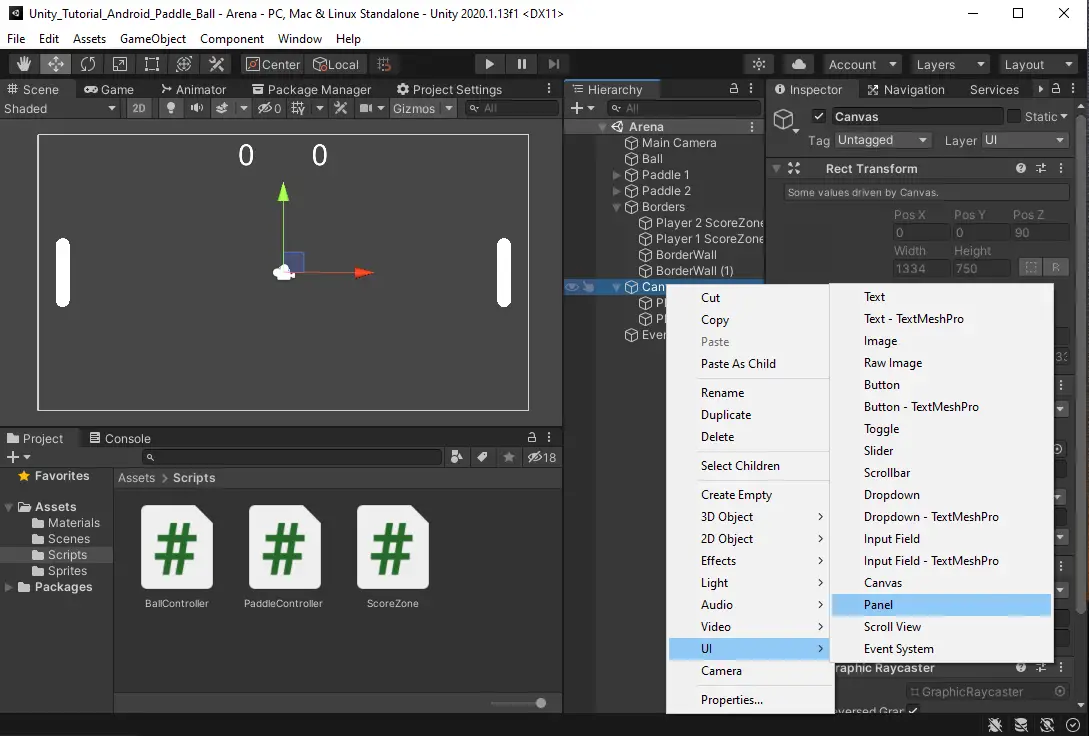
With our scoring system in place, it only feels right to add some type of start screen so that the match does not start as soon as the game loads. To do this we will start by adding a UI Panel. Right click on the Canvas and select UI > Panel.
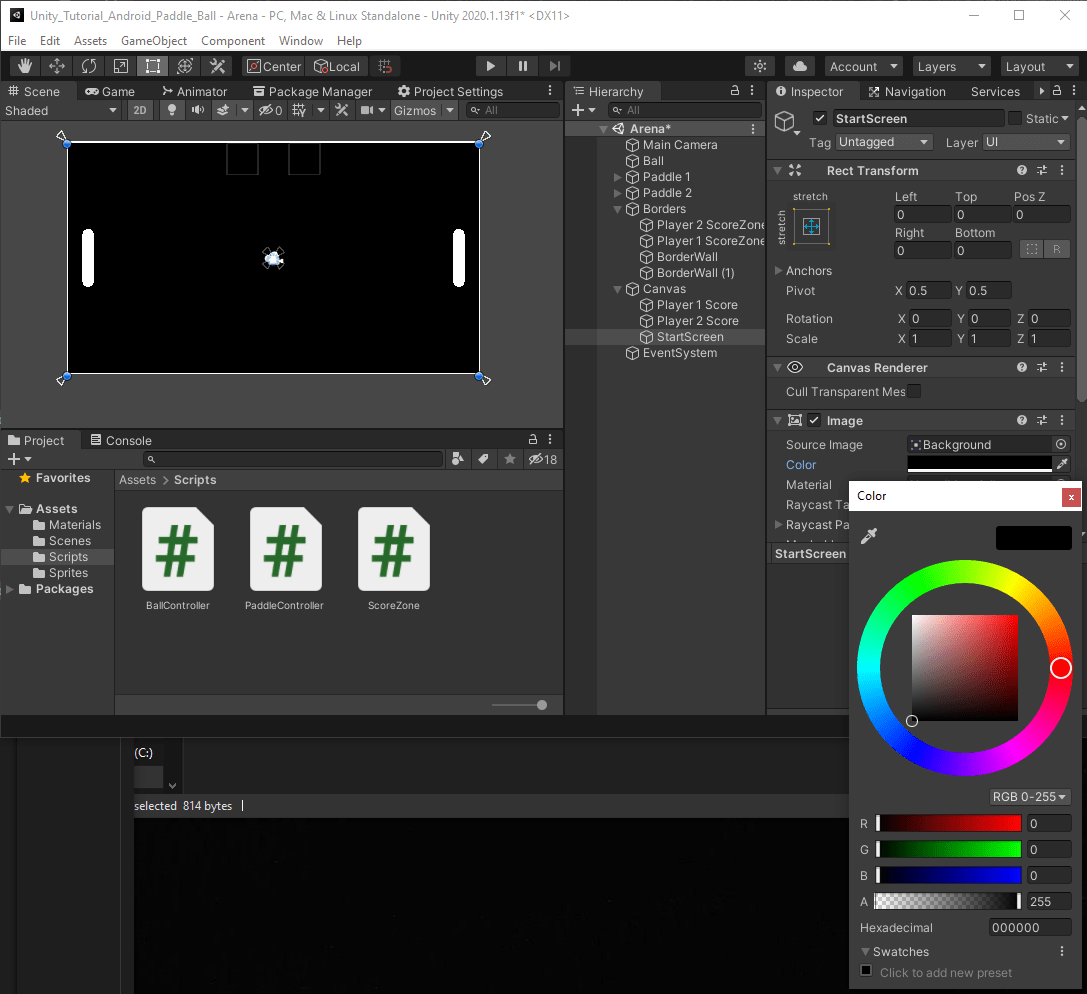
Rename the panel to StartScreen and set the Image color to black and the opacity, A value, to 255.
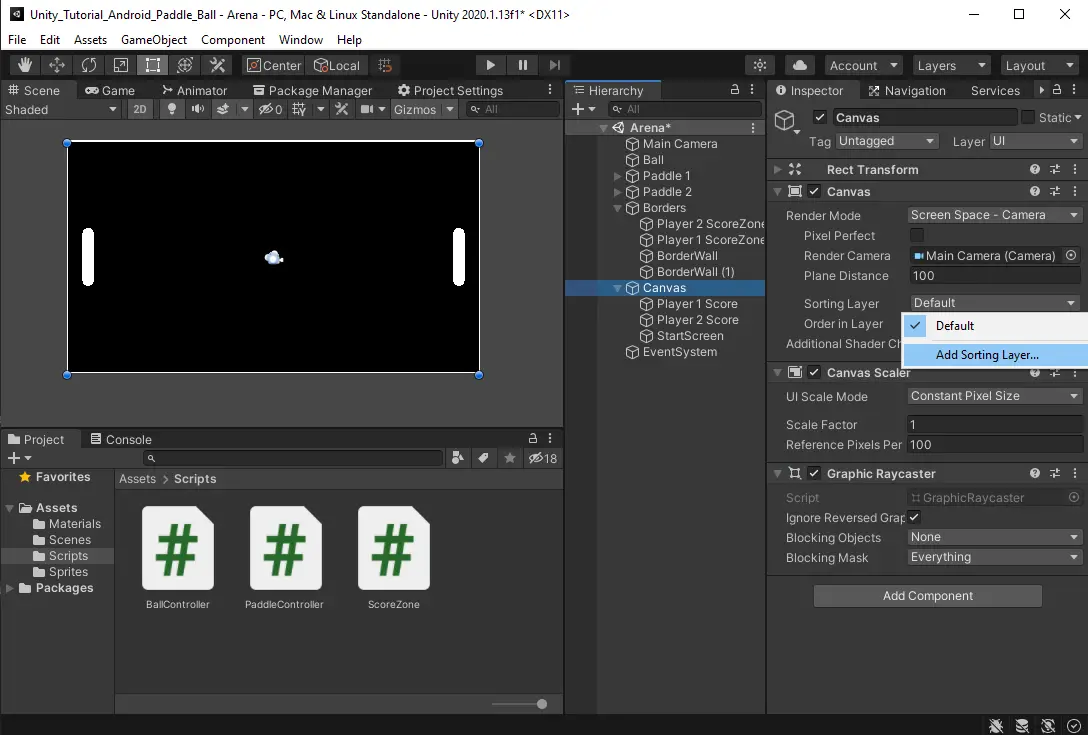
Now that our panel appears black something is off; the paddles and ball are sitting on top of the canvas. To fix this, we will need to add a sorting layer. Select the canvas and inside the canvas component select the sorting layer dropdown and then add sorting layer.
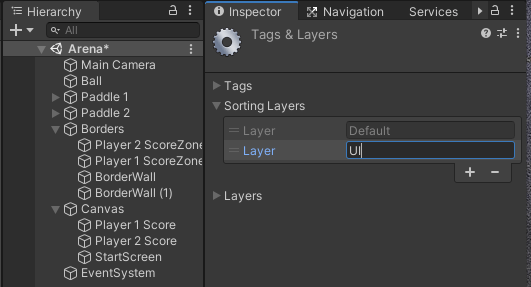
This will open up the Tags & Layers properties. Click the plus sign and change the new layer name to UI.
Now, we can assign our new layer. Go back to the canvas and assign the new UI layer to the Sorting Layer field. The panel now appears above the sprites for the ball and paddles and the screen is black.
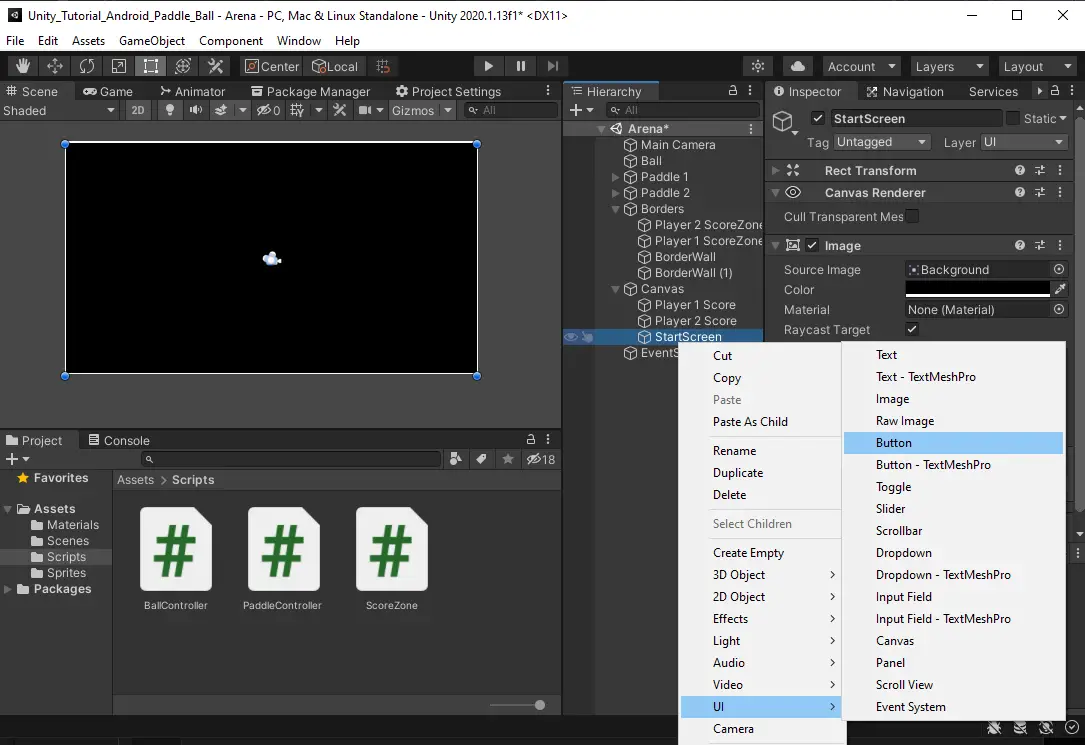
The player needs a way to start the game and a button is the perfect way to do this. Add a button UI GameObject to the Start Screen by right clicking the Start Screen and selecting UI > Button.
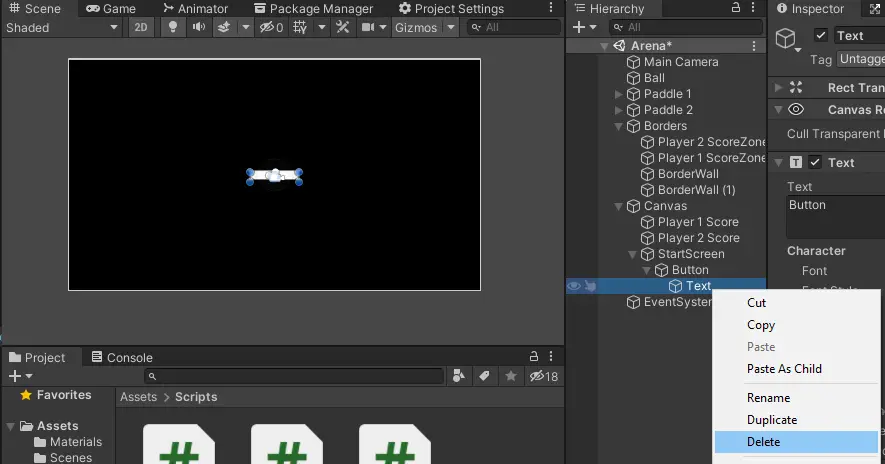
This adds a button that appears wide with a child text object by default. Expand the button and delete the text object, as we do not need it.
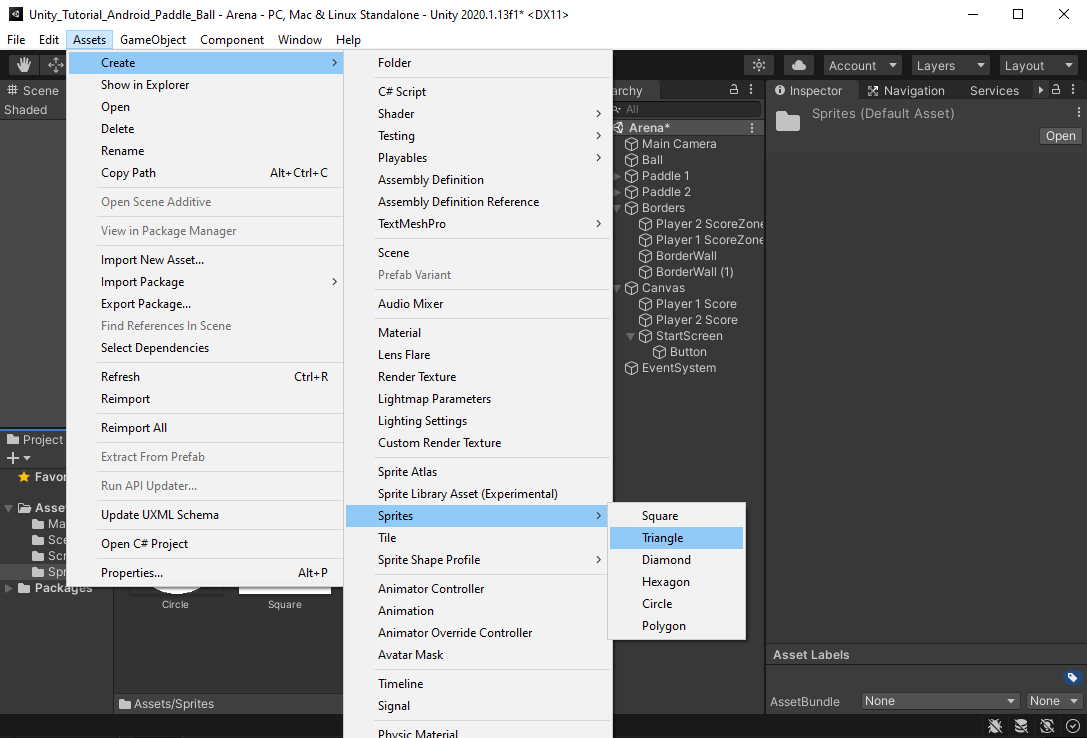
What better way to signal to the player that they need to click to play the game than making the button the play symbol. Create a triangle sprite inside of the sprite folder using the same method as the circle and square from before.
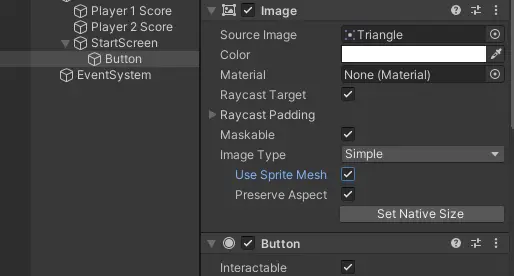
To add the triangle sprite to the button drag it into the Source Image field. Select Use Sprite Mesh and Preserve Aspect to have the button form to the triangle shape without warping it.
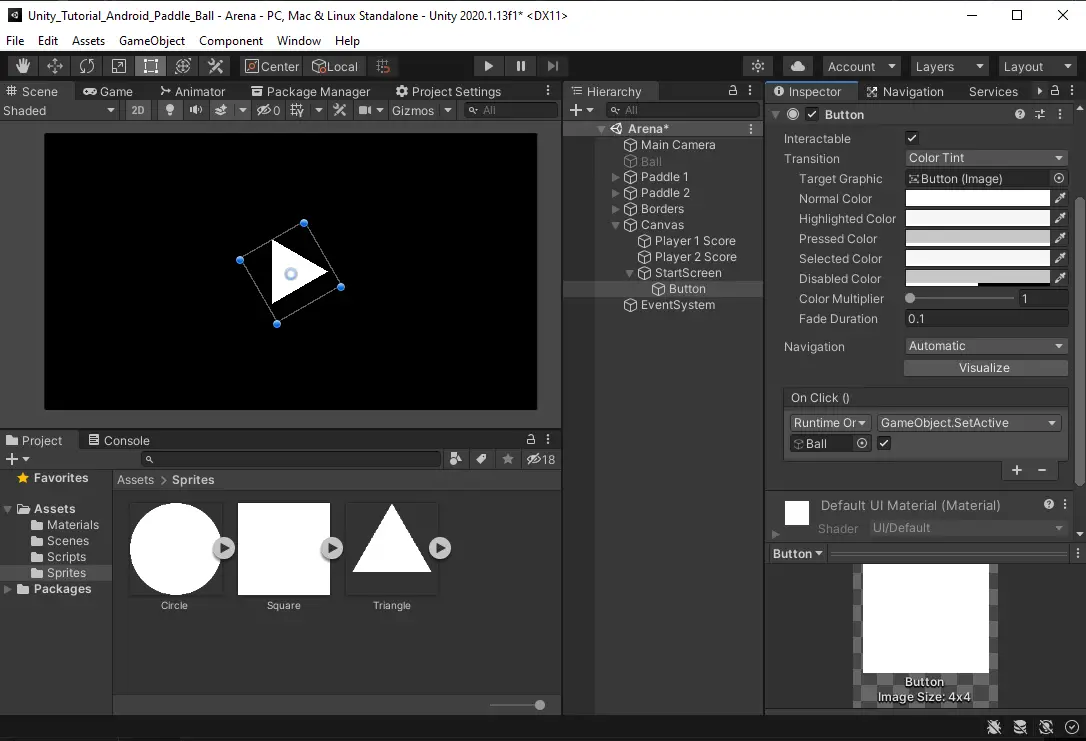
To make the Triangle more visible, set the height and width to 100. Now, set the Z rotation to 30 to make it appear more like a play symbol. We can make the button bigger by setting the X and Y scale to 2.

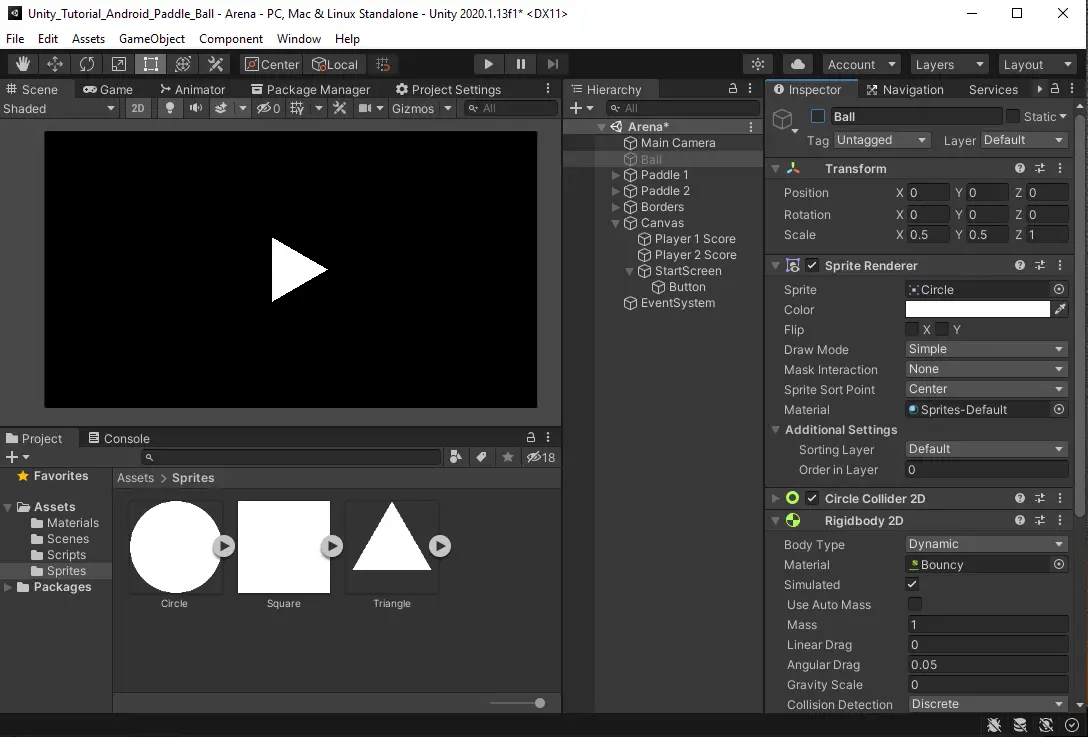
Even though we cannot see it the ball will still start moving when the game is loaded. To stop this, set the Ball to disabled by deselecting the checkbox in the inspector.
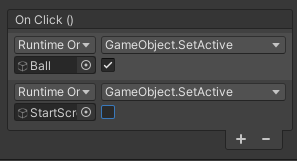
We can now have our play button enable the ball and disable the Start Screen panel when it is clicked. Back in the Start Screen Button, click the plus icon inside the On Click() methods for the button component. Drag the Ball into the object field. Click the dropdown and select GameObject > SetActive. Select the checkbox to set the active status to true. This will enable the Ball when it is clicked.
Next, add another method to the button but this time drag in the Start Screen. Click the dropdown and select the GameObject SetActive method once more but this time leave the checkbox unchecked.

You should only have the following two methods in the On Click() for the button.
Game Over Screen
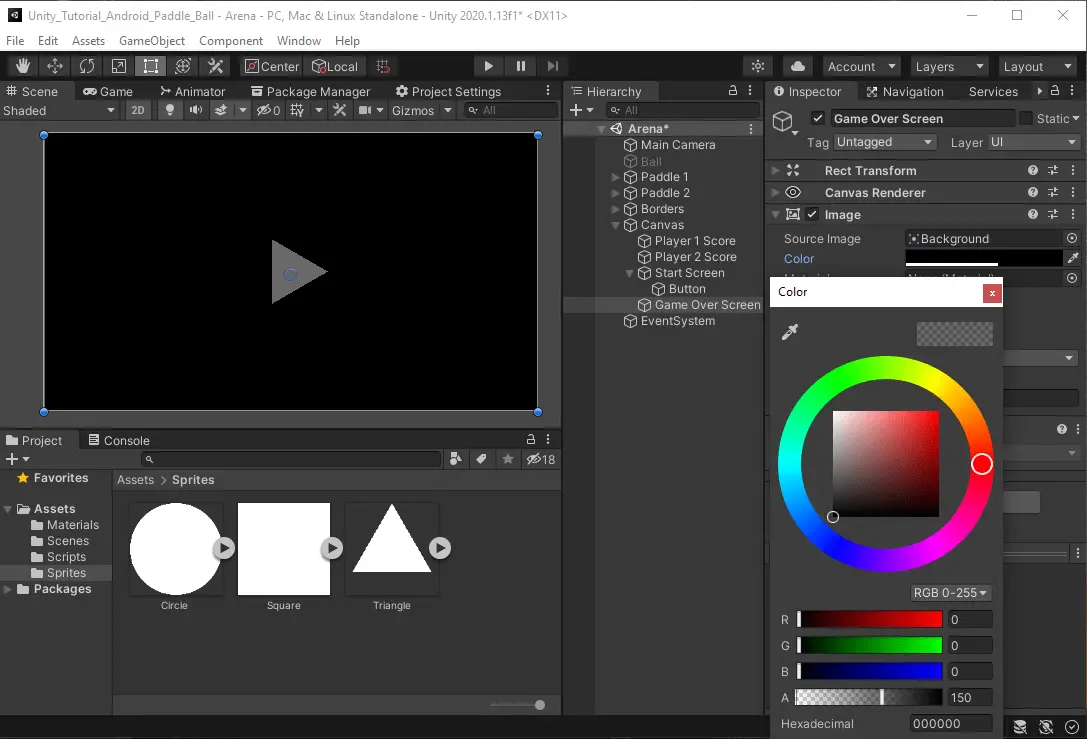
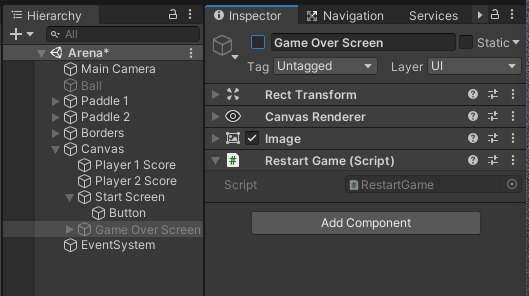
In addition to the Start Screen we will also need a Game Over Screen. Add a new Panel to the canvas and name it Game Over Screen. Set the Color to black and the opacity to 150 that way you can partially see through it. Do not worry this will make sense shortly.
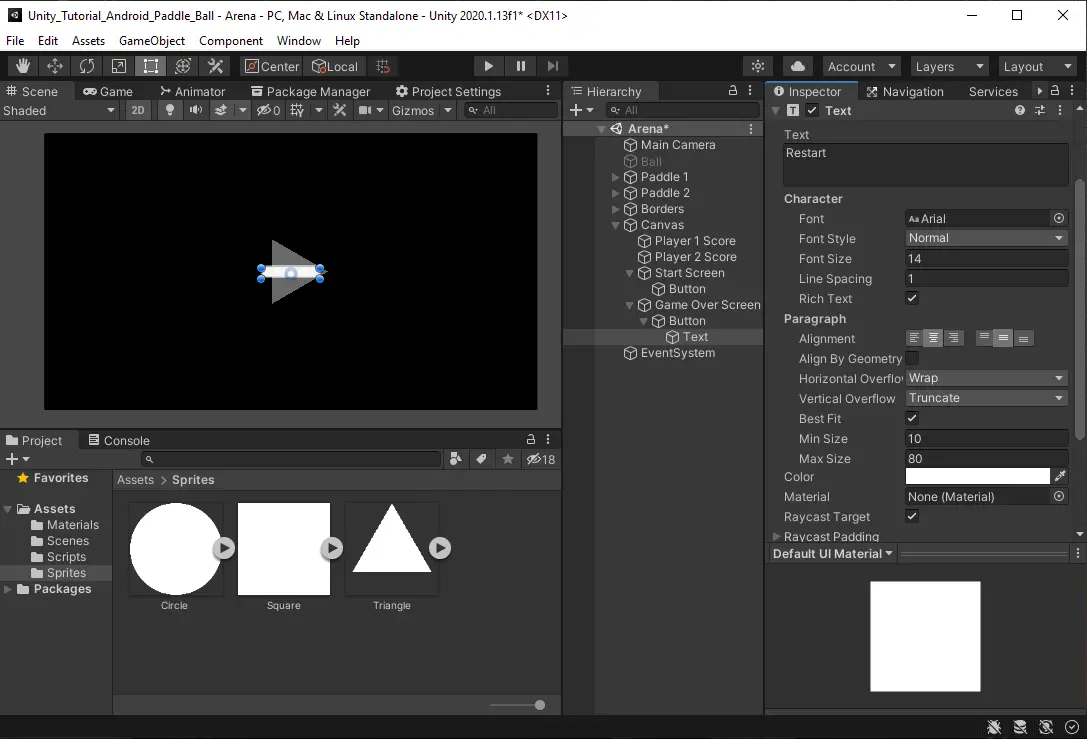
As before, add a UI Button but this time set the text to Restart. In the Text of the button, select Best Fit and set the max size to 80 and change the Color to white to make the text visible.
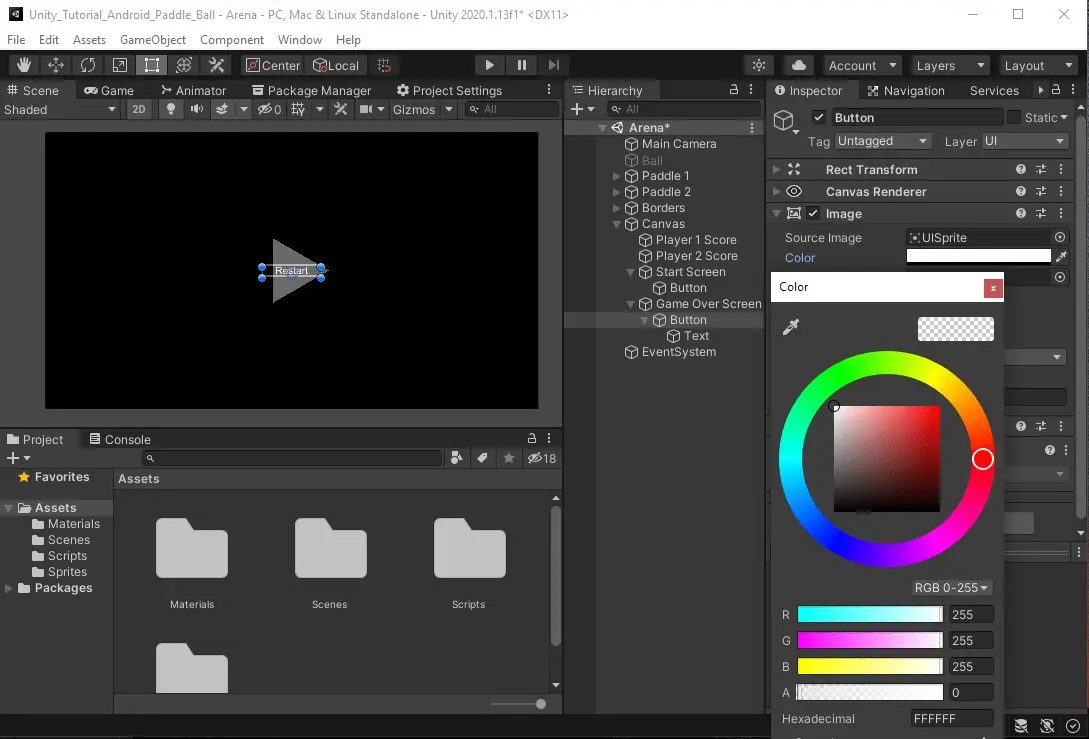
To make the button show up as only text we will need to hide the white background. With the Button selected, go to the image component and set the color transparency to 0.
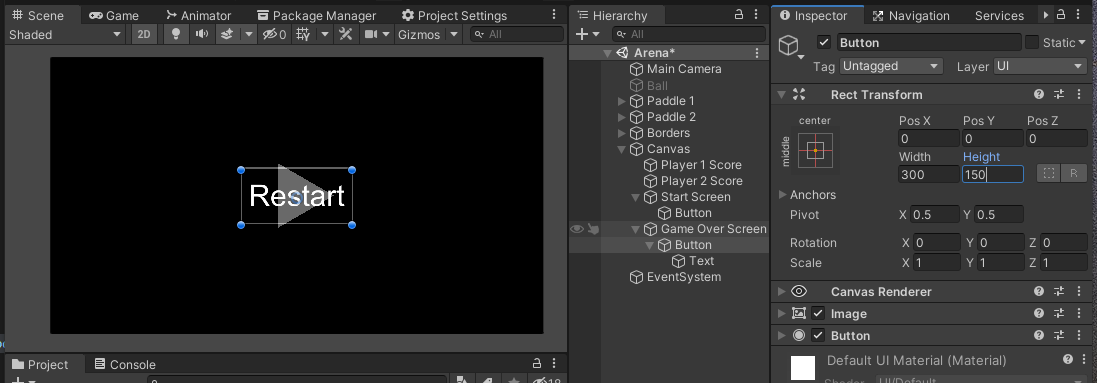
This looks good, but the text is a little too small despite setting Best Fit. This is because the size of the button is too small, and the text will not escape the dimensions of the button. We just need a bigger button. Set the button width to 300 and the button height to 150 and now the text is more legible.
Create a Restart Game Script
Additionally, we need a method to call when clicking the restart button so that the game will restart. To do this, we will need to create a custom method. Create a new script in the scripts folder named RestartGame.
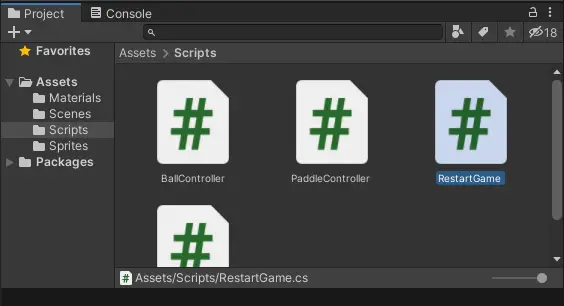
This script will have only one method for restarting the game and will use Unity’s SceneManagement to call load scene on the current scene to reload it.
using System.Collections;
using System.Collections.Generic;
using UnityEngine;
using UnityEngine.SceneManagement;
public class RestartGame : MonoBehaviour
{
public void RestartTheGame()
{
SceneManager.LoadScene(SceneManager.GetActiveScene().buildIndex);
}
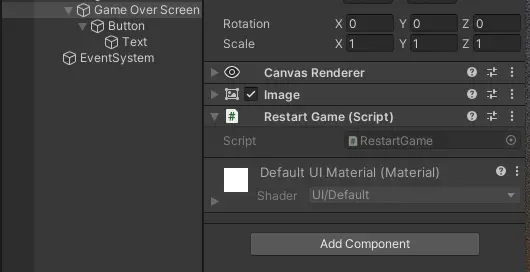
}To call the method it must be attached to a GameObject. Add the RestartGame Script to the Game Over Screen panel.
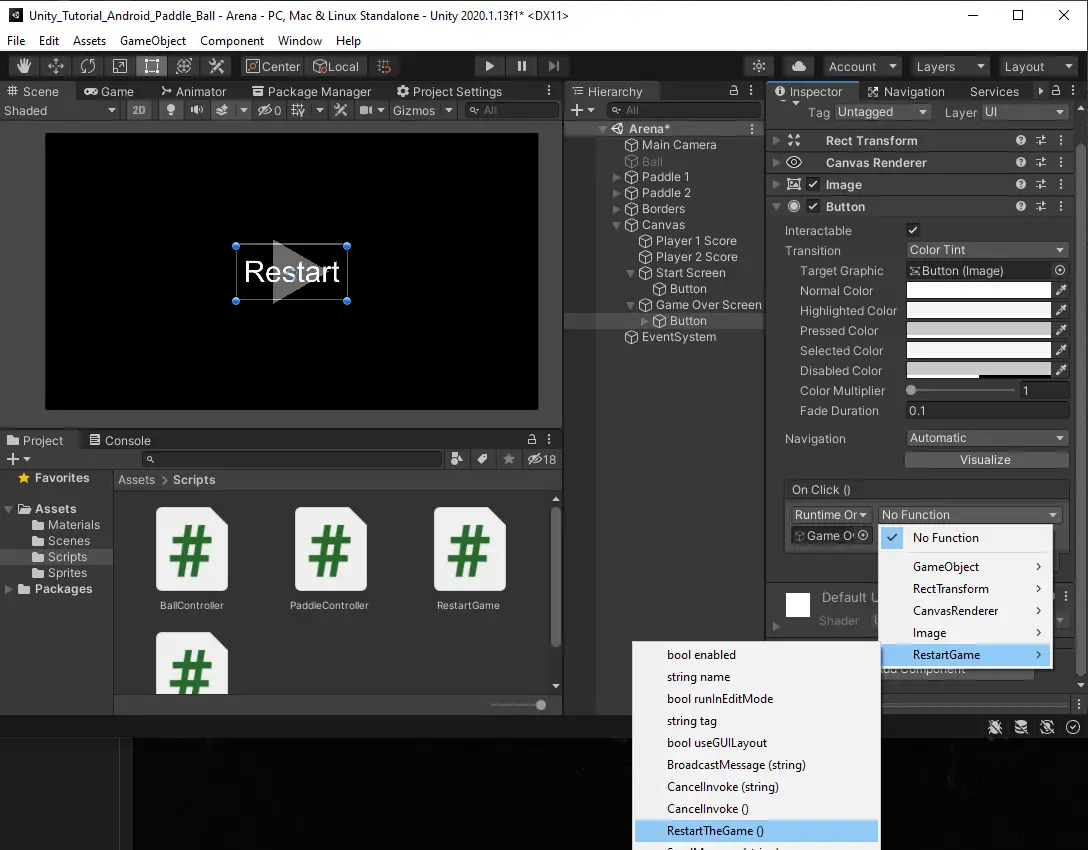
Now, on our restart Button we can add our new method to the On Click(). Drag in the reference to the Game Over Screen and select RestartGame > RestartTheGame.
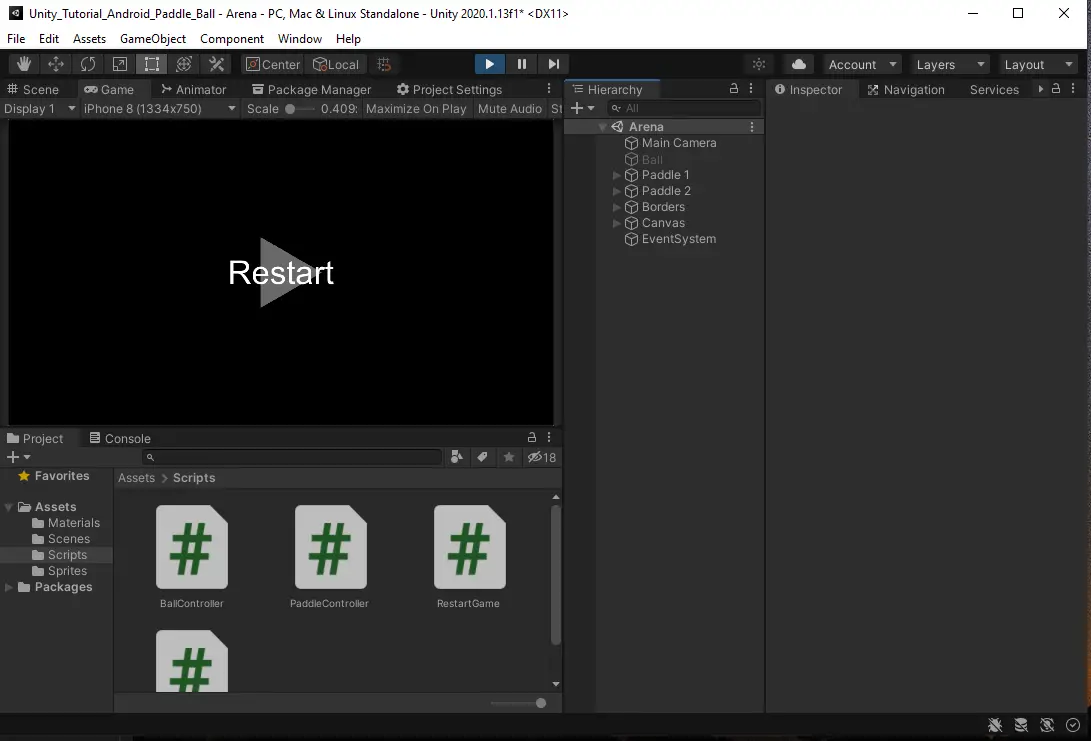
Click play and press the restart button and the scene will reload but the Game Over Screen will still be visible.
Game Over Conditions
Consequently, we now need a way to specify when the Game Over Panel should appear or disappear. Disable the Game Over Screen by deselecting the checkbox in the inspector. This will tell the game when the scene is loaded, start with this panel disabled.
Since we are tracking the scores in the ScoreZone script it is the best place to determine when the game is over. Update the ScoreZone script to check to see if the score is equal to or above 7 and if so, disable the Ball and enable the Game Over Screen.
Here is what the script should look like now.
using System.Collections;
using System.Collections.Generic;
using UnityEngine;
using UnityEngine.UI;

public class ScoreZone : MonoBehaviour
{
    [SerializeField]
    private Text scoreText;
    private int score;

    [SerializeField]
    private GameObject GameOverScreen;

    void Start()
    {
        score = 0;
    }

    void OnCollisionEnter2D(Collision2D col)
    {
        if(col.gameObject.GetComponent<BallController>() != null)
        {
            score++;
            scoreText.text = score.ToString();
            col.gameObject.GetComponent<BallController>().ResetBall();
        }

        if(score >= 7)
        {
            col.gameObject.SetActive(false);
            GameOverScreen.SetActive(true);
        }
    }
}
Back in the editor, Drag a reference to the Game Over Screen into the GameOverScreen field on both Player 1 ScoreZone and Player 2 ScoreZone.
Play the game and you will see that we now have a fully functional game loop. When a player reaches 7 the ball will disappear, and we see the button to restart the game. Pressing the Restart button will reload the scene and start the game over. Rinse and repeat.
Anchor UI Elements
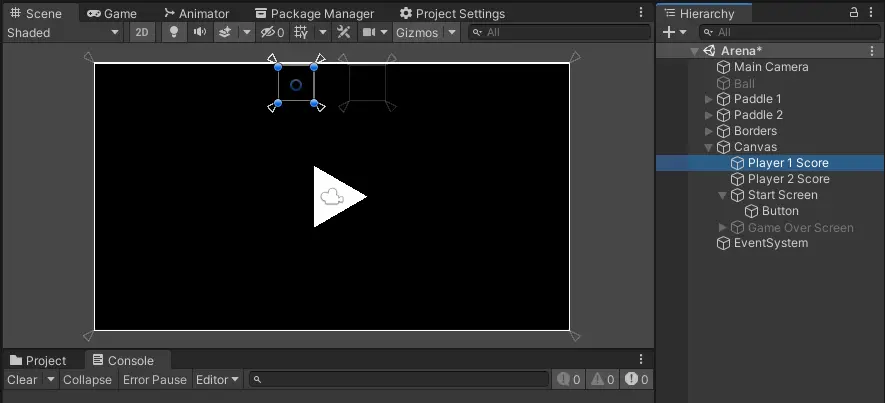
Now we have a small problem. When the screen resolution changes the UI elements may shift around. We can solve this issue by anchoring the objects in the canvas. Inside of the Canvas select each UI element and anchor the object in place using the triangle anchors in each corner. The anchors usually start in the center of the screen. If they are hard to see because of the play button, you can disable the Start Screen, just remember to enable it before moving on.
We have four UI elements to anchor. Move the anchors to the corners of the Player 1 Score, Player 2 Score, the Start Screen Button, and the Game Over Screen Button.
Building for Android
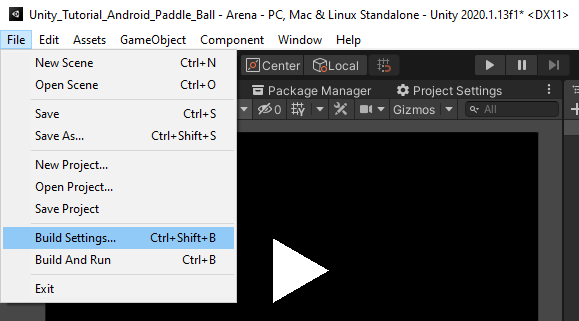
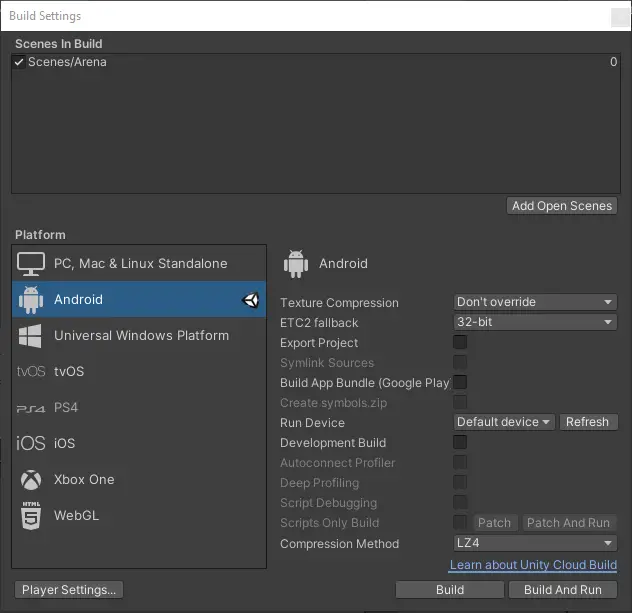
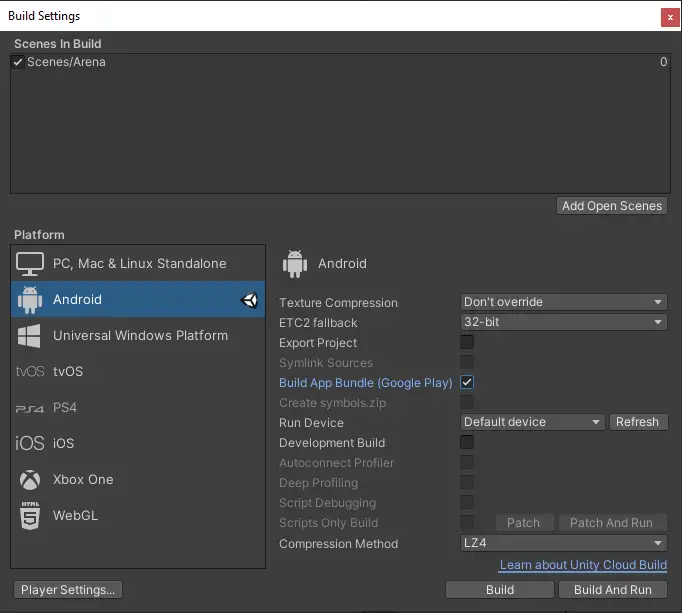
Up to this point we have been building our game and not focusing on anything Android related from here on out we will focus on getting our game running on the mobile platform. Open up the build settings by going to the Menu Bar and selecting File > Build Settings.
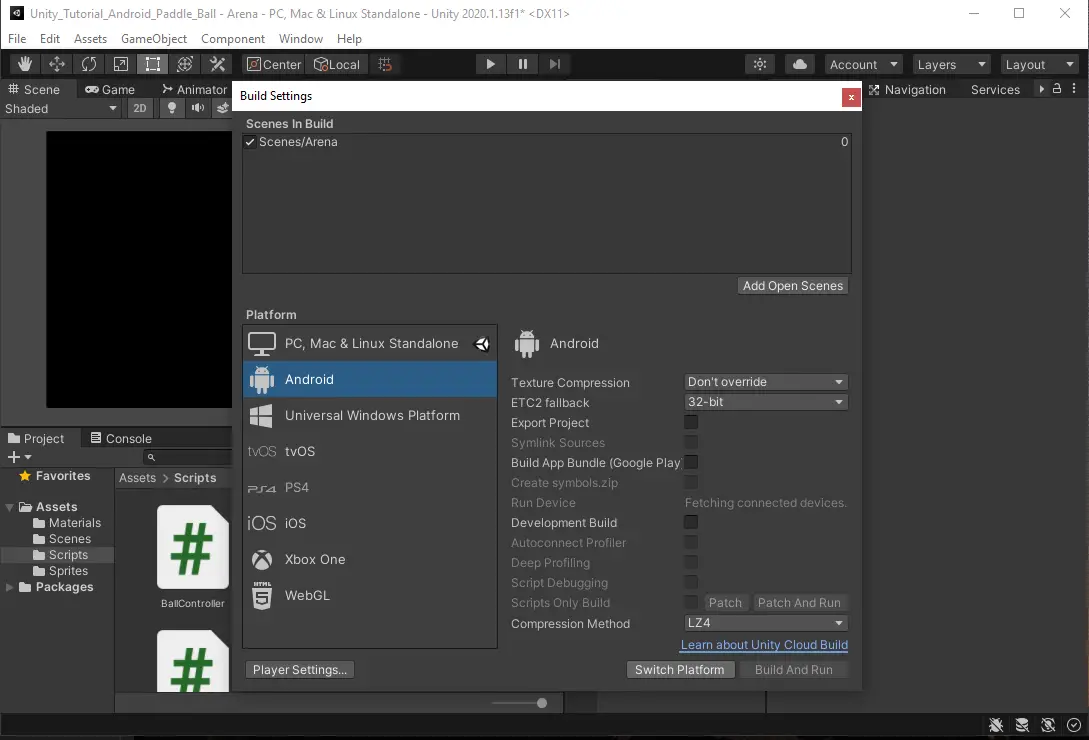
Select Android under Platforms and click Switch Platform in the lower right-hand corner. The editor will now load in everything you need to build for Android.
Testing on Android in Unity
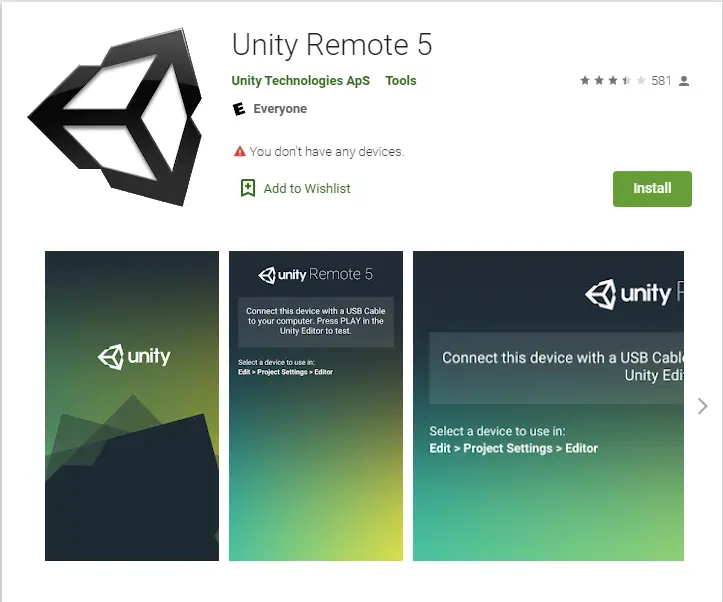
This step is optional. If you do not have an Android device, you can skip to the next section to implement touch controls. Download Unity Remote 5 on your Android device. Once installed open the app and plug your phone into your computer with a USB cable.
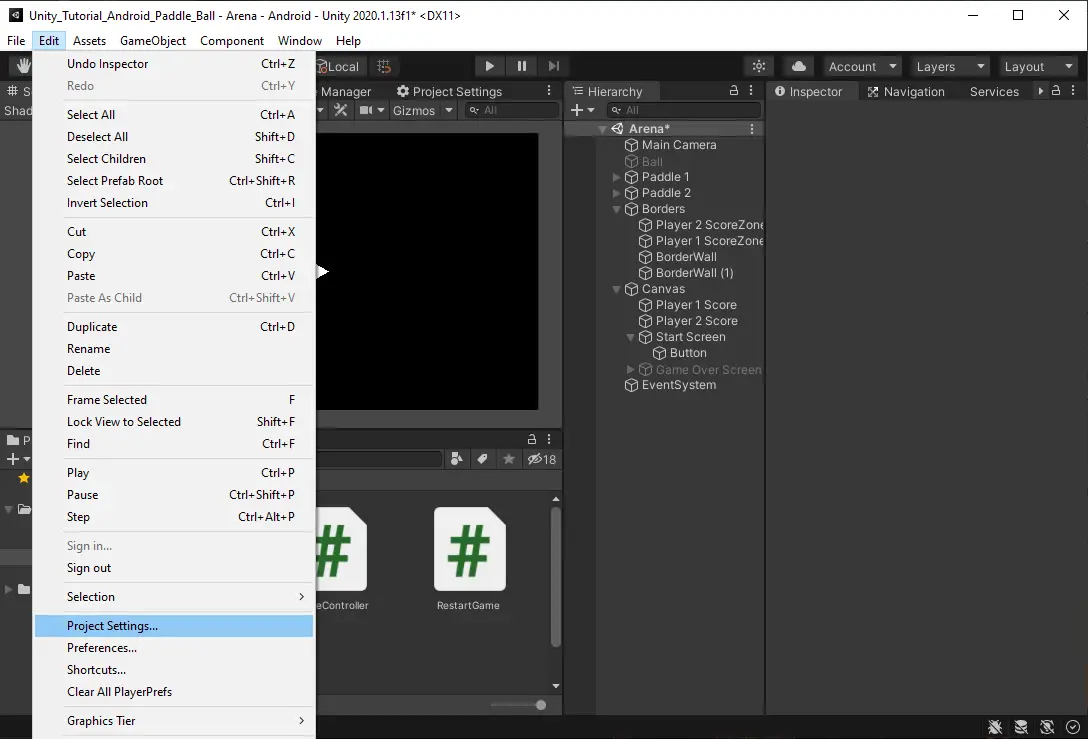
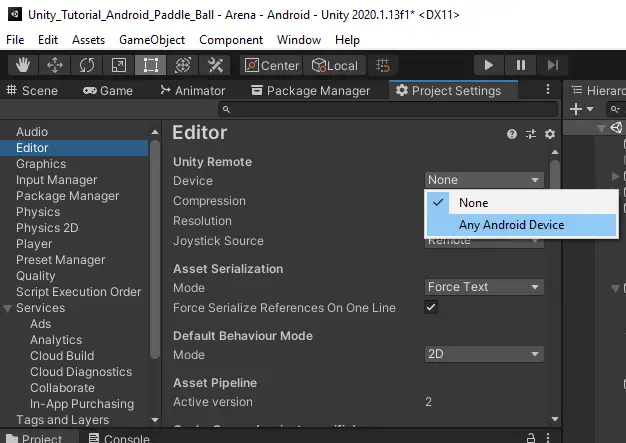
Inside of Unity go to project settings by selecting Edit > Project Settings from the menu bar.
In the Project Settings select Editor and change the Unity Remote Device settings to Any Android Device.
Now when you press play you can move the paddles around on the screen with your finger, but they are still moving together as one. Time to add some multiplayer controls.
Add Multiplayer Touch Controls
The controls are roughly the same, but we need to identify which paddle belongs to which player. So, we check each input, using Unity’s Input.touches, to see if the touch is 2 or less X positions away from the paddle. If it is then it assigns that touch to the paddle. This way each paddle can check for its own touch input.
Here is the updated PaddleController.
using System.Collections;
using System.Collections.Generic;
using UnityEngine;

public class PaddleController : MonoBehaviour
{
    private Rigidbody2D rigidBody;

    void Start()
    {
        rigidBody= GetComponent<Rigidbody2D>();
    }
    void Update()
    {
        movement();
    }

    private void movement()
    {
        foreach (Touch touch in Input.touches)
        {
            Vector3 touchPos =  Camera.main.ScreenToWorldPoint (touch.position);
            Vector2 myPosition = gameObject.GetComponent<Rigidbody2D> ().position;
            if(Mathf.Abs(touchPos.x - myPosition.x) <= 2)
            {
                myPosition.y = Mathf.Lerp (myPosition.y, touchPos.y, 10);
                myPosition.y = Mathf.Clamp(myPosition.y, -3.7f, 3.7f);
                gameObject.GetComponent<Rigidbody2D> ().position  = myPosition;
            }
        }
    }
}
Play the game and, if using the Unity Remote app on Android, you can now independently move the paddles.
Update the Android APK Meta information
Before we build our APK to install on Android we want to update some of the meta data. Open the project settings once again. Select Player and here you can set the company name, name of the app, version, add custom app icons, etc. We are just going to set our Company Name, MonkeyKidGC.

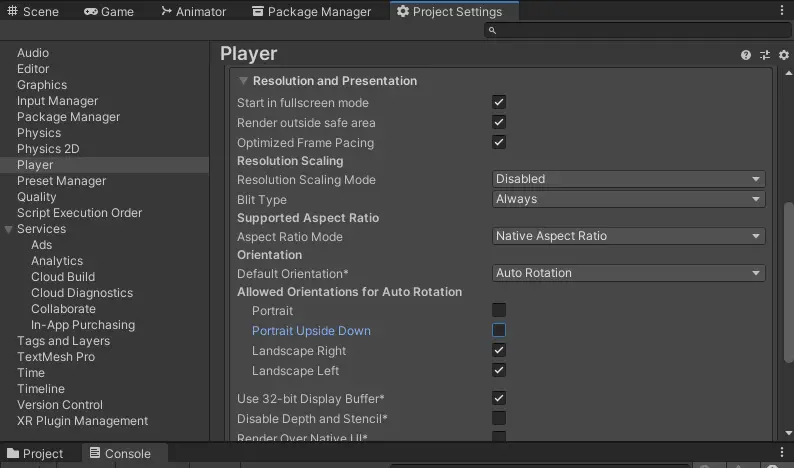
Restrict the Screen Rotation for Android
Since our game relies on the phone being in landscape to play, we will restrict the orientation to only allow landscape. Still in the Player settings, select the Resolution and Presentation header. Navigate down to Allowed Orientations for Auto Rotation and deselect the checkbox for Portrait and Portrait Upside Down.
Build the Android APK in Unity
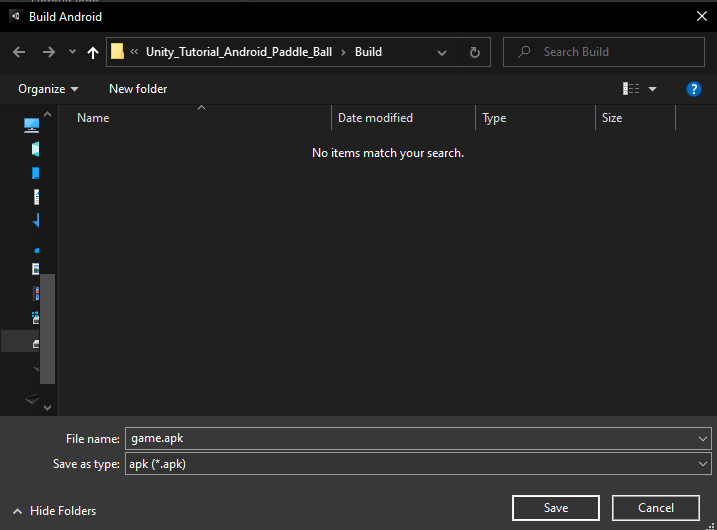
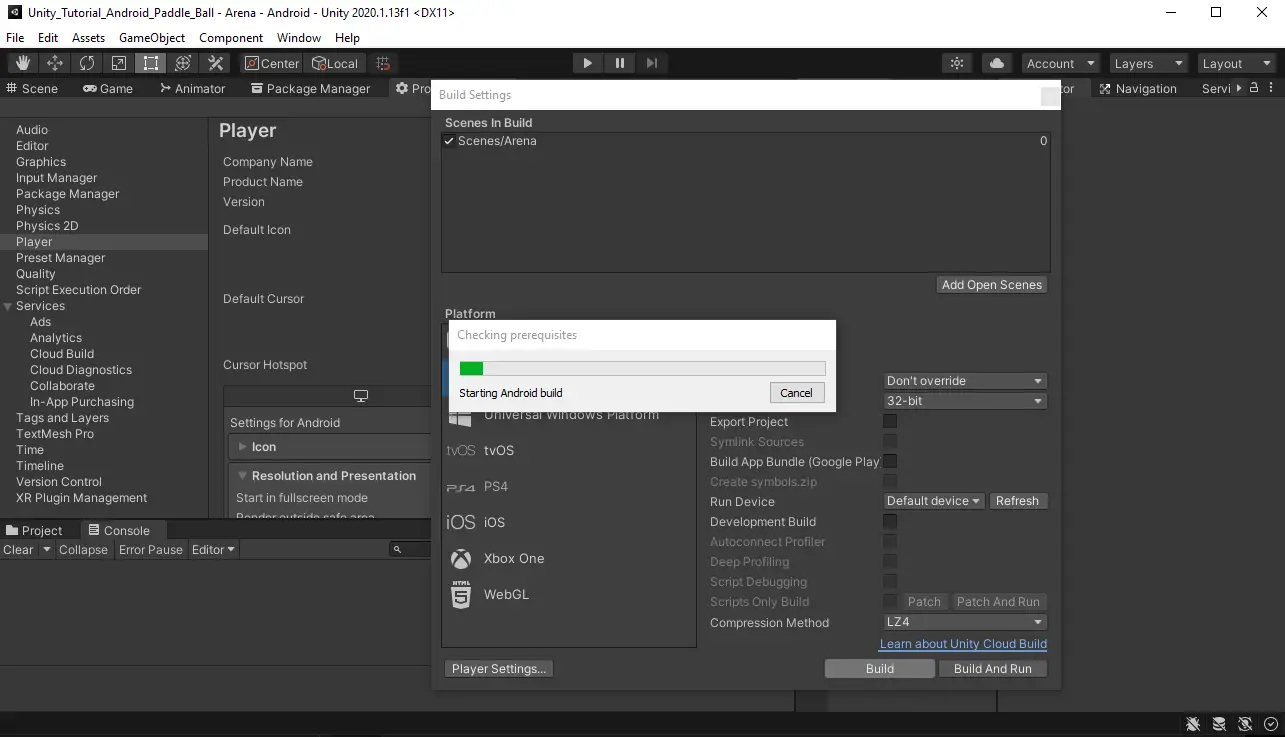
At last, it is time to build our APK. Open the Build Settings once again. If you still have your Android device connected you can select Build and Run which will build the APK, push it to the phone, and launch the app. If not, you can select Build which will build the APK and save it.
Either way you will be prompted for the location to save the newly created APK. Create a build folder inside of your Unity project and enter the file name for the APK. Hit save to start the build.
Depending on your machine the build may take a few minutes. You will be greeted with a progress bar to keep track of the build.
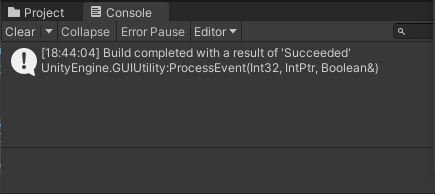
If there are any errors the build will fail, and the errors will appear in the console. If not, you will be greeted with a “Build completed with a result of ‘succeeded’” message.
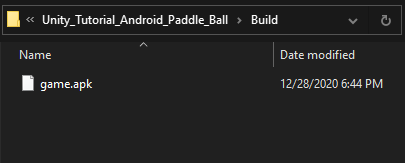
Navigate to the build folder and you can access the apk. Take this file and install it, email it to friends, or submit it to app stores for publishing.
If you want to submit to the Google Play store you will need to also build a AAB file. Do this by selecting the Build App Bundle (Google Play) checkbox in the build settings before selecting Build.
And now you have created your first multiplayer mobile game for Android. Feel free to play with the code and see what modifications you can make to the game. Add colors, sounds, particle effects, or anything else you can think of. You can find the completed project in our GitHub Repo. Thank you for stopping by. Stick around and check out more of our tutorials or posts like our piece on Tips and Tricks: Unity Set Parent. Also, leave a comment telling us what you liked or did not like about the tutorial. Was it easy to follow along? What do you want to learn next? As always check out some of our published apps below.