

Introduction
When moving characters, vehicles, or other objects around your game physics quickly become an important factor. Unity comes with built in physics simulations which you can apply to your GameObjects through the use of Rigidbody components. One of the most commonly used properties of Rigidbodies is velocity.
Furthermore, you can set Rigidbody velocity in one of two ways. You can assign it directly by using `Rigidbody.velocity = Vector3`or by using Rigidbody.AddForce. When changing the velocity of your GameObjects it is recommended that you use Rigidbody.AddForce but there are circumstances where you may need to modify the velocity directly. In this Tips and Tricks, we are going to talk about how you can assign velocity directly, what velocity means, and how it affects our GameObjects inside of Unity.
What is Rigidbody Velocity
First, if you want to know how to use something the right way, it is best to understand what it is. There is no better place to start learning what something is than looking up the definition. According to Unity’s Documentation on Rigidbody.velocity, velocity “represents the rate of change of Rigidbody position”. The Wikipedia entry for Velocity states “Velocity is equivalent to a specification of an object’s speed and direction of motion”. Basically, for a GameObject to have velocity we must have a speed and a direction.
How Does the Rigidbody’s Velocity Affect Your GameObjects?
Unity’s implementation of velocity requires that it be assigned to a Vector3 value but as we know a Vector3 is just a position with X, Y, and Z coordinates. How does supplying only a position translate into a direction and speed?
Well, for example, when you supply a Vector3 of (2,0,0), Unity will automatically convert this into the needed values. Our Vector3 of (2,0,0) becomes travel in the direction of 2 X, 0 Y, and 0 Z. The values are read as units and are then used to calculate our speed. Unity takes these units and converts them into units per second. To sum up, this means our example will head in a line towards the X position of 2 at a speed of 2 units per second. If you are wondering what the distance of a unit is, Unity states that they are conceptualized as meters but really could be any measure of distance.
How to Use Rigidbody Velocity
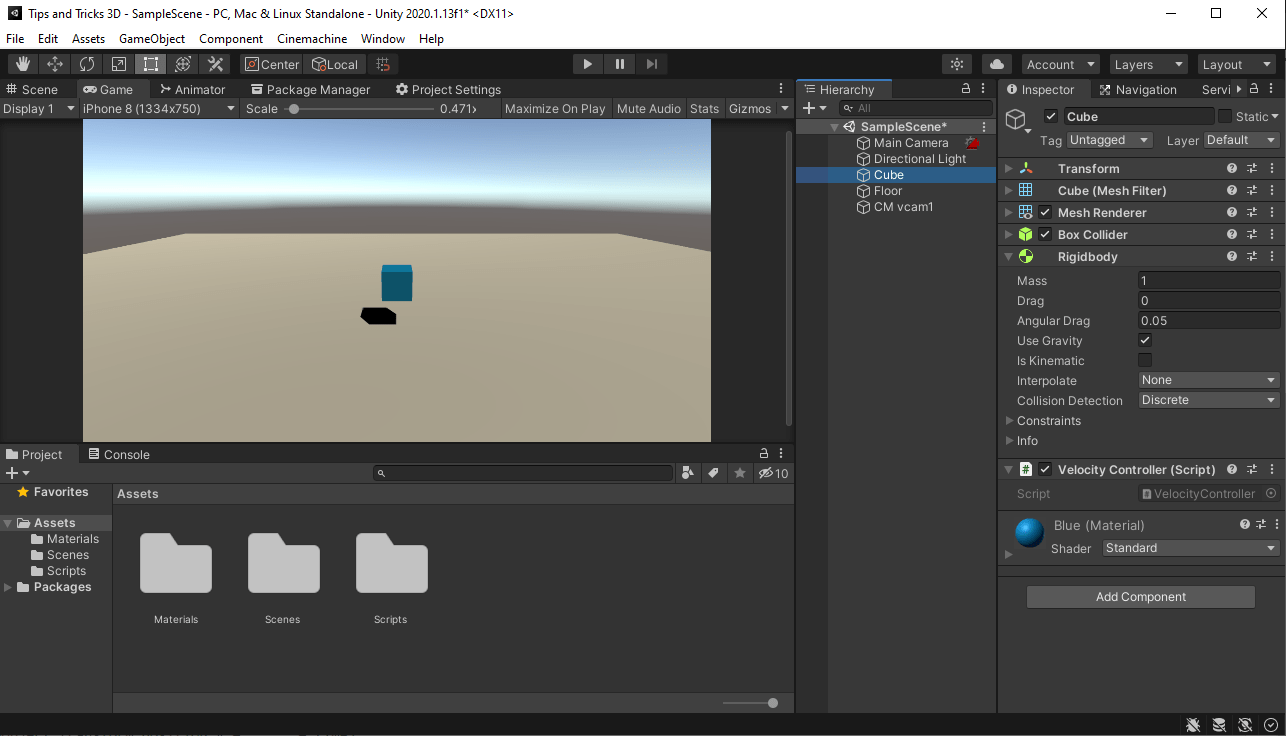
For this demonstration we have set up a simple scene with a cube, a floor, and a Cinemachine camera set to follow the cube. We have attached a Rigidbody to the cube so we can control its velocity and a blue material to spice things up a bit.
Create a script named VelocityController and attach it to the cube. We will use this to write some simple code to manipulate our Cube’s velocity.
Inside of our script, we create two fields. One is to hold our Vector3 and is serialized so we can edit it in the inspector, see why we declare this as a private field in our article on Encapsulation. The second is a reference to our Rigidbody which we initialize in our Start method.
For our Update method, we will check for UpArrow to be pressed, which will trigger the MoveTheCube method, or the Escape key, which triggers the ReturnToCenter method.
The MoveTheCube method will take our cube’s velocity and set it to the ourVelocity Vector3 value we set in Unity’s inspector window.
Lastly, the ReturnToCenter method will return the cube to the center of the screen and reduce the velocity to zero using the Vector3.zero value, just in case things get weird.
using System.Collections;
using System.Collections.Generic;
using UnityEngine;

public class VelocityController : MonoBehaviour
{
    [SerializeField]
    private Vector3 ourVelocity;
    private Rigidbody ourRigidbody;
    void Start()
    {
        ourRigidbody = GetComponent<Rigidbody>();
    }
    void Update()
    {
        if(Input.GetKeyDown(KeyCode.Escape))
        {
            ReturnToCenter();
        }
        if(Input.GetKeyDown(KeyCode.UpArrow))
        {
            MoveTheCube();
        }
    }

    private void MoveTheCube()
    {
        ourRigidbody.velocity = ourVelocity;
    }
    private void ReturnToCenter()
    {
        ourRigidbody.position = ourRigidbody.velocity = Vector3.zero;
    }

}
Rigidbody Physics
Our Rigidbody handles all of the physics simulations we need for this example for example it will handle gravity and drag which will lower the velocity over time as our object is affected by these forces.
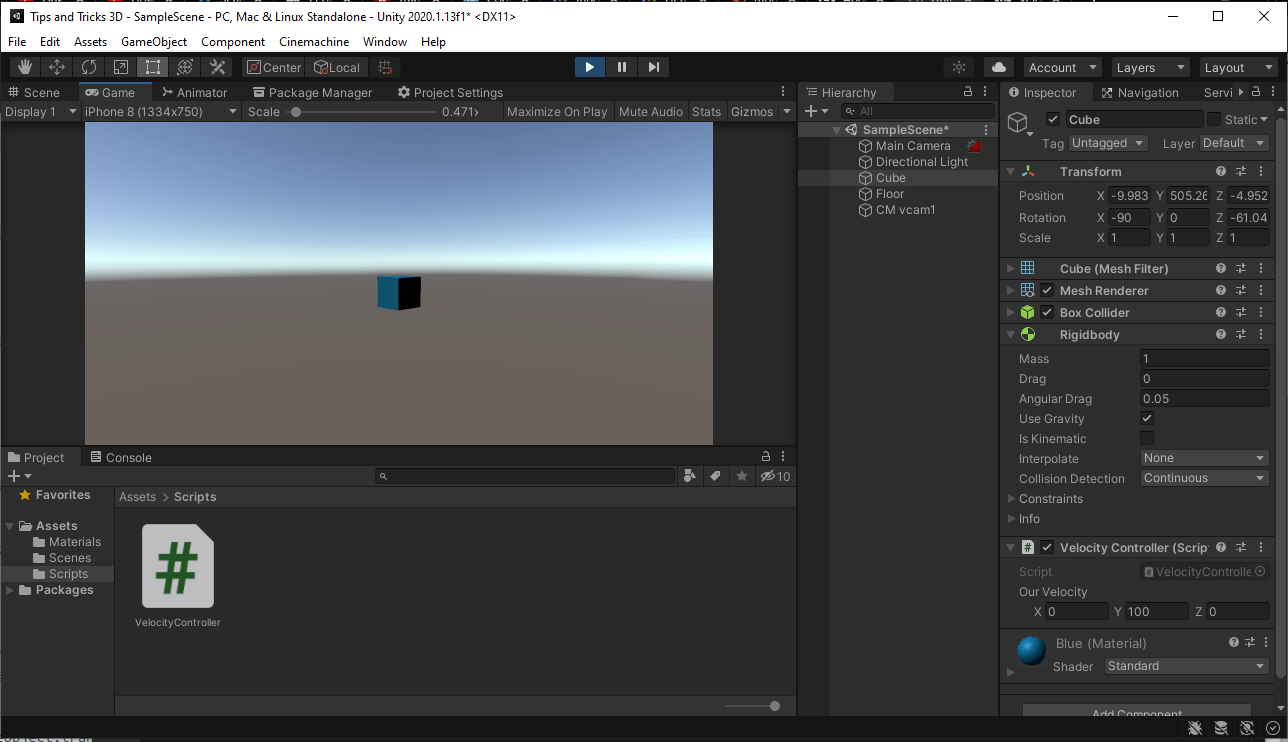
Back in the Unity editor, set the Y value of Our Velocity to 100 and hit play to start the game. Press the up key and you will see that our object accelerates upwards for a good while before gravity takes effect and our cube begins to fall again. If you watch the position values inside of the cube’s transform component, you will see that the cube’s Y value increases quickly at first but starts to slow eventually stopping around a value of 508. It takes about 10 seconds to reach its highest position.
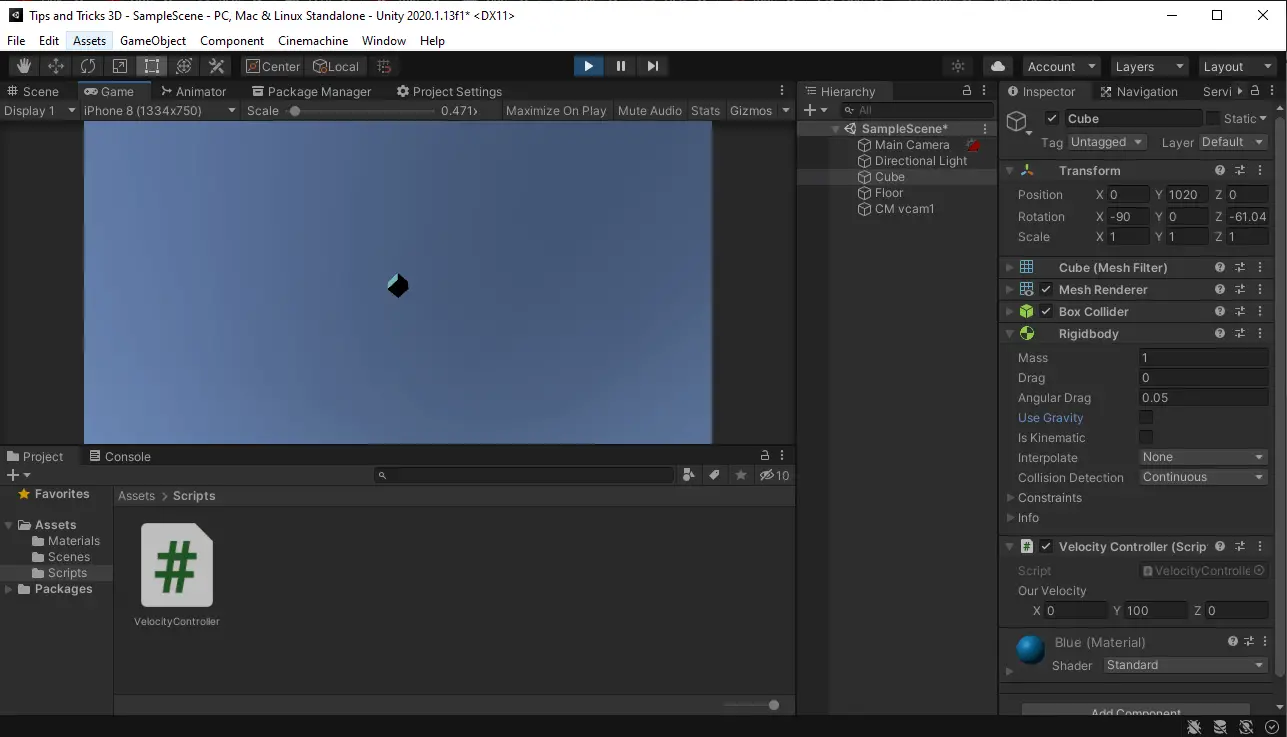
At first the cube is accelerating at 100 Y units per second but as gravity is taking effect on the cubes velocity that rate slows. We can stop gravity from affecting our velocity by unchecking the Use Gravity option in the Rigidbody for our cube. If you run the game without gravity and hit the up key, at 10 seconds you will see that the cube now has a position Y value of 1000.
We can hit escape to return our cube to the center. To see how changing all the Vector3 values affects our velocity, change all values to 10 and remember to turn gravity back on. Now when we hit our up arrow the cube will jump diagonally across our game world. Continue to play with these values and see the different results you can come up with.
And now you are ready to start using Rigidbody velocity in your own games created in Unity. Feel free to clone the repo for this demonstration from our GitHub. Thank you for stopping by. Stick around and check out more of our tutorials or posts like our piece on How to Make a Multiplayer Pong game for Android. Also, leave a comment telling us what you liked or did not like about the tutorial. Was it easy to follow along? What do you want to learn next? As always, check out some of our published apps below.