

Animate a Character with Unity’s 2D Animation Package
Introduction
Learning how to animate a character is a pivotal part of creating a game. Animations breathe life into your game and can influence a player’s emotions and responses. Have a character wince when they get hurt and the player instantly understands what happened and that they should avoid it. Making the character bob up and down and lean forward while running and the game instantly feels faster. This can all be done with animations.
In this tutorial we are going to use Unity to show you how to animate a character. To do this we will use layered and single layer sprites, Unity’s 2D Animation package, Rig our character in the sprite editor, and use Unity’s animation window for recording skeletal animation. So, let us jump right in.
Set Up Game Art for 2D Animation in Unity
The first thing we need to do is make sure our game art is in the correct format for editing. You can use a sprite sheet or a PSB file to arrange your game art in layers. The layers will be manipulated individually in our animations. For more on how to create and import game art check out or article on Unity’s PSD Importer.
Do not worry if you do not have the tools to create layered art or are working with a flat image. Single piece sprites can also be manipulated with this method of animation. The only caveat is that the areas of the image you want to animate must be clearly defined or isolated. If you want to animate the arm of a single layer sprite, the arm cannot overlap other body parts. If it does, the other body parts will be warped when you animate the arm.
Unity’s 2D Animation Package
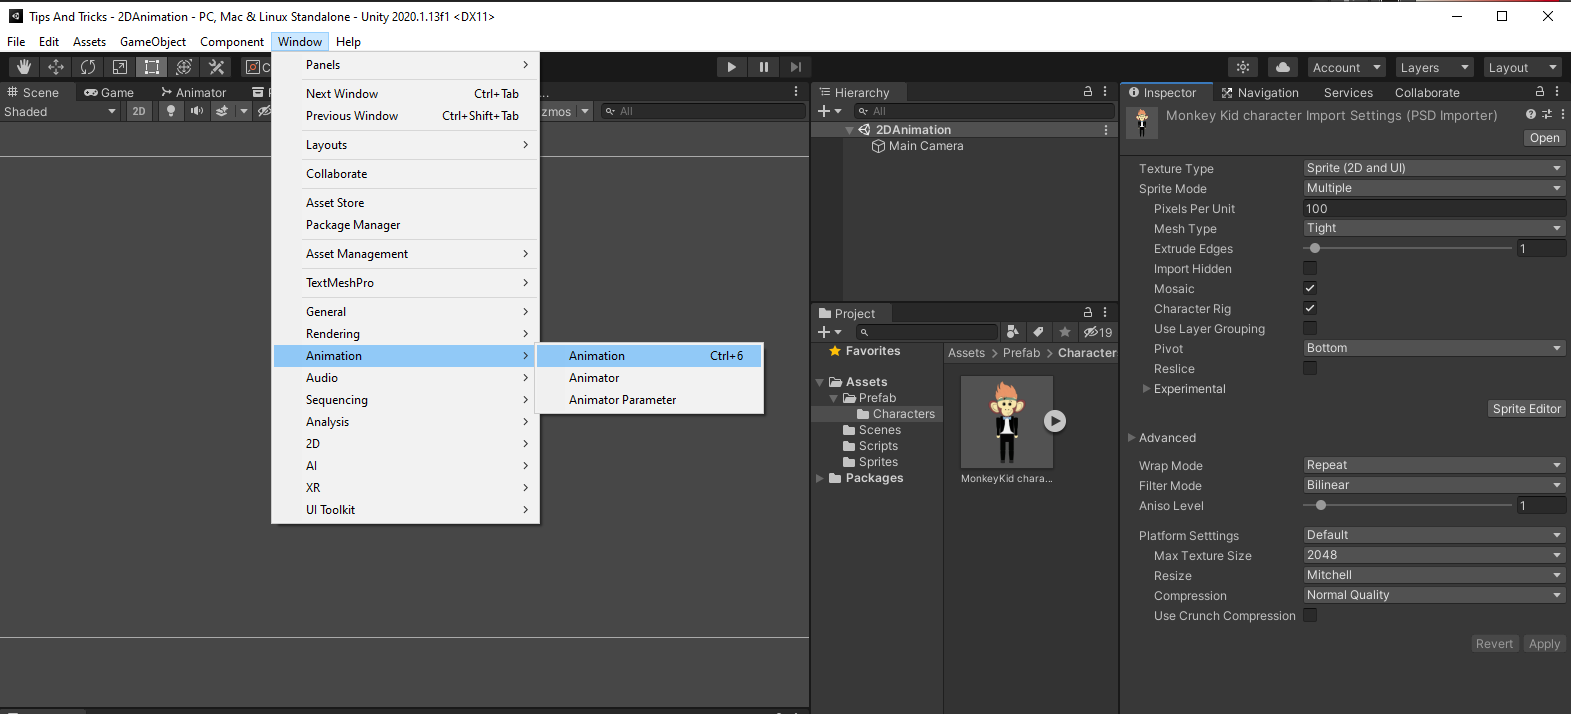
Before you can start animating the art you have imported into Unity, you will have to install the 2D Animation package. Unity’s 2D Animation package can be installed directly from the editor using the package manager.
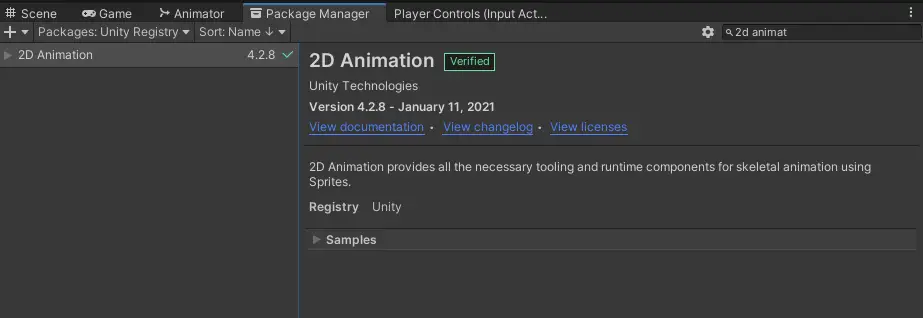
Set the Packages drawdown to Unity Registry and scroll down or search for 2D Animation. If the package is not installed you will see the option to install in the bottom right. If the package is installed you will have the option to import it or update if there are updates available.
How to Animate a Character with Skeletal Animations
With the 2D Animation package installed and your game art imported it is now time to start animating our sprite. We will use Rigging to apply a skeleton to our sprite. Rigging is the process of laying out a skeletal structure for our sprite. This structure will manipulate the corresponding sections of our sprite. Sprites can be rigged with as many or few bones as needed. For example, a large number of chained bones are needed to animate a tail that can curl and move naturally. In comparison, the cannon of a tank requires only one bone.
Unity Sprite Editor for 2D Rigging
To start rigging our sprite with bones, select the sprite in the project view. The inspector will display the properties of the selected sprite. Select Unity’s Sprite Editor, which is located just below the first section of properties.
Initially, you will be greeted with a sliced view of your sprite in the new Sprite Editor window that appears. You can use this view to adjust pivot points or correct any sprites that Unity has sliced wrong. The skinning editor is the tool we need to rig our sprite. Select the dropdown in the top left corner and choose Skinning Editor.

Character Rigging
Now, add a bone to your sprite by selecting Create Bone. Pick a point on your sprite to act as the “main” bone. The first place you click will be the pivot point of the bone. For a human character, I like to start with the pelvic bone. Drag out to extend the length of the bone. Click a second time to finalize the first bone. A second bone will automatically begin. Continue creating bones until you are done. Right click to exit the bone chain.

For limbs or other parts that need to be parented, select the parent bone. This will create a transparent bone that connects to the new bone. For example, an arm bone will need to be parented to the top of the spine. If it were parented to the head, the arms would move if the head tilted.
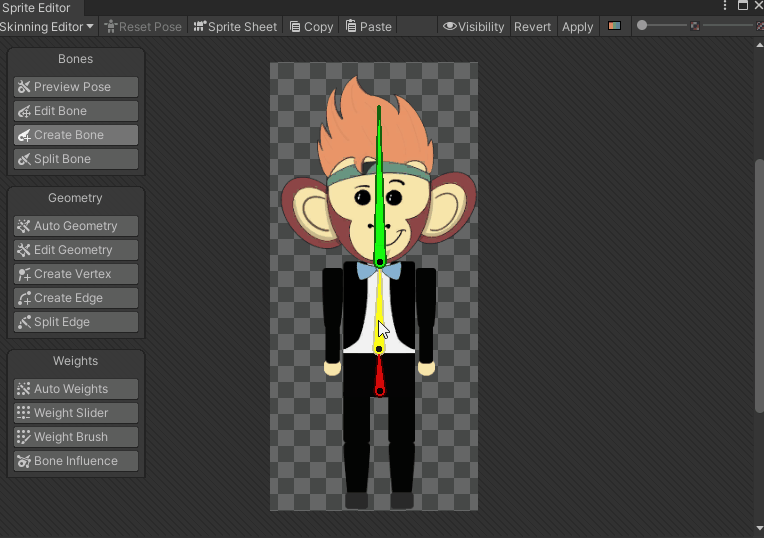
Continue parenting bones for the arms and legs. The legs will need to be parented to the hip bone for proper movement.
Generate Geometry and Weights for Bone Influence
Next, to manipulate the sprite, the bones need to know which part of the sprite they belong to. Unity can automatically generate the geometry for us by using the Auto Geometry button. Click the Generate For All Visible button to apply the setting.
After the geometry is generated, your sprite will look psychedelic. The color corresponds to a bone. The more color on the sprite the more that color bone will influence the image.
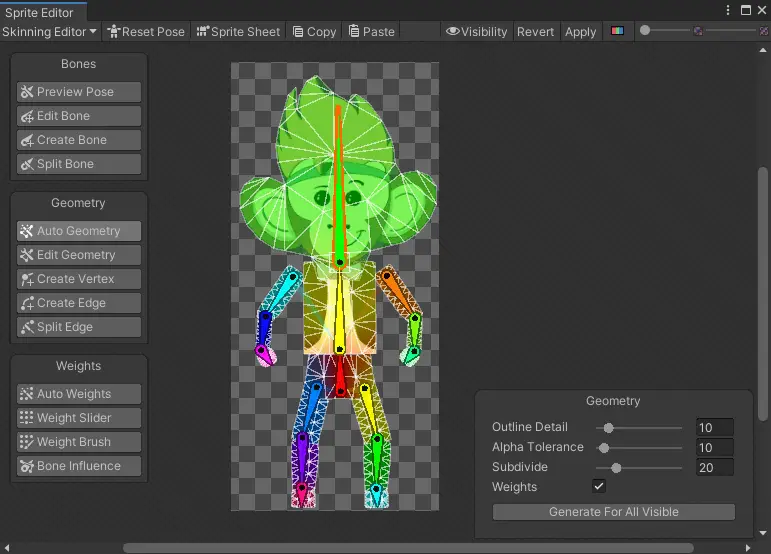
You will most likely find that a bone is influencing a part of the image it should not. This will be more problematic if your sprite is not clearly segmented.
For single layer images, you will want to use the weight brush to change a bone’s influence. Select the weight brush tool, then click the sprite. Select a bone you want to add influence for and begin painting. You can adjust the size, hardness, and other properties from the tool properties in the lower right window.
For layered images, you can use the weight brush or the bone influence tool. Select the bone influence tool and double click a sprite you want to edit. In the bottom right window, a list of bones will appear. Select the bone and click the minus button to remove the bone.
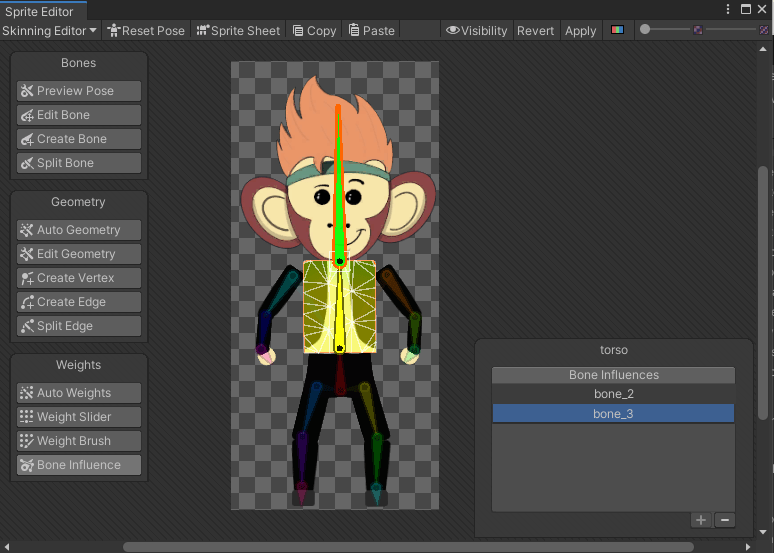
If you edit the bone influences, use the Auto Weights tool to apply the new influences to the sprite. If you do not the sprite movement will not reflect the new bones.
Click Apply in the top right of the Sprite Editor window to apply our rig to the sprite.
Animating in Unity’s Animator
Finally, with our character rigged we can start animating. Open the animation window by going to the menu bar, selecting Window, Animation, Animation.
Drag your sprite into the scene to create a GameObject for the sprite or open a prefab that contains the character you want to animate. Select the GameObject that holds your sprite. In the animation window a Create button will appear. Select the button to create an Animator component for our sprite.
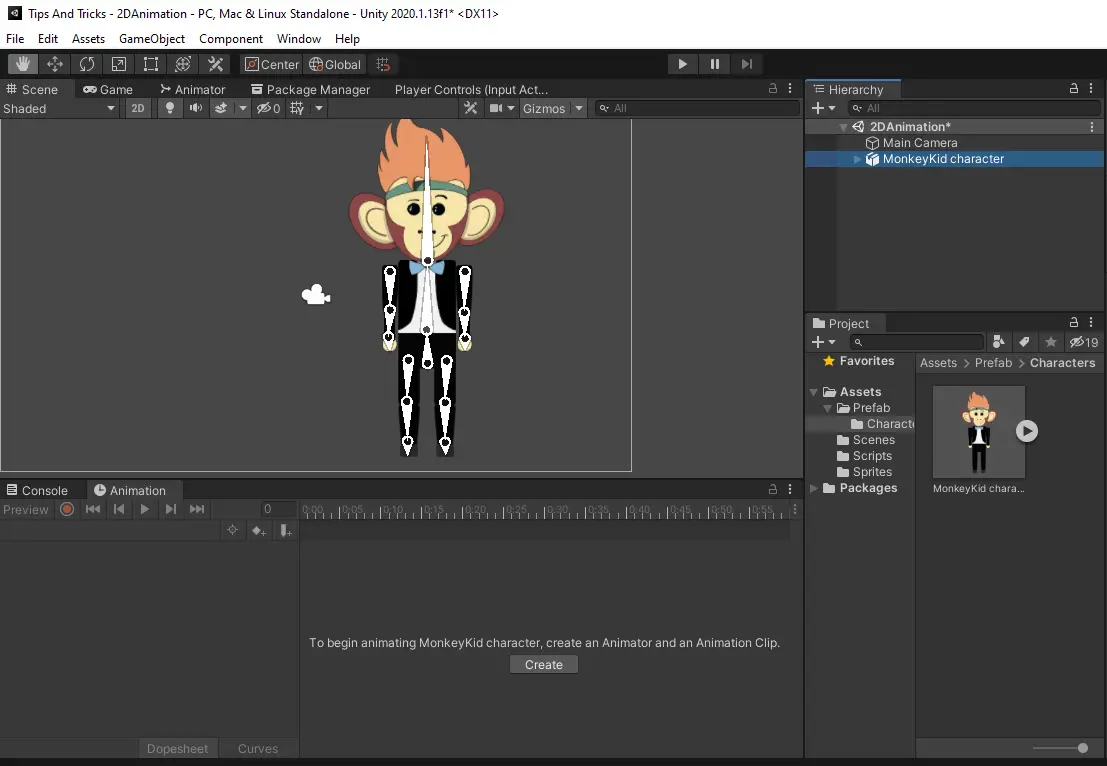
A new window will open prompting for a name. This will create a new animation that is associated with our animator. We will name ours “wave”. Pick a location to store the animation and hit save.
2D Skeletal Animation
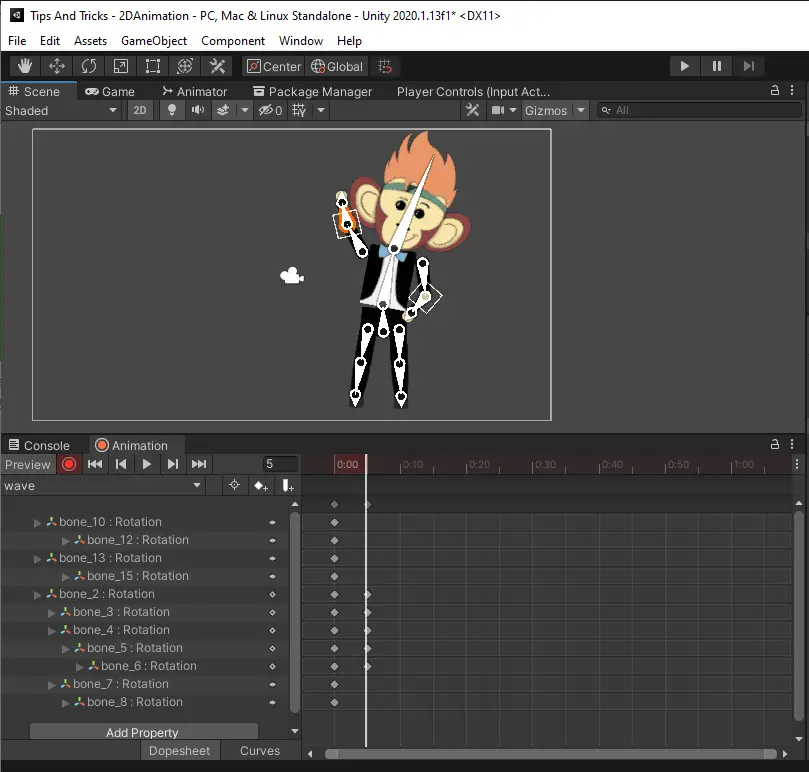
Back in our animation window, with the character selected, the playback options will no longer be greyed out. To begin recording our new animation, click the record button.
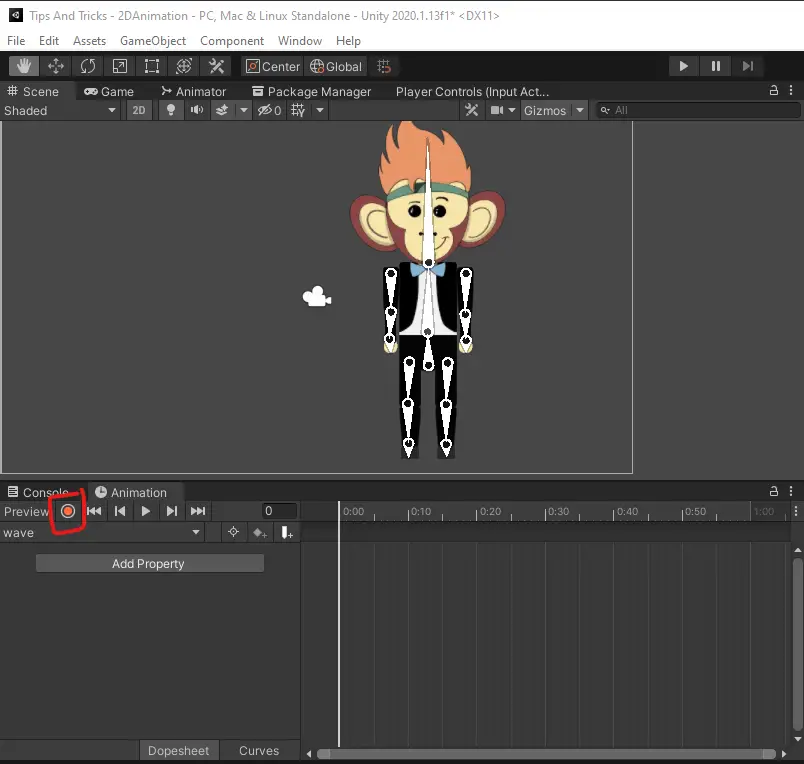
This will start recording the movements we are making to our sprite. Take note of the timeline on the right. Our final position will be recorded on the timeline at the position of the play head. Position your sprite for the initial pose. Notice that the bones that are being manipulated begin to pop in below our playback options.
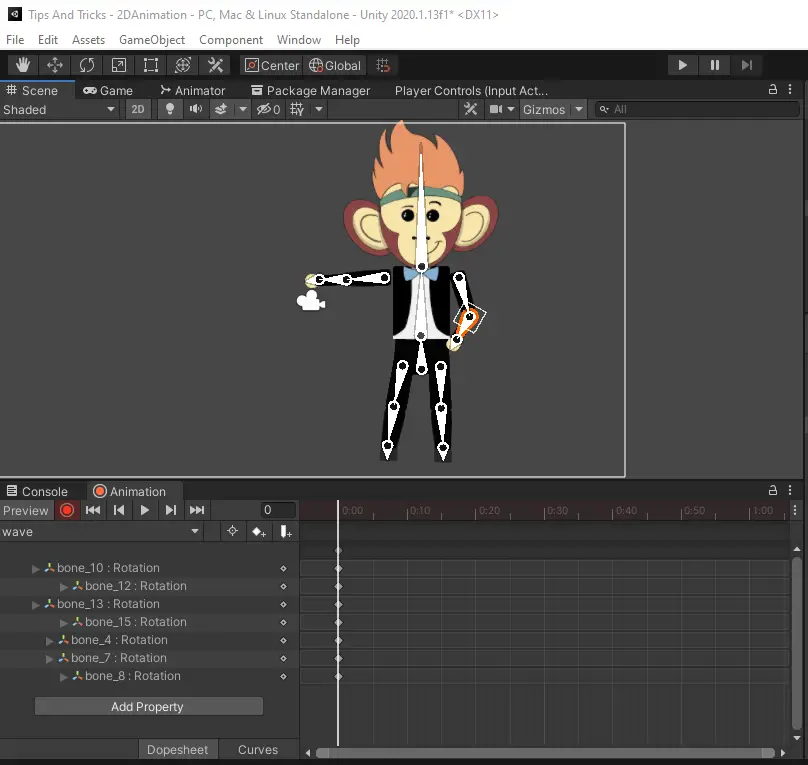
For timing our first position will be raising our characters hand halfway to the wave position. We then move the play head to the next position on the timeline we want to animate. Unity will fill in the spaces between animation frames by moving the bones from one position to the next. Add additional frames if you want to slow the animation down or have greater control of the movement. You can also move animations around the timeline to speed them up or slow them down.
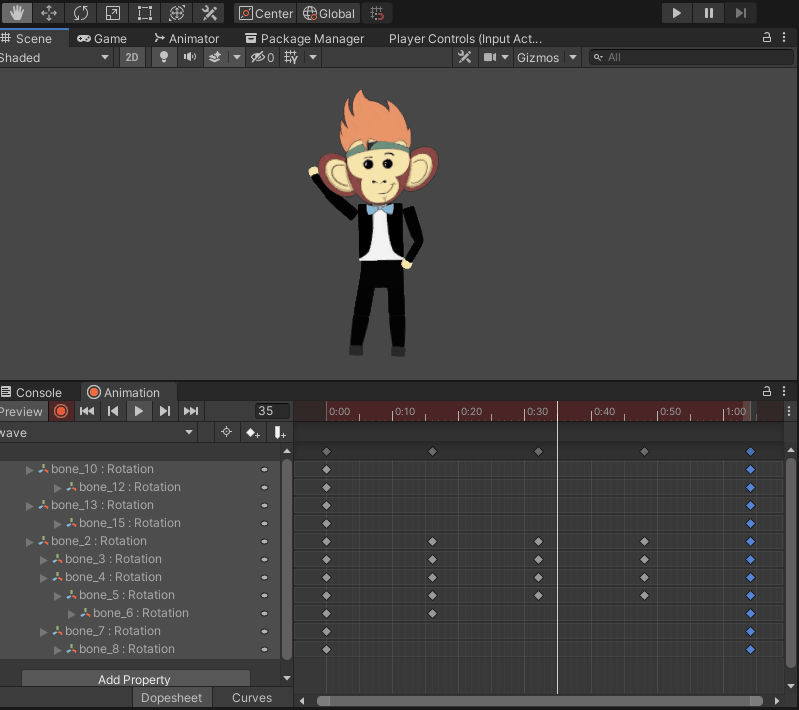
Repeat this process for the remainder of the frames you wish to animate. For animations that need to loop, such as a walk/run, copy the entirety of the first frame. Do this by selecting the diamond, keyframe, at the top of the timeline and hitting CTRL + C. Then drag your play head to the time you want to paste it and use CTRL + V to paste. Now you will have a seamless loop.
And now you are ready to animate a character in games you create with Unity. Thank you for stopping by. Stick around and check out more of our tutorials or posts like our piece on How to Pass Parameters with ScriptableObject Events. Also, leave a comment telling us what you liked or did not like about the tutorial. Was it easy to follow along? What do you want to learn next? As always check out some of our published apps below.